Kitchen cabinets have a way of becoming the place where good intentions go to die. That smoothie attachment you used twice, the mismatched lids without bottoms, the three-deep stack of mugs you have to dig through every morning — it accumulates quietly until one day you can’t find a measuring cup without unloading half a shelf. The good news is that you don’t need a weekend, a renovation, or a pile of expensive organizers to fix it. You need a focused afternoon and a willingness to be honest about what you actually use.
This guide walks you through a complete cabinet declutter in roughly three to four hours. The key is to work in a deliberate sequence rather than poking at one cabinet at a time. By the end, you’ll have shelves that hold only things you reach for, in an arrangement that makes cooking faster instead of frustrating.
Set yourself up before you touch a single shelf
The biggest mistake people make is opening a cabinet and immediately starting to “tidy.” That just shuffles clutter around. Spend the first 15 minutes preparing so the actual work goes quickly and you don’t lose momentum halfway through.
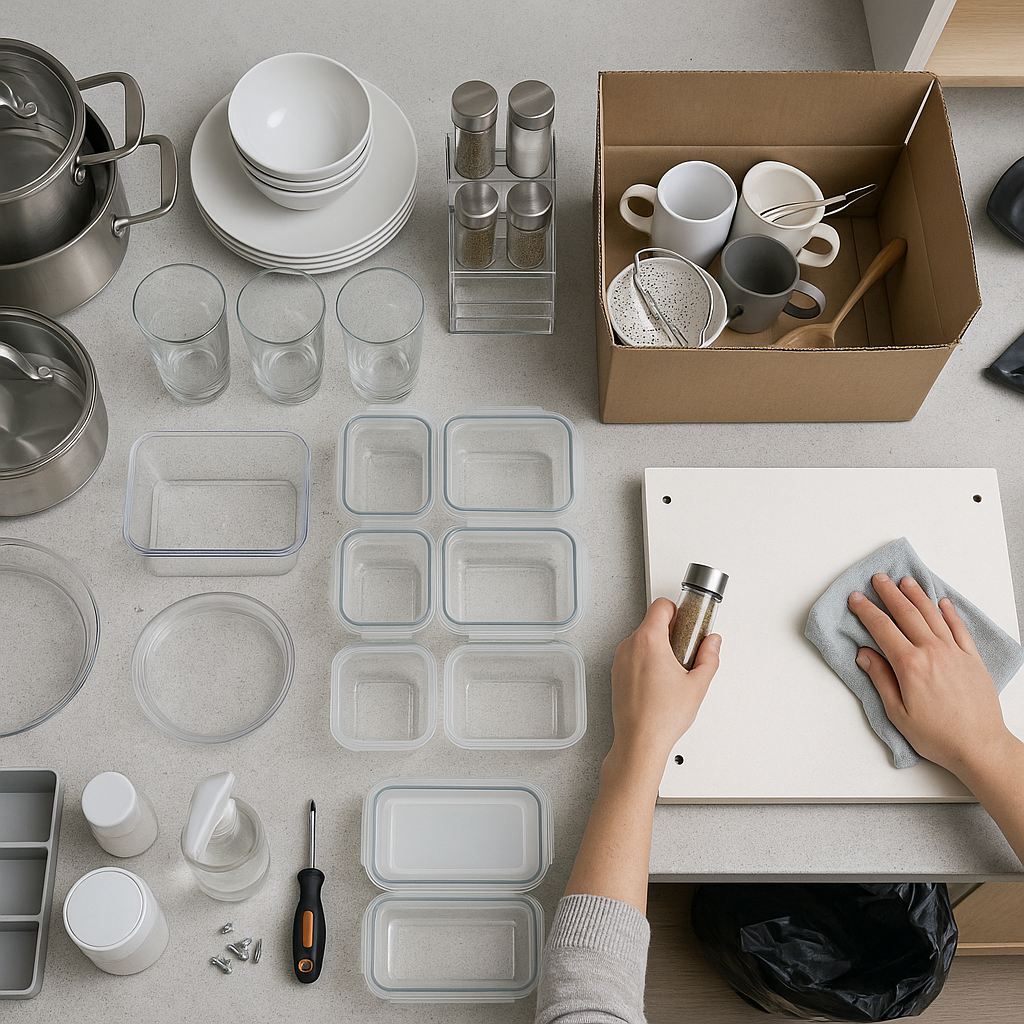
Clear a large staging area first — your kitchen table, an island, or even a clean stretch of counter. This is where everything will land so you can see it all at once. Seeing the full scope of what you own is what makes good decisions possible; you simply can’t judge whether you need four spatulas when they’re hidden in three different drawers.
Gather your sorting supplies:
- Three labeled containers — one for trash, one for donate, and one for “belongs elsewhere” (items that drifted into the kitchen but live somewhere else).
- A damp cloth and all-purpose cleaner for wiping shelves while they’re empty.
- A notepad or your phone to jot down genuine storage gaps you discover — not to shop now, but later.
- A timer, set in chunks, so a single overwhelming cabinet doesn’t swallow your whole afternoon.
Resist the urge to buy bins and organizers beforehand. You can’t know what you need until you’ve seen how much you’re keeping. Buying first almost always means you end up storing clutter in prettier packaging.
Empty the cabinets and confront what’s actually in there
Now do the part that feels dramatic but pays off enormously: take everything out. Work cabinet by cabinet, pulling the contents onto your staging area. Wipe down each empty shelf as you go — crumbs, sticky rings, and dust have likely built up where you couldn’t see them.
As items come out, sort them into broad groups on the table: dishes, glassware, mugs, pots and pans, food storage containers, bakeware, small appliances, gadgets, and so on. Grouping like with like is where the truth comes out. You may discover you own eleven travel mugs, or that you’ve been holding onto a “spare” set of plates for a dinner party that hasn’t happened in years.
Toss the broken and the obvious first
Before you agonize over anything, do a fast pass for items that are clearly done: chipped mugs, scratched nonstick pans, warped plastic, lids with no matching containers, and gadgets that don’t work. These decisions require zero deliberation, and clearing them builds quick momentum. Chipped and cracked dishware isn’t just ugly — it can harbor bacteria and chip further into food, so it earns an easy spot in the trash or recycling.
Decide what stays using the “weekly use” test
Here’s the principle that does the heavy lifting: keep what you use, not what you might use someday. A reliable filter is to ask whether you reach for an item in a typical week or month of normal cooking. If your dishwasher cycle realistically uses five plastic kids’ cups, you don’t need to store twenty-five.
Go through each group and make a call. To keep the afternoon moving, give yourself permission to decide quickly — your gut is usually right. Some honest questions that cut through the indecision:
- Do I have duplicates? Most kitchens function beautifully with one good vegetable peeler, two or three wooden spoons, and a single set of measuring cups. Keep the best of each and let the rest go.
- Does it work the way it should? A blender that leaks or a can opener that mangles lids is taking up space it hasn’t earned.
- Would I buy this again today? If the honest answer is no, that’s a strong signal it belongs in the donate box.
- Is this realistically going to get used, or is it guilt? The bread maker from three Christmases ago counts as guilt, not utility.
Be ruthless, because there’s a direct relationship between how much you own and how hard it is to keep tidy. The less you keep, the easier everything that follows becomes — and the more room your favorite, genuinely useful tools have to breathe.
Handle the food storage container chaos
Plastic containers deserve their own mention because they’re the single most notorious cabinet offender. Match every lid to a base. Anything orphaned — a lid with no bottom or a bottom with no lid — goes. Keep a sensible number for how you actually store leftovers, and consider standardizing on one or two stackable shapes so they nest neatly instead of avalanching every time you open the door.
Reorganize around how you actually cook
With only the keepers left, you get to put things back intentionally. The goal isn’t to recreate the old layout — it’s to build zones that match the way you move through the kitchen. Organization experts consistently point to designated zones as the thing that keeps a kitchen functional long after the decluttering high wears off.
Think about grouping by function:
- A prep zone near your main counter space, holding cutting boards, knives, mixing bowls, and frequently used utensils.
- A cooking zone beside the stove for pots, pans, cooking spoons, and the oils and spices you use most.
- A cleaning zone around the sink, keeping dish soap, sponges, and towels within arm’s reach.
- An everyday-dishes zone close to the dishwasher or table so unloading and setting the table take fewer steps.
The principle behind all of it is simple: store things where you use them. Put your most-used items at eye level and within easy reach. The prime real estate — the shelves between your shoulders and your hips — should hold daily dishes and glasses, not the slow cooker you pull out twice a year.
Relocate the seldom-used stuff
Specialty items — the turkey roaster, holiday platters, the second set of stemware — don’t deserve prime cabinet space. Move them to high shelves, the back of deep corner cabinets, or storage outside the kitchen entirely, like a basement or pantry closet. Freeing up reachable space for daily essentials is one of the most satisfying parts of this whole process.
Use a few smart organizers to make it stick
Now — and only now — you can address the storage gaps you noted earlier. Because you’ve already pared down, you’ll likely need far fewer products than you’d have guessed. The point of an organizer is to make a good system easier to maintain, not to cram in more stuff.
A handful of genuinely useful, low-effort upgrades:
- Shelf risers let you reach a dinner plate without disturbing the salad plates stacked beside it, and they double your usable vertical space on a shelf.
- Adjustable shelf heights are worth the patience — moving a shelf up or down an inch can transform how easily you grab everyday items.
- Under-shelf holders reclaim that dead gap of air above your dishes. They’re handy for corralling small, scatter-prone items like stock cubes, spice packets, or salt and pepper that otherwise migrate all over the shelf.
- Drawer dividers and bins keep utensils and gadgets from sliding into one tangled heap every time you open the drawer.
Measure your shelf depth and height before buying anything. A common letdown is ordering a clever-looking holder only to find your cabinet is too shallow for it — so know your dimensions and have a backup use in mind.
Get the donations and trash out the door today
This step is non-negotiable, and it’s where many afternoons quietly fail. Bags of “donate” items left sitting in the corner have a way of creeping back into the cabinets within a week. Finish the job: take out the trash, put the recycling in the bin, and load the donation box into your car immediately. If you can drop it off the same day, do it. If not, schedule the drop-off so it’s a commitment, not a vague intention.
Take a moment to look at your before-and-after, too. The visible payoff — clear shelves, items you can actually see and reach — is what motivates you to keep the system going.
The bottom line
Decluttering your kitchen cabinets in an afternoon comes down to a clear sequence: prep your space, empty everything out so you can see what you own, group like items, keep only what genuinely earns its place, and put the survivors back in functional zones with the daily essentials front and center. Add a couple of well-chosen organizers only after you’ve pared down, and get the donations out the door before you sit down.
Once it’s done, the maintenance is easy — a tidy cabinet practically stays tidy on its own, because there’s a logical home for everything and far less to put away. The next time you go looking for a measuring cup, it’ll be right where it should be.