How to Create an Organized Home Drop Zone Without a Mudroom

A home drop zone is the first barrier against household chaos. When you walk through the door with your hands full, whatever system is waiting for you dictates where your belongings land. Without a dedicated landing spot, coats drape over dining chairs, school backpacks slide across the kitchen floor, and keys disappear into random corners.

You do not need an expansive, Pinterest-ready mudroom with custom cabinetry to solve this problem. A functional drop zone simply requires identifying where clutter naturally accumulates and putting low-friction systems in place. By tailoring the setup to your home’s layout, you can contain daily gear right at the point of entry.

The 4 Core Elements Every Drop Zone Needs

Regardless of where you set up your drop zone, every functional setup relies on four primary components to keep everyday items off floors and flat surfaces:

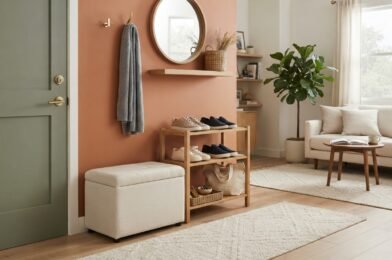
  • Low-friction hanging storage: Coats, dog leashes, and bags need immediate hooks. Coat hangers on a closet rod create too much resistance for daily use; simple wall hooks or over-the-door hooks ensure items are hung up rather than tossed aside.
  • Dedicated shoe containment: Shoes multiply near entry points quickly. A low shoe rack, a wide shallow basket, or a stackable shelf keeps footwear out of walking paths.
  • Small-item landing dishes: Wallets, transit passes, sunglasses, and keys need a designated tray, shallow bowl, or upcycled jar so they do not migrate to kitchen counters.
  • Personal “Go Baskets”: A separate basket or cubby for each household member holds grab-and-go essentials such as lunchboxes, library books, hats, or sports gear.

If You Have a Small Entryway (or None at All)

When the front door opens straight into a living room or a narrow hallway, floor space is at a premium. Bulky furniture will choke the walkway, so the focus must shift to narrow profiles and wall space.

Start by evaluating the vertical clearance behind or beside the door. You can use vertical space to store more in small rooms without taking up valuable walking area. Mount a single board with heavy-duty double hooks at eye level for adult coats and bags, and install a second row lower down for children’s items. If you are dealing with very tight square footage, read through practical tactics on how to store shoes when you have no entryway to keep the floor clear.

A slim console table with an open base can slide against a narrow hallway wall. Place a tray on top for keys and mail, and slide two storage baskets underneath for everyday shoes. If there is no space for a console, a floating wall shelf with integrated key hooks underneath serves the exact same purpose with zero footprint.

Converting a Standard Reach-In Coat Closet

If you have a traditional reach-in closet near your primary door, you can convert it into a mini interior mudroom. Standard closets with a single high rod and shelf often waste the bottom two-thirds of their volume, leading to piles of shoes under hanging garments.

To convert the closet into a functional drop zone:

  1. Remove the traditional hanger bar, or slide all formal guest coats to one narrow side.
  2. Mount sturdy utility hooks along the back wall and the inside of the closet door. Hooks make it realistic for everyone in the house to hang their jackets instantly.
  3. Add a low, sturdy bench or a modular cubby shelf across the closet floor. The top surface provides a place to set bags down or sit while putting on boots, while the cubbies underneath hold daily footwear.
  4. Label upper shelf bins for out-of-season accessories, extra bags, and bulk weather gear like umbrellas.

If the closet doors swing inward or get in the way of traffic flow, consider removing the doors entirely and painting the interior a clean, bright neutral. This creates an open alcove that feels built-in while removing the physical barrier of opening a door when your arms are full.

Using the Laundry Room as a Hidden Drop Zone

For homes where family members enter through a garage or side entrance that connects directly to the utility area, the laundry room is one of the most practical places to establish a makeshift drop zone. It keeps everyday clutter hidden away from main living spaces and guest view.

Because laundry rooms handle high traffic and moisture, prioritize durable, wipeable surfaces. An unused wall across from the washer and dryer can host a mounted wall rack or a premade hall tree with hooks, a small bench, and cubbies. If floor space around the appliances is tight, mount over-the-door hooks onto the door that leads into the kitchen to hold athletic gear, reusable grocery totes, and swim bags.

Take advantage of the laundry room’s counter space if you have it. Place a paper sorter or small drawer unit on one end of the folding counter to process school forms, receipts, and incoming letters before they spread to your kitchen island. Pair this physical sorting area with regular habits to declutter paper clutter and important documents so bills and school notices do not sit indefinitely.

The Garage Entryway Drop Zone

If you primarily enter the house through an attached garage, stopping dirt and clutter before it crosses the interior threshold is the most efficient strategy. The garage offers substantial wall area, making it ideal for bulky gear that otherwise overwhelms indoor entryways.

Focus on the perimeter wall right beside the access door leading inside. Install a heavy-duty wall rail system or horizontal wooden cleat. From here, you can hang heavy winter coats, sports bags, and backpacks on deep utility hooks. Place an industrial boot tray directly on the garage floor next to the door to catch wet shoes, mud, and road salt.

Because garages fluctuate in temperature and humidity, avoid fabric storage bins. Instead, assign each family member a heavy-duty plastic crate or wire wire basket to serve as their individual grab-and-go container. Keep a closed recycling bin within arm’s reach of the door so unwanted junk mail from the mailbox never even enters the house.

Managing the Daily Flow of Items

A drop zone fails when it is treated as a long-term storage unit rather than a transit station. When hooks hold four coats per person and shoe trays hold six pairs of shoes per family member, the system collapses under its own weight.

Establish a strict capacity limit: one seasonal jacket and two pairs of everyday shoes per person at the drop zone. Anything beyond that should return to personal bedroom closets. Once a week, spend five minutes clearing accumulated papers, empty water bottles, and extra footwear that have gathered around the hooks. With clear boundaries and an intentional layout, your home drop zone will keep your living spaces organized every time you walk through the door.

How to Sort and Store Craft Supplies in Small Spaces

Crafting in a small space presents a distinct challenge: creative hobbies require physical materials, but small living areas offer little room to spare. When fabrics, card stock, adhesives, and specialty tools sprawl across dining tables or cram into random bags under the bed, starting a new project feels more exhausting than inspiring.

Organizing a craft collection does not require an entire spare room. It requires an honest sorting system, clear physical boundaries, and storage choices tailored specifically to your physical living setup.

The Universal Starting Point: The Full-Inventory Purge

Before organizing according to your specific space constraints, every supply must pass through a single, complete inventory. Stashing items room by room without seeing the whole picture leads to duplicate purchases and forgotten materials.

Begin by collecting every craft supply from around your home: closet shelves, junk drawers, under-bed bins, and tote bags. Gather them in one central area and divide them into basic craft mediums, such as paper crafting, sewing, vinyl cutting, painting, or jewelry making.

Once grouped, assess each category aggressively. The goal is to balance the room required for your materials with the actual physical footprint you have available. When space is scarce, keeping supplies you might use “someday” directly steals space from the projects you actively make today. Split the inventory into four definitive piles:

  • Keep: Active supplies for current crafts, core tools you use constantly, and essential consumables.
  • Donate: Unopened kits you lost interest in, duplicate tools, fabric scraps smaller than practical use, and partial materials that local schools, thrift shops, or community centers can repurpose.
  • Sell: High-value machines, specialty dies, or bulk materials you no longer touch.
  • Trash: Dried-up acrylics, brittle glues, dried markers, and dull blades beyond sharpening.

If you struggle to let go of supplies bought with good intentions, applying practical strategies from common decluttering mistakes and how to avoid them will help keep emotional momentum going.

When You Craft at a Shared Dining or Living Room Table

If your primary creative surface doubles as where you eat meals or work from home, the biggest friction point is setup and pack-down time. If pulling out paints takes twenty minutes, you will rarely craft. If cleaning up takes twenty minutes, your supplies will end up living on the table permanently.

Mobile Rolling Carts

A multi-tiered metal utility cart functions as a portable workstation. Dedicate the top tier to daily-use items: precision scissors, utility blades, rulers, and primary adhesives. Use the middle tier for work-in-progress trays, and the bottom tier for bulkier items like cutting mats or power cords. When crafting time ends, roll the entire station into a closet, laundry nook, or behind an armchair.

Caddy and Project-Bag Systems

Divide active projects into self-contained vessels. Clear zippered pouches or handled caddies allow you to grab everything needed for one specific task (such as embroidery or knitting) in a single lift. Storing the necessary tools alongside that project’s materials prevents multiple trips across the house.

When You Have Only a Dedicated Closet or Nook

Turning a reach-in closet or a small recessed wall into a craft hub requires maximizing every square inch of depth and height. You cannot afford dead air space between shelves.

Vertical Wall and Door Mounting

The backs of closet doors and bare vertical patches are prime storage territory. Mounting a steel or wooden pegboard allows you to hang frequently reached-for tools: rotary cutters, thread spools, Cricut tools, and rolls of washi tape. Hanging tools keeps your horizontal desktop completely clear for cutting and assembling. For deeper closet setups, learning how to use vertical space to store more in small rooms helps you take advantage of the neglected area directly below the ceiling.

Clear Modular Drawers and Shelf Risers

Deep closet shelves often turn into black holes where supplies disappear. Replace deep, open baskets with stacked, clear plastic drawers. Because you can see inside without unstacking them, you avoid digging through layers of card stock or yarn to find a specific color. Shelf risers double your usable shelf surface by letting you stack smaller, clear containers without resting them directly on top of each other.

When You Have Multiple Mediums but Zero Extra Closets

Many crafters do not stick to just one hobby. You might sew garments, press vinyl decals, make custom cards, and paint watercolors. In a small home without spare closets, cross-medium chaos happens quickly.

Category-Based Containment

Organize materials strictly by specific functional group rather than mixing them across projects. Group like items together:

  • Cutting and blades: Cricut blades, replacement rotary discs, precision craft knives, and heavy-duty scissors.
  • Adhesives: Hot glue guns and sticks, double-sided tape, fabric glue, tacky glue, and spray adhesives.
  • Substrates: Card stock grouped by weight, rolls of adhesive vinyl, heat-transfer vinyl, and fabric bundles.
  • Colorants: Watercolor pans, acrylic tubes, gouache, and alcohol markers stored horizontally to prevent nib dry-out.

The Core-Station vs. Deep-Storage Split

Keep only the tools and substrates needed for your current rotation in your primary living space. Seasonal materials—such as holiday-themed stamps, Christmas ribbon, or autumn wreath supplies—should not occupy prime real estate year-round. Pack off-season materials into labeled, airtight plastic containers and store them on high closet shelves, under beds, or alongside seasonal home decor.

When You Are Organizing on a Tight Budget

Investing in expensive matching acrylic systems or specialized modular craft furniture is unnecessary. Functional organization depends entirely on clear division and consistent boundaries, both of which can be created with repurposed household items.

Repurposed Glass and Plastic Jars

Clean food jars, baby food containers, and wide-mouth glass jars make ideal holders for buttons, safety pins, embroidery floss, beads, and clips. Because they are transparent, you immediately see your stock levels before buying duplicates. Group small jars inside shallow cardboard boxes or shoebox lids to keep them from sliding around in drawers.

Household Food Bags and Shoeboxes

Heavy-duty zipper food bags are excellent for categorizing die-cut pieces, scrap fabrics sorted by color, stencils, and half-used sticker sheets. Label each bag with a permanent marker, punch a hole in the corner above the seal, and store them upright in an empty shoebox like file folders. This prevents small, loose items from scattering throughout larger bins.

Maintaining Craft Order in Tight Quarters

Small-space systems fail when the volume of supplies exceeds the physical boundaries assigned to them. Setting up the system is only half the work; preserving usable space requires ongoing routines.

Practice a one-in, one-out rule for non-consumable tools. If you acquire a new rotary cutter or specialized ruler, remove the older version you reach for less often. For consumables like fabric remnants or paper pads, establish rigid containment boundaries: when the card stock bin is full, finish existing paper projects before purchasing new packs.

Pairing these storage boundaries with a simple daily tidy habit ensures your crafting surfaces stay ready for actual creating. Resetting your tools and packing away current projects at the end of each session prevents clutter from taking over your living areas, keeping your small creative space practical, functional, and ready to use.

How to Downsize Your Book Collection Without Regret

For anyone who loves reading, books represent more than paper and ink. They hold memories of specific seasons of life, intellectual ambitions, gifts from loved ones, and stories that shaped personal perspectives. Letting them go can trigger genuine guilt, fear of future regret, or a sense of parting with your own identity.

Downsizing a book collection does not require turning your home into a sterile environment. It simply means curating your shelves so every remaining volume serves a real purpose—whether through frequent reference, genuine comfort, or an active plan to read it soon.

The Universal Setup: Establishing Boundaries Before You Start

Regardless of your living situation or collection size, three baseline rules prevent decision fatigue and second-guessing:

  • Gather volumes into one central space: Pulling all books from nightstands, shelves, and storage tubs into a single well-lit area forces you to see the true physical footprint of the collection.
  • Designate physical boundaries: As popular organizer Dana K. White explains with the “container concept,” your shelves are finite borders, not flexible suggestions. Decide which bookcases you are keeping, and let that shelf space dictate how many books can remain.
  • Box the exits immediately: Keep cardboard boxes or crates directly beside your work area. As soon as a volume is rejected, place it inside and close the flap. Keeping discarded titles in plain sight invites second-guessing.

If you find that sentimental attachments to childhood favorites or gifts are paralyzing your momentum, it helps to review practical strategies for decluttering sentimental items before tackling the hardest volumes.

Downsizing When You Have Very Little Free Time

If you cannot dedicate an entire Saturday to sorting through hundreds of titles, trying to empty every bookcase at once will create a chaotic mess on your living room floor that only adds stress.

Instead, use the “reverse sweep” method. Rather than inspecting every title to see what should go, take five minutes to stand in front of a single shelf and pull out only the books you actively love and know you will reread. Leave everything else in place.

Once your true favorites are accounted for, schedule short 15-minute intervals across the week to evaluate the remaining titles shelf by shelf. Focus on low-friction categories first: outdated travel guides, software manuals for old tech, duplicate copies, and cookbooks containing only one recipe you actually make (which can be photographed or transcribed). Avoiding common traps outlined in 5 common decluttering mistakes and how to avoid them will keep these short sessions productive.

Downsizing for a Major Move or Smaller Space

Moving to a compact apartment or a home with limited built-in shelving requires ruthless prioritization. In small quarters, books quickly claim valuable square footage that needs to serve daily living functions.

When physical space is strictly capped, rank your keepers by accessibility:

  1. The Core Shelf: Fill your available bookcase space with your absolute favorite titles and active reference material. When the shelf is full, the list is closed.
  2. The 90-Day Quarantine Box: If you are stuck on a dozen “maybe” books, pack them into a sturdy cardboard box, seal it with tape, and write a date three months away on the side. Place the box in a closet or garage. If three months pass and you have not opened the box to retrieve a specific title, donate the sealed carton without looking inside. Physical separation breaks the emotional attachment.
  3. Digital and Library Offloading: Fiction paperbacks, standard bestsellers, and commercial non-fiction rarely need to take up physical shelf space. Most public libraries stock these in abundance, both in print and via digital apps like Libby. Keep only the rare, out-of-print, or heavily annotated editions that cannot be easily replaced for a few dollars.

If you must store some reading material in tighter living areas, learning how to use vertical space to store more in small rooms can help keep your remaining volumes neatly displayed without cluttering primary floor surfaces.

Downsizing the “Aspirational” Library: The Unread Stack

One of the heaviest emotional hurdles in clearing bookshelves is the unread book stack (known in Japanese as tsundoku). Unread books often represent unfulfilled intentions: the classic novel you meant to finish, the difficult philosophy text you planned to study, or the craft guide you bought three years ago.

To evaluate these without lingering guilt, apply a simple two-question filter to each unread volume:

  1. “If I had two uninterrupted hours this afternoon, would I pick this up right now?” If the answer is no, you are holding onto the fantasy of who you might be, rather than the reality of what you enjoy reading today.
  2. “Would I pay full price for this book at a bookstore today?” If your current self would pass it by on a retail table, your past purchase should not hold your shelf space hostage.

Acknowledge that buying a book and reading a book are two entirely separate hobbies. Donating an unread volume is not a failure; it releases the title to someone who will actually read it.

Downsizing Collections with Sentimental or Gift Attachments

Books inscribed by friends, volumes inherited from grandparents, or college textbooks tied to formative years are notoriously difficult to discard. The fear of regret is strongest here.

Separate the memory from the physical paper:

  • Inscriptions and dedications: If someone wrote a heartfelt message inside the front cover of a mass-market paperback you will never open again, carefully remove the flyleaf page and store it inside a personal scrapbook or journal. Rehome the remaining text block.
  • College and academic volumes: Unless your day-to-day career requires consulting that specific volume, academic textbooks become obsolete quickly. If you want to keep the memory of a special seminar or thesis topic, keep a single core volume and let the rest go.
  • Inherited sets: You do not need to display an entire 24-volume encyclopedia or leather-bound classic set to honor a relative. Choose two or three standout volumes that look attractive and carry fond memories, then rehome the remainder.

Responsible Rehoming: Where Downsized Books Should Go

Knowing your books are moving on to people who will value them makes downsizing far easier to execute.

  • Local Public Libraries: Most municipal libraries accept gently used books for their annual fundraising sales. Call ahead to check their donation drop-off schedules and guidelines.
  • Little Free Libraries: Neighborhood book-exchange boxes are ideal for circulating clean fiction, popular thrillers, and children’s literature directly into your local community.
  • Used Bookstores: Independent second-hand shops often offer store credit or modest cash for curated titles in good condition, allowing you to convert bulky inventory into a single future purchase.
  • Specialized Nonprofits: Organizations providing books to literacy programs, community shelters, and prison libraries frequently need clean, unannotated paperbacks.
  • Recycling Damaged Copies: Books that are moldy, water-damaged, heavily torn, or missing pages should not be donated. Paperbacks can generally be placed into paper recycling bins. For hardcovers, the glue-heavy binding and fabric covers cannot be processed by municipal recycling machinery; slice the paper text block away from the rigid cardboard spine using a utility knife, recycle the interior pages, and discard the cover.

Keeping Your Shelves Balanced Long-Term

Once your collection fits comfortably within its assigned shelving, establish a simple gatekeeping rule to prevent clutter from creeping back. Use the one-in, one-out principle: before a new physical book finds a permanent place on your shelf, pick one existing volume to donate, trade, or gift to a friend. Treating your bookshelf as a curated exhibit rather than an archive ensures your home remains orderly and your collection stays deeply relevant to your life.

A Step-by-Step Guide to Cleaning Window Tracks and Blinds

Window frames and window treatments collect an astonishing amount of airborne dust, dead bugs, and outdoor grime. Because they sit behind curtains or shades, they are easy to overlook until sliding a window open feels like dragging stone across gravel, or lowered blinds reveal a visible film of gray film. Tackling them is one of those high-impact tasks that instantly freshens a room’s air and light quality, fitting naturally into a comprehensive plan when you establish a monthly deep cleaning routine.

Cleaning these areas does not require specialized industrial gear. With everyday household supplies and the right sequence, you can restore smooth tracks and bright blinds quickly. Below, the process is broken down according to your immediate situation—ranging from quick seasonal maintenance to restoring neglected, grime-caked windows.

Essential tools to gather before you start

Working in tight grooves requires tools that reach narrow channels and lift loose dirt before water creates mud. Gather these items in a portable caddy:

  • Vacuum cleaner: Fitted with a narrow crevice tool or a small brush attachment.
  • Dry detail brush: An old toothbrush or a small, stiff-bristle utility paintbrush.
  • Cleaning agents: Baking soda and distilled white vinegar in a spray bottle (set to a fine mist).
  • Microfiber cloths or mitts: Essential for trapping dust without scratching finishes.
  • Butter knife or putty knife: Wrapped in a thin rag to reach deep frame corners.
  • Light silicone spray: To restore smooth gliding action without attracting dirt.

Light monthly maintenance for sliding window tracks

If your tracks are merely dusty rather than packed with hardened grime, a dry-first cleaning method takes under five minutes per window.

The biggest error people make is spraying liquid directly onto dry dust. Liquid immediately turns loose debris into paste, smearing it into the corners. Instead, always begin with a dry clean:

  1. Slide the window sash completely open to expose the track.
  2. Take your dry toothbrush or small paintbrush and sweep the dust from the edges, corners, and weep holes toward the center of the sill.
  3. Use your vacuum’s crevice attachment to suck up all the accumulated loose particles.
  4. Dampen a microfiber cloth with warm water (no heavy detergents needed), wrap it over your finger or a dull butter knife, and wipe down the channel tracks from one end to the other.
  5. Dry the track thoroughly with a clean rag to prevent immediate dust settlement.

Deep cleaning neglected, grimy window tracks

When tracks have accumulated outdoor dirt, pollen, and condensation moisture over months or years, the soil hardens into stubborn sludge. This requires a chemical lift using household baking soda and vinegar.

As detailed in Merry Maids’ guide to cleaning window tracks, a controlled fizzing reaction loosens caked-on buildup without abrasive scraping:

  1. Remove loose surface dirt: Always run the vacuum crevice tool first to remove anything dry.
  2. Dust with baking soda: Lightly sprinkle baking soda along the entire track channel. Aim for a light dusting; piling it on will produce an overflowing mess once liquid hits it.
  3. Spritz with vinegar: Mist white vinegar over the baking soda. The mixture will begin to fizz, penetrating the hardened crust. Let it sit for 5 to 10 minutes to soften the bond.
  4. Scrub the channels: Work along the tracks with an old toothbrush, paying extra attention to the corners and vertical guides. The bristles will agitate the softened grime easily.
  5. Lift the sludge: Press a damp microfiber cloth into the groove, sliding it along to absorb the paste. Rinse the cloth frequently in a bucket of warm water.
  6. Clear the weep holes: Inspect the small drainage slots on the exterior edge of the frame. If plugged with mud, poke a toothpick or pipe cleaner through them so future rainwater drains properly rather than backing up inside the sill.

If hardened dirt remains in the tracks, a handheld clothes steamer provides intense heat that melts dried buildup. Direct the steam nozzle into the channel for a few seconds, then wipe immediately with a microfiber rag.

Once the tracks are clean and completely dry, protect the mechanical action. Apply a light silicone-based spray along sliding channels and rollers. Avoid heavy grease, WD-40, or cooking oils; petroleum and food oils attract floating dust rapidly, creating a sticky residue that jams window rollers within weeks.

Cleaning aluminum Venetian blinds without bending slats

Aluminum blinds are notoriously delicate. Pressing too hard bends the thin metal, leaving permanent creases that ruin their appearance and hang crookedly. Avoiding rough handling is just as crucial as avoiding the common cleaning mistakes that make your home look messier.

Routine dusting in place

To dust aluminum slats safely, rotate the tilt wand so the blinds are closed flat facing downward. Slip a microfiber dusting mitt onto your hand, or use a soft microfiber cloth. Wipe across each slat horizontally, starting at the top rail and working your way down. Next, tilt the slats in the opposite direction so they overlap upward, and repeat the horizontal wipe. Supporting the back of the blinds gently with your non-dominant hand distributes the pressure evenly so slats never buckle.

Deep cleaning greasy or kitchen blinds

If the blinds hang near a stove or patio door, dusting alone will not remove greasy residue. Take them down for a soaking session:

  1. Unhook the blind headrail from the mounting brackets and lift the assembly down.
  2. Fill a bathtub with a few inches of warm water and add a tablespoon of gentle liquid dish soap.
  3. Lay the blinds flat in the water, extended fully, and let them soak for 15 to 20 minutes to dissolve grease films.
  4. Gently wipe both sides of the slats with a soft sponge or microfiber cloth.
  5. Drain the tub, rinse the blinds with a handheld showerhead using clean water, and hang them over a shower curtain rod or patio railing on towels until completely dry before rehanging.

Cleaning faux-wood and real wood blinds

Natural wood and synthetic wood blinds require different care due to their moisture sensitivity.

Real wood blinds

Real wood blinds should never be soaked, steamed, or treated with heavy water-based sprays, which cause swelling, warping, and peeling paint finishes. Vacuum them using a soft dusting brush attachment on low suction. For spot cleaning sticky areas, dampen a microfiber cloth very lightly with water, wipe the mark, and buff dry immediately with a second towel. Applying a light coat of wood-safe cleaner or mineral oil to a rag once or twice a year preserves natural wood luster.

Faux-wood blinds

Made from PVC or composite materials, faux-wood blinds withstand moisture well. You can clean them in place by closing the slats and wiping them down with a mixture of warm water and a few drops of dish soap. Alternatively, slide a pair of kitchen tongs wrapped in microfiber cloths held by rubber bands across each individual slat to clean top and bottom surfaces in a single swipe.

A simple routine to prevent grime accumulation

Windows stay clean significantly longer when integrated into regular home upkeep. Vacuuming window tracks for thirty seconds while cleaning baseboards prevents outdoor dirt from compounding into mud. Dusting blinds during standard dusting passes stops airborne grease from turning dry powder into stubborn film. By pairing dry-vacuuming with targeted spot cleaning, your windows will slide open effortlessly and admit bright, clean light year-round.

How to Build an Evening Reset Routine for a Calm Morning

Waking up in a hurried, reactive state rarely starts with a bad morning. It usually starts the night before. When you walk into a kitchen piled with dinner pans, search through laundry hampers for clean work clothes, or frantically hunt for your keys while checking the clock, your day begins in defense mode. The solution often promoted online is an elaborate, multi-step evening ritual designed to overhaul your life. In practice, rigid routines collapse under real-world fatigue.

A functional evening reset is not a late-night deep clean or a rigid performance. It is a protective boundary that closes out the current day and removes friction from the next one. By shifting a few small physical and mental tasks into the evening, you create an environment where a peaceful morning happens by default.

Flawed Evening Advice and What Works Instead

Most evening routines fail because they require peak willpower at the exact hour when your mental and physical energy is lowest. Examining where common evening productivity advice breaks down makes it far easier to build a system you can sustain.

Myth 1: You need an hour-long, multi-step evening checklist

What actually works: Cap your physical reset at 10 to 15 minutes.

When an evening checklist includes washing floors, folding three loads of laundry, meditating, journaling, stretching, and prepping gourmet meals, it becomes an intimidating second shift. On busy or exhausting days, you will skip the entire routine rather than complete a fraction of it. A sustainable evening reset focuses solely on the high-traffic friction points that derail your morning. If you already practice the 15-minute tidy-up habit during the day, your evening needs even less effort. Setting a timer for 10 minutes creates urgency, prevents perfectionism, and ensures the routine finishes before fatigue takes over.

Myth 2: You must leave the entire house spotless before bed

What actually works: Reset only your primary transit and launch zones.

Attempting to clean every room at 9:00 PM leads straight to burnout. Your evening efforts belong strictly in three primary areas: the kitchen counter and sink, your workspace, and the entryway. You do not need pristine baseboards or empty laundry baskets to wake up calm. You simply need clear kitchen counters so you can make breakfast without moving clutter, an organized desk so you can start work without distraction, and a clear entryway so leaving the house is effortless.

Myth 3: Planning tomorrow means scheduling every hour

What actually works: Check your calendar and pick your top three priorities.

Detailed time-blocking late at night often triggers anxiety about everything waiting for you tomorrow. Instead of mapping out every thirty-minute window before sleeping, check your calendar for early commitments, note travel times, and select just three core tasks that must get done. Writing down those three priorities transfers them out of your head and onto paper, preventing your brain from looping over them while you try to fall asleep.

Myth 4: Deciding outfits and packing bags is fine to do in the morning

What actually works: Outsource morning decisions to the night before.

Decision fatigue is real. Even minor choices—choosing pants, hunting for matching socks, packing a lunch, finding work badges—deplete mental bandwidth before your workday officially starts. Laying out your complete outfit (down to socks and accessories), packing your bag, and gathering essential paperwork the night before eliminates every low-stakes decision from your morning routine.

Myth 5: You should stay reachable until you fall asleep

What actually works: Create a digital shutdown two hours before sleep.

Answering work emails or scrolling group chats late in the evening keeps your nervous system vigilant. Set your phone and computer to Do Not Disturb mode roughly two hours before your target bedtime. Close all active browser tabs and work applications on your computer so you do not open your laptop the next day to unfinished crises from the previous afternoon. Closing those digital doors signals to your mind that the work day is finished.

The 4-Part Evening Reset Routine

To keep the process simple, divide your reset into four distinct phases: closing down the space, staging the launch pad, shutting down mentally, and resting. Moving through these steps in order takes roughly 15 to 20 minutes total.

  1. The 10-Minute Zone Reset:
    • Kitchen: Run or empty the dishwasher, clear dinnerware from the sink, wipe down the primary food prep counters, and prep the coffee maker or kettle. Knowing cleaning mistakes that make your home look messier—like leaving drying pans scattered across counters—helps you target the visual clutter that creates morning stress.
    • Living Space: Return stray mugs to the kitchen, fold the throw blanket, and return items to their general homes.
    • Desk / Workspace: Clear loose papers, close physical notebooks, and shut down computer monitors.
  2. Stage the Launch Pad:
    • Set out tomorrow’s clothes, shoes, and outerwear in your bedroom or bathroom.
    • Pack your work bag, gym gear, or school backpacks with all necessary chargers, water bottles, and documents.
    • Place your keys, wallet, transit pass, and packed bags directly by the front door or in your designated departure area. If your front hall lacks storage, implementing practical systems like storing shoes without an entryway keeps this launch area completely clear of tripping hazards.
    • Stage lunch containers or non-perishable breakfast ingredients on the counter or in an easy-to-reach refrigerator spot.
  3. Mental Shutdown (5 Minutes):
    • Open your calendar to confirm tomorrow’s appointment times and commitments.
    • Write down your top three priorities for tomorrow on a physical notepad.
    • Spend two to three minutes noting one or two simple wins or useful lessons from the day to deliberately close out your thoughts.
  4. Sensory Wind-Down:
    • Engage Do Not Disturb mode across your devices.
    • Dim overhead lights and switch to low-level lamps to signal your circadian rhythm.
    • Prepare a caffeine-free beverage, like peppermint tea, to mark the transition between your active evening and restful sleep.

How to Start When You Have Zero Energy

If you are returning home exhausted or dealing with sick children, attempting a four-part reset will feel impossible. On those evenings, do not abandon the system entirely. Strip it down to the absolute bare minimum.

Pick exactly two non-negotiable actions that prevent the greatest friction the following morning. For most people, that means:

  • Clearing the kitchen sink and prepping the coffee pot.
  • Setting out keys, phone charger, and bag by the front door.

Those two steps take under four minutes. Yet waking up to a functional kitchen and knowing your departure items are already assembled prevents the morning rush from spiraling. Once those two actions become automatic habits, you can gradually reintroduce the calendar check or the quick surface wipe-down.

Building Consistency Without Perfection

An evening reset routine is a tool to support your life, not a chore chart you must execute flawlessly every single day. There will be nights when you get home late, travel, or simply fall asleep on the couch. That is normal life, not a failed system.

The goal is simply to shift the balance so that most of your mornings begin with clarity rather than chaos. Treat the evening reset as a gift of time and calm to your future self. By spending a focused quarter of an hour closing down your home and your thoughts tonight, you give yourself the space to wake up tomorrow on your own terms.

How to Use Vertical Space to Store More in Small Rooms

Most small rooms aren’t actually short on storage — they’re short on used storage. When floor space runs out, we tend to stop looking, even though there’s usually three or four feet of empty wall above every surface in the room. That blank vertical real estate is the single most underused asset in a small home, and learning to fill it intentionally is what separates a cramped room from a calm one.

The principle is simple: when you can’t go out, go up. But doing it well takes more than nailing a shelf to the wall and hoping for the best. Below is a practical approach to turning vertical space into genuine, everyday storage — without making your walls look like a hardware aisle.

Start by reading the room from floor to ceiling

Before you buy a single organizer, spend five minutes looking at your room the way a storage planner would. Stand in the doorway and mentally divide each wall into three zones: low (floor to about knee height), middle (the prime, easy-reach zone), and high (above shoulder height). In most small rooms, the middle zone is crammed and the high zone is completely empty.

Your goal is to move infrequently used items up so the prime middle zone stays clear for the things you reach for daily. A few questions that make the plan obvious:

  • What do I use every day? Keep it in the easy-reach middle zone.
  • What do I use a few times a month? Push it high or low.
  • Where is there empty wall above a piece of furniture? That’s a shelf waiting to happen.
  • Which doors are doing nothing but opening and closing? Every one is a potential storage surface.

This quick audit prevents the most common mistake: buying vertical storage and then realizing it doesn’t fit your habits, so it sits empty while clutter piles up around it.

Shelves: the workhorse of vertical storage

Shelving is the highest-impact change you can make in a small room, because it adds usable square footage without taking up any floor at all. The trick is choosing the right type for the spot.

Floating shelves for clean, flexible walls

Floating shelves have no visible brackets, so they read as light and intentional rather than cluttered — important in a small space where heavy fixtures shrink the room visually. Mount one or two above a desk, nightstand, or sofa to hold books, a plant, or a small bin of supplies. Keep the depth modest (around 6 to 8 inches is plenty for most items) so the shelf doesn’t jut into the walkway or bonk anyone on the head.

One nuance people miss: group your floating shelves rather than scattering single shelves across multiple walls. A tidy cluster on one wall feels designed; lone shelves on every wall feel chaotic and make a small room feel busier than it is.

Closet shelves above the clothes bar

Small bedrooms almost always come with small closets, and the easiest fix is adding a shelf or two above the existing clothes rod. That dead space at the top of the closet can hold folded sweaters, off-season clothing, or labeled bins for things you rarely touch. If you store items up there in matching bins with front-facing labels, you keep the visual calm and you never have to dig.

Ladder shelves and tall narrow units

When you do have a little floor to spare, choose furniture that’s tall and narrow rather than wide and low. A ladder shelf or a slim bookcase uses a small footprint but climbs high, multiplying storage in the exact direction you have room to spare. Anchor any tall unit to the wall — in a small room it’s often near a bed or seating, and tip-overs are a genuine hazard.

Put your doors and walls to work

Doors are flat, vertical, and almost always wasted. The same goes for big empty stretches of wall. These are the cheapest wins in the whole strategy.

Over-the-door organizers

An over-the-door organizer instantly creates a wall of small compartments on a surface that was doing nothing. They’re not just for shoes — the clear-pocket versions are excellent for:

  • Cleaning supplies and spray bottles on a utility closet door
  • Craft and office odds and ends
  • Toiletries and travel-size bottles inside a bathroom door
  • Snacks or pantry packets on a kitchen door
  • Accessories, socks, or scarves on a bedroom closet door

Choose one with a rigid frame or a fitted bracket if your door gets a lot of slamming, since loosely hung organizers swing and bang.

Hooks — the most underrated tool you own

A few hooks on a wall is one of the simplest ways to store things vertically, and adhesive hooks like Command hooks work for far more than picture frames. Use them to hang bags, hats, headphones, robes, dog leashes, jewelry, kitchen utensils — anything with a loop or handle. Because they require no drilling, they’re ideal for renters and for testing a placement before committing to a permanent fixture.

The pro move is to hang things you’d otherwise pile. A tote bag on a hook is off the floor; the same bag dumped on a chair becomes the seed of a clutter pile.

Pegboards for endless flexibility

If you have a craft corner, a home office, a garage, or a hardworking kitchen wall, a pegboard turns a flat surface into fully customizable storage. The beauty is that you can rearrange hooks, baskets, and bins as your needs change — nothing is locked in. You don’t need a giant wall, either; even a modest pegboard mounted above a desk can hold supplies, free up drawer space, and double as decoration. Group items by category and leave a little breathing room so the board stays useful rather than overwhelming.

Stack up inside cabinets, drawers, and shelves

Vertical thinking shouldn’t stop at the walls. The empty air inside your cabinets and drawers is prime territory, and it’s where small items quietly waste the most space.

Stacking drawers and risers

Under a kitchen sink or inside a deep cabinet, a single layer of items leaves a tall, hollow space above it. Acrylic or plastic stacking drawers let you store two or three layers in the same footprint — instantly doubling or tripling capacity — while keeping smaller items contained and easy to pull out. The same logic applies to shelf risers in cabinets and pantries: a riser creates a second tier so the back row isn’t buried behind the front.

Vertical filing instead of stacking

Counterintuitively, one of the best vertical tricks is to store flat items upright. File your cutting boards, baking sheets, and pan lids vertically in a rack so you can grab one without unstacking the whole pile. Do the same with folded clothing in a drawer — stand the items on edge like files so you can see every one at a glance. It’s “vertical” in the sense that you’re using the depth of the drawer as height.

Don’t forget the space under and over the bed

In a small bedroom, the bed is the biggest single object — and it hides two excellent storage zones.

Under the bed is ready-made for low, flat storage. Use shallow rolling bins or under-bed boxes for off-season clothes, extra linens, or shoes. Lidded or zippered containers keep dust out, and bins on casters slide in and out without crawling. If your frame sits low, bed risers lift it a few inches and unlock more clearance — a cheap upgrade that pays off immediately.

Above the bed is the high zone again: a single floating shelf or a slim cabinet mounted well above the headboard can hold books and decor that would otherwise eat up nightstand space. Just keep anything heavy off the wall directly over where you sleep.

Common mistakes that undo all your effort

Going vertical works beautifully until a few predictable errors creep in. Watch for these:

  • Overfilling the walls. Vertical storage should reduce visual noise, not add to it. Leave some blank wall so the room can breathe.
  • Storing daily items too high. If you need a step stool every morning, the system will fail. Reserve high zones for occasional-use items.
  • Skipping labels and containers. Open shelves full of loose stuff read as clutter. Bins and labels keep high storage looking deliberate.
  • Ignoring weight limits. Adhesive hooks and lightweight shelves have real limits; overload them and you’ll be patching drywall.
  • Treating it as one-and-done. Even the best system needs a regular reset. Do a quick weekly pass to return things to their spots and clear accumulating clutter before it spreads.

Think in height, not width

Small rooms feel cramped not because they lack storage, but because all the storage lives in the same crowded zone. The fix is to spread your belongings across the full height of the room — up onto shelves, onto doors and walls, into the stacked layers inside your cabinets, and under the bed — so the easy-reach middle stays clear and calm. Start with a single high-impact move this week: add one shelf above a doorway or desk, hang a row of hooks, or drop a stacking drawer set under the sink. Then keep a short weekly reset on the calendar so the vertical space you reclaimed stays working for you instead of quietly filling back up.

How to Organize a Linen Closet Step by Step

The linen closet is one of those spaces that quietly descends into chaos. It starts innocently enough—a folded set of sheets here, a spare bottle of shampoo there—and within a year you’re shoving a wad of mismatched pillowcases against the door just to get it closed. The problem isn’t that you own too much (though you might); it’s that the closet has no system, no logic, and no boundaries.

On the bright side, a linen closet is one of the most satisfying spaces to organize because it’s small, contained, and the rules are simple once you know them. This is a project you can finish in a single afternoon, and the payoff—grabbing a clean towel without an avalanche—lasts for months. Here’s exactly how to do it, step by step.

Start by Emptying the Entire Closet

It’s tempting to “tidy in place”—straightening stacks and nudging things into corners. Resist that urge. You cannot organize a space you can’t fully see, and half-finished sorting almost always recreates the original mess.

Pull everything out and lay it on a bed or the floor nearby. As you empty the shelves, you’ll likely uncover items that have no business being there in the first place: holiday decorations, random electronics, gift bags, that bin of stuff you meant to take to the basement. Set those aside immediately—getting non-linen-closet items out of the equation is half the battle.

Wipe down the empty shelves while you’re at it. You may never see them this bare again, so take advantage of the clean slate.

Sort Ruthlessly Into Keep, Donate, and Toss

Now go through every single item and make a decision. The most common mistake here is keeping things “just in case.” Linens are bulky, and storage space is the real cost of hanging onto items you’ll never use.

As you sort, be honest about the condition of your textiles. Threadbare towels, faded sheets, and pilled blankets aren’t doing you any favors. Worn-out towels can be repurposed as cleaning rags or donated to animal shelters, which often accept them gratefully.

What to actually let go of

  • Sheet sets missing pieces. A fitted sheet with no matching flat sheet or pillowcases is dead weight. Match your sets as you sort and note what’s incomplete.
  • Towels that are stiff, frayed, or stained beyond rescue. If you wouldn’t hand it to a houseguest, it’s not earning its shelf space.
  • Sizes you no longer own. Got rid of the twin bed two years ago? The twin sheets can go too.
  • Expired or empty toiletries and medicine. If your linen closet doubles as a backup bathroom cabinet, this is where a shocking amount of clutter hides—old prescriptions, dried-up lotions, hotel shampoos you’ll never use.
  • Excess quantity. You don’t need eight sets of sheets per bed. Two to three per bed is plenty for most households.

Categorize Everything Before It Goes Back

This is the step that separates a closet that looks organized from one that stays organized. Before you put anything back, group your keep pile into clear categories.

For linens specifically, sort by size and type: King, Queen, Full, and Twin sheets in their own stacks, then bath towels, hand towels, washcloths, and blankets each in their own group. If you’ve been struggling to find matching sets, this sorting moment is where you’ll finally see what you have and what’s gone astray.

For everything else, think in terms of function: a group for medicine, a group for extra toiletries and soaps, a group for backup toilet paper and paper towels, a group for guest supplies. You’re essentially building “zones” before you’ve even touched a shelf.

A quick tip for keeping sheet sets together

One of the oldest and best tricks in the book: fold a complete sheet set and tuck the whole bundle inside one of its own pillowcases. Now the set lives as a single unit—no more orphaned fitted sheets, no more mystery of the disappearing pillowcase.

Assign Zones and Use Bins to Contain Small Items

Now you’ll put everything back, but with intention. Think about how you reach into the closet and what you grab most often.

The principle is straightforward: store things where it makes sense to use them. Items you reach for daily or weekly go at eye level and on the easiest shelves. Things you rarely touch go up high or down low.

  • Top shelves: Bulky, infrequently used items—extra pillows, seasonal blankets, spare comforters. These are out of the way but still accessible when guests arrive.
  • Middle shelves (the prime real estate): Your everyday towels and the sheet sets you use most. This is the zone you reach without thinking, so reserve it for daily life.
  • Lower shelves: Heavier bins and bulk supplies. A basket of loose toilet paper rolls works beautifully on a bottom shelf—pull the rolls out of their plastic packaging first so they stack neatly and look tidier.

Bins and baskets are your best friends

Loose small items are what turn a closet into a junk drawer. The fix is to corral them. Pull medicine, soaps, and toiletries out of their bulky retail packaging and group each category into its own labeled basket—one for medicine, one for backup toiletries, one for washcloths, and so on. When you want something, you pull out the whole basket, take what you need, and slide it back. Nothing slumps over or migrates.

Fabric bins work especially well for sheet sets. Labeling each bin by size—”Queen,” “King”—means you (and anyone else in the house) can grab the right set instantly without unfolding three wrong ones first.

Consider a Unified Look (and Why It Helps)

This part is optional, but it has a practical payoff beyond aesthetics. A linen closet where everything matches isn’t just prettier—it’s easier to maintain.

One popular approach is sticking to all-white sheets and towels. The reasoning is genuinely functional: white linens can be bleached without worrying about fading or staining, they always coordinate regardless of which set you grab, and a uniform palette makes the whole closet read as calm rather than cluttered. If you’ve ever stared at a jumble of mismatched colors and patterns, you know how visually noisy that is.

You don’t have to go fully white to get the benefit. Choosing a simple, cohesive theme—matching baskets, a consistent color story, uniform bins—creates a sense of order that makes the space feel maintained even when it’s not perfectly tidy. The visual consistency does a lot of quiet work.

Make the Top Shelves Reachable and the System Sustainable

An organized closet only stays organized if it’s easy to use. If your top shelf requires a treasure hunt for a step stool every time, you’ll start dumping things on lower shelves instead—and the system breaks down within weeks.

A small, foldable step stool stored right inside the closet solves this elegantly. It takes up almost no space and means the top shelves stay genuinely usable rather than becoming a no-man’s-land where things go to be forgotten.

Keep it from sliding back into chaos

The single most important habit for a lasting linen closet is the periodic edit. Every couple of months, do a quick pass through your toiletries and medicine—toss the expired and empty, and you’ll prevent the slow accumulation that wrecks the space over a year. It takes five minutes and saves you from ever needing a full overhaul again.

A few more habits that keep the system intact:

  • Refold and return. When laundry comes out of the dryer, fold it the same way every time and put it back in its assigned zone immediately.
  • One in, one out. Buy a new set of towels? Retire an old set the same day.
  • Respect the bins. If a basket is full, that’s your signal to declutter that category—not to start a new pile on top.
  • Keep labels visible. Labels aren’t just for show; they tell everyone in the household where things belong, which means the burden of tidiness doesn’t fall on you alone.

The same empty, sort, and contain approach works in other tight spots too, from under-sink cabinets to a clothes closet that’s overflowing.

Keeping the linen closet tidy

Organizing a linen closet takes five moves: empty it completely, sort honestly into keep–donate–toss, group what’s left into clear categories, assign zones with bins to contain the small stuff, and build in the habits that keep it that way. The bulky, rarely-used items go up high; your everyday towels and sheets claim the easy-to-reach middle; and a couple of labeled baskets tame everything that used to roam free.

Start this weekend by simply pulling everything out and matching your sheet sets—you’ll be surprised how much clarity that one step gives you. From there, the rest of the system practically builds itself, and you’ll have a closet that closes easily, looks calm, and actually stays that way.

How to Store Shoes When You Have No Entryway

If your front door opens directly into your living room, your kitchen, or a hallway barely wide enough to turn around in, you already know the problem: shoes have to go somewhere, and that somewhere usually ends up being a growing pile by the door. Without a dedicated entryway, footwear creeps into every room, trips you on the way out, and makes even a tidy home feel chaotic the moment you walk in.

Fortunately, you don’t need an entryway to have a calm, organized shoe situation. You need a system that uses the space you actually have — walls, under-bed gaps, closet interiors, and a few square feet of floor — and a habit that keeps shoes from multiplying. Here’s how to build both.

Start by deciding what actually lives near the door

The biggest mistake people make in small spaces is trying to store all their shoes in one spot near the entrance. You don’t need to. The shoes that need to be accessible at the door are the ones you reach for daily — your commuting pair, your everyday sneakers, the slip-ons you grab for the dog. That’s usually three to five pairs per person, not your entire collection.

Everything else — seasonal boots, dressy heels, hiking shoes, the sandals you wear twice a summer — can be stored elsewhere in the home, even somewhere less convenient. Separating “active” shoes from “stored” shoes instantly shrinks the problem you’re trying to solve at the door.

Before you buy a single organizer, do a quick declutter. Pull every pair you own into one place and be honest:

  • Toss or recycle anything broken, painfully uncomfortable, or worn past repair.
  • Donate shoes you haven’t worn in a year and won’t miss.
  • Keep what you genuinely wear, then sort those into “daily” and “occasional.”

It’s far easier to organize 15 pairs than 40. The decluttering step is the one most people skip, and it’s the one that makes every storage solution below actually work.

Go vertical: use the walls and the back of your door

When floor space is the thing you don’t have, the answer is almost always up. Vertical storage gives you a home for daily shoes without sacrificing the walking path you need by the entrance.

Over-the-door racks

An over-the-door shoe organizer is the single most underused tool for entryway-less homes. It hangs on the back of any standard door — your front door, a coat closet, even a bathroom door near the entrance — and holds anywhere from 12 to 24 pairs depending on the design. Pocketed fabric versions are great for flats, sneakers, and kids’ shoes; wire or metal over-door racks handle bulkier footwear better and don’t sag over time.

The trick is choosing the right door. If your front door swings against a wall, the back of it is prime real estate. If not, a nearby closet door works just as well.

Wall-mounted racks and shoe ladders

A leaning shoe ladder is one of the more stylish options out there — it props against the wall, takes up almost no floor footprint, and turns a row of shoes into something that looks intentional. Wall-mounted rails or angled shelves do the same thing while keeping the floor completely clear, which makes vacuuming and mopping far easier.

If you rent and can’t drill, look for tension-mounted or adhesive-backed options, and keep the weight light — these hold a few pairs of flats or sneakers, not a stack of winter boots.

Tall rotating or tiered racks

For small and studio apartments, a tall rotating shoe rack is a clever pick because it stores upward instead of outward. You get multiple tiers in a footprint not much larger than a single pair of shoes, and the spin makes it easy to see everything. Multi-tier vertical racks tucked into a corner do the same job at a lower price point.

Hide shoes in furniture you already need

When you have no entryway, your best storage often disguises itself as something else. The goal is dual-purpose furniture: pieces that earn their footprint by doing two jobs at once.

  • Storage benches: A bench with a lift-up seat or cubbies underneath gives you a place to sit while you put shoes on and a place to stash them. Position it against the wall closest to your door, even if that’s technically in your living room.
  • Storage ottomans: If a bench feels too utilitarian for a living room, an upholstered storage ottoman blends in as furniture while quietly holding several pairs inside.
  • Stackable shoe cabinets: Slim-profile shoe cabinets — sometimes called shoe dressers — tilt shoes into shallow drawers, so they project only a few inches from the wall. They’re ideal when you want shoes fully hidden and the surface up top doubles as a spot for keys and mail.
  • Console tables with baskets: A narrow console against a wall, with two or three large baskets tucked underneath, creates an instant “drop zone” that looks deliberate rather than messy.

Baskets deserve a special mention. A couple of large, sturdy baskets by the door are the lowest-effort solution that exists — shoes go in, the visual clutter disappears, and there’s no fiddling with slots or pockets. They’re especially forgiving for families and kids who won’t reliably line shoes up on a rack.

Reclaim the spaces you’re not using

The shoes that don’t need to live by the door can go almost anywhere — and most homes have hidden capacity people never think to use.

Under the bed

The gap under your bed is some of the most wasted storage in the house. Flat under-bed bins on wheels or shallow shoe boxes slide right in and keep off-season and occasional pairs out of sight but easy to retrieve. Clear bins or labeled boxes save you from dragging everything out to find one pair. If your bed sits low, bed risers can create the few extra inches you need.

An underused closet

If you have a coat closet, linen closet, or spare closet that’s only half-full, it can become a dedicated shoe zone. Add a tension rod with hanging shoe pockets, stack shoe cubbies on the floor, or fit a small tiered rack inside. Even claiming the floor of an existing bedroom closet for your stored shoes frees up the entry area for daily pairs only.

Unexpected gaps

Look for the dead spaces most people ignore. A pair of slim shoe stands tucked under a window ledge, a narrow rack beside the sofa, the empty stretch under a console or radiator shelf — these awkward spots are perfect for low-profile shoe storage precisely because nothing else fits there. The point is to spread shoes across several small, out-of-the-way places rather than forcing them all into one overcrowded spot.

Build a habit so the system actually sticks

Storage solves the where, but habits solve the why does this keep happening. The best rack in the world fails if shoes never make it into it.

  • Make the daily spot effortless. The easier it is to put shoes away, the more likely it happens. A basket you toss into beats a rack you have to align perfectly — especially for kids and anyone in a hurry.
  • Set a hard limit. Decide how many pairs are allowed in the entry zone (say, two per person). When it overflows, that’s your cue to relocate a pair to under-bed or closet storage.
  • Do a 30-second reset. Once a day — ideally before bed — put stray shoes back. It takes under a minute and stops the pile from ever forming.
  • Rotate seasonally. Twice a year, swap stored and active shoes so your prime door space always holds what you’re actually wearing now.

One more practical note: keep wet or muddy shoes off fabric and wood. A simple boot tray or a washable mat near the door catches drips and protects your floor and your storage furniture, which matters a lot more when your “entryway” is really the corner of your living room.

Common mistakes that keep small-space shoes messy

A few patterns sabotage even good intentions. Watch for these:

  • Buying storage before decluttering. You’ll size your solution to a collection you should have shrunk first.
  • Choosing storage that’s too fiddly. If putting a shoe away takes effort, it won’t happen consistently.
  • Trying to store everything at the door. Spread the load across the home instead.
  • Ignoring vertical and hidden space. Floor space is your scarcest resource — use walls, doors, and under-bed gaps first.
  • No designated landing spot. Without a clear “shoes go here,” they go everywhere.

Shoes sorted, no entryway required

You don’t need an entryway to keep shoes under control — you need a plan that matches your actual space. Start by decluttering, then keep only your daily pairs near the door using a bench, baskets, or an over-the-door rack. Push everything else into vertical and hidden storage: the back of a door, under your bed, a wall-mounted ladder, or an underused closet. Finally, protect the system with a 30-second daily reset and a firm cap on how many pairs live by the entrance.

Pick one solution from this article — even just adding two baskets by the door tonight — and build from there. A tidy entry zone in a home that doesn’t technically have an entry is entirely within reach.

How to Organize Under-Sink Cabinets for Easy Access

The cabinet under your sink might be the single most chaotic square foot of storage in your entire home. It’s an awkward space carved up by pipes, dampened by the occasional drip, and treated like a junk drawer for half-empty spray bottles, mystery sponges, and a tangle of plastic bags you swore you’d reuse. Every time you open it, something tips over.

Luckily, this space responds incredibly well to a handful of smart moves. You don’t need a custom cabinet or a contractor — you need to think vertically, contain things in the right way, and put the items you actually reach for within arm’s reach. Here’s exactly how to do it.

Start by emptying the cabinet completely

It’s tempting to organize around what’s already in there, but that’s how you end up shuffling clutter from one corner to another. Pull everything out and set it on the floor or counter so you can see what you’re truly working with.

As you empty, sort items into quick piles:

  • Keep and use regularly — dish soap, your go-to all-purpose cleaner, sponges, dishwasher pods.
  • Keep but rarely use — specialty cleaners, oven cleaner, extra refills.
  • Relocate — items that drifted here but belong elsewhere (snacks, tools, batteries).
  • Toss or recycle — empties, dried-out cleaners, duplicate products, and that collection of crusty rags.

While the cabinet is empty, wipe down the base. This is also your chance to check for any signs of moisture or a slow leak around the pipes — a soft or discolored cabinet floor is worth addressing before you reload it. A clean, dry starting point makes everything that follows easier.

Protect the base before you put anything back

Under-sink cabinets get damp. Condensation, the occasional drip from a worn connection, and leak-prone cleaning bottles all take a toll on the cabinet floor over time. A protective layer is cheap insurance.

A simple rubber mat or a peel-and-stick liner cut to fit the base does two jobs at once: it shields the wood from water damage and gives bottles a grippier surface so they’re less likely to slide and topple. If a bottle does leak, you’ll spot it on the mat instead of discovering warped cabinet wood months later. Choose something you can lift out and rinse in the sink.

Go vertical to stop wasting the best space

Here’s the core principle that fixes most under-sink chaos: the problem isn’t a lack of space — it’s wasted space. When you line bottles up front-to-back, the ones in back become invisible and unreachable, and the gap between the tops of the bottles and the underside of the counter sits completely empty. That dead air is prime real estate.

Building upward reclaims it. The most effective tools for this are:

  • Pull-out drawers or sliding shelves — these bring everything in the back forward to you, so nothing gets buried. They’re the gold standard for access.
  • Tiered or two-shelf risers — adjustable metal or plastic shelves that often have legs designed to straddle the pipes, creating a second level for storage.
  • Stackable clear drawers — see-through units that let you stack two or three high while still being able to see and reach the contents.
  • A small rolling cart — if your cabinet is tall and open enough, a slim cart on wheels can slide in and pull out as a unit.

Working around the plumbing

The drainpipe and supply lines are the reason most off-the-shelf shelving doesn’t fit neatly. Before you buy anything, measure three things: the interior width, the interior depth, and the height clearance from the cabinet floor to the pipes. Then measure where the pipes actually sit, because a U-shaped or expandable organizer is designed to nest around them.

If your pipes are positioned dead center, look for two narrower units that flank them rather than one wide shelf. If the configuration is especially awkward, a pull-out drawer that occupies only the front portion of the cabinet — leaving the pipe area clear behind it — often works better than trying to bridge over the plumbing.

Sort into zones and contain wisely

Once you have vertical structure, group like with like so you’re not hunting. A typical under-sink cabinet breaks down into a few natural zones: dish-related items (soap, sponges, brushes), surface and glass cleaners, refills and backstock, and reusable bags or specialty supplies.

Choose the right containers

Containers help, but the wrong ones create new problems. A few guidelines worth following:

  • Favor clear over opaque. When you can see the contents at a glance, you stop buying duplicates and you actually use what you have. Clear bins and drawers earn their place here more than almost anywhere else in the house.
  • Skip oversized baskets. One giant bin sounds tidy, but it just becomes a deep pit where items pile on top of each other. You end up unloading half of it to reach the bottom. Smaller, purpose-grouped containers keep things accessible.
  • Use a shallow tray on top for small loose items. Sponges, scrub brushes, and odd little tools live best in a single shallow tray on the upper level, where they’re visible and easy to grab without digging.
  • Reserve one deeper bin for bulky, soft items. Reusable shopping bags, for instance, compress well and can live in a single deep container on the bottom rather than spilling everywhere.

A door-mounted caddy or a couple of adhesive hooks on the inside of the cabinet door are also worth considering — they’re perfect for a roll of trash bags, rubber gloves, or a small spray bottle, and they use space that would otherwise go untouched.

Put frequently used items where your hand lands first

Organization isn’t just about fitting everything in — it’s about access. The items you touch every day should be the easiest to reach, and the things you use twice a year can hide in the back or up high.

In practice, that means keeping your everyday cleaner, dish soap, and sponges on the top tier of your vertical unit or at the front of a pull-out drawer. Backstock, refills, and seasonal or rarely-used products go lower, deeper, or behind. This single habit eliminates the constant rummaging that makes under-sink storage feel so frustrating.

One more access-related tip: store spray bottles upright and slightly forward so the trigger heads don’t catch on the shelf above when you slide things out. It’s a small thing that prevents the daily knock-over.

Keep cleaning products safe

If small children or pets are part of your household, the under-sink cabinet deserves extra thought because it’s exactly the spot they can reach. A simple childproof cabinet latch is inexpensive and effective. Keep products in their original, labeled containers, and never decant cleaners into food or drink containers — accessibility should never come at the cost of safety. For specific guidance on any particular product, follow the manufacturer’s storage instructions on the label.

Common mistakes that undo your hard work

Even a well-organized cabinet can slide back into chaos. These are the pitfalls I see most often:

  • Over-buying. Bulk cleaning supplies seem like a deal until you have four bottles of the same thing crowding the space. Buy what you’ll use in a reasonable window.
  • Ignoring the vertical gap. If there’s empty air above your bottles, you haven’t finished. Add a shelf or riser.
  • Choosing organizers before measuring. Returning ill-fitting bins is a tax on impatience. Measure around the pipes first, every time.
  • Treating it as a one-time project. Take 90 seconds every few weeks to pull stray items, toss empties, and reset the zones. Maintenance is what keeps it functional.
  • Keeping things that don’t belong. Tools, paper goods, and snacks all tend to migrate here. Give them a real home elsewhere.

Four moves to a better under-sink cabinet

An organized under-sink cabinet takes four moves: empty it out and edit ruthlessly, protect the base with a liner or mat, build upward with pull-out drawers or tiered shelves to capture wasted vertical space, and place your most-used items where your hand naturally reaches. Keep your containers clear and appropriately sized — skip the one giant basket — and you’ll be able to see and grab what you need without unloading the whole cabinet.

Start this weekend with just the emptying and sorting step. Once you see the bare, clean space and know your exact measurements, the right organizers practically choose themselves — and you’ll have a cabinet that stays usable instead of one you dread opening.

How to Declutter Your Kitchen Cabinets in One Afternoon

Kitchen cabinets have a way of becoming the place where good intentions go to die. That smoothie attachment you used twice, the mismatched lids without bottoms, the three-deep stack of mugs you have to dig through every morning — it accumulates quietly until one day you can’t find a measuring cup without unloading half a shelf. You don’t need a weekend, a renovation, or a pile of expensive organizers to fix it. You need a focused afternoon and a willingness to be honest about what you actually use.

This guide walks you through a complete cabinet declutter in roughly three to four hours. The key is to work in a deliberate sequence rather than poking at one cabinet at a time. By the end, you’ll have shelves that hold only things you reach for, in an arrangement that makes cooking faster instead of frustrating.

Set yourself up before you touch a single shelf

The biggest mistake people make is opening a cabinet and immediately starting to “tidy.” That just shuffles clutter around. Spend the first 15 minutes preparing so the actual work goes quickly and you don’t lose momentum halfway through.

Clear a large staging area first — your kitchen table, an island, or even a clean stretch of counter. This is where everything will land so you can see it all at once. Seeing the full scope of what you own is what makes good decisions possible; you simply can’t judge whether you need four spatulas when they’re hidden in three different drawers.

Gather your sorting supplies:

  • Three labeled containers — one for trash, one for donate, and one for “belongs elsewhere” (items that drifted into the kitchen but live somewhere else).
  • A damp cloth and all-purpose cleaner for wiping shelves while they’re empty.
  • A notepad or your phone to jot down genuine storage gaps you discover — not to shop now, but later.
  • A timer, set in chunks, so a single overwhelming cabinet doesn’t swallow your whole afternoon.

Resist the urge to buy bins and organizers beforehand. You can’t know what you need until you’ve seen how much you’re keeping. Buying first almost always means you end up storing clutter in prettier packaging.

Empty the cabinets and confront what’s actually in there

Now do the part that feels dramatic but pays off enormously: take everything out. Work cabinet by cabinet, pulling the contents onto your staging area. Wipe down each empty shelf as you go — crumbs, sticky rings, and dust have likely built up where you couldn’t see them.

As items come out, sort them into broad groups on the table: dishes, glassware, mugs, pots and pans, food storage containers, bakeware, small appliances, gadgets, and so on. Grouping like with like is where the truth comes out. You may discover you own eleven travel mugs, or that you’ve been holding onto a “spare” set of plates for a dinner party that hasn’t happened in years.

Toss the broken and the obvious first

Before you agonize over anything, do a fast pass for items that are clearly done: chipped mugs, scratched nonstick pans, warped plastic, lids with no matching containers, and gadgets that don’t work. These decisions require zero deliberation, and clearing them builds quick momentum. Chipped and cracked dishware isn’t just ugly — it can harbor bacteria and chip further into food, so it earns an easy spot in the trash or recycling.

Decide what stays using the “weekly use” test

Here’s the principle that does the heavy lifting: keep what you use, not what you might use someday. A reliable filter is to ask whether you reach for an item in a typical week or month of normal cooking. If your dishwasher cycle realistically uses five plastic kids’ cups, you don’t need to store twenty-five.

Go through each group and make a call. To keep the afternoon moving, give yourself permission to decide quickly — your gut is usually right. Some honest questions that cut through the indecision:

  • Do I have duplicates? Most kitchens function beautifully with one good vegetable peeler, two or three wooden spoons, and a single set of measuring cups. Keep the best of each and let the rest go.
  • Does it work the way it should? A blender that leaks or a can opener that mangles lids is taking up space it hasn’t earned.
  • Would I buy this again today? If the honest answer is no, that’s a strong signal it belongs in the donate box.
  • Is this realistically going to get used, or is it guilt? The bread maker from three Christmases ago counts as guilt, not utility.

Be ruthless, because there’s a direct relationship between how much you own and how hard it is to keep tidy. The less you keep, the easier everything that follows becomes — and the more room your favorite, genuinely useful tools have to breathe.

Handle the food storage container chaos

Plastic containers deserve their own mention because they’re the single most notorious cabinet offender. Match every lid to a base. Anything orphaned — a lid with no bottom or a bottom with no lid — goes. Keep a sensible number for how you actually store leftovers, and consider standardizing on one or two stackable shapes so they nest neatly instead of avalanching every time you open the door.

Reorganize around how you actually cook

With only the keepers left, you get to put things back intentionally. The goal isn’t to recreate the old layout — it’s to build zones that match the way you move through the kitchen. Organization experts consistently point to designated zones as the thing that keeps a kitchen functional long after the decluttering high wears off.

Think about grouping by function:

  • A prep zone near your main counter space, holding cutting boards, knives, mixing bowls, and frequently used utensils.
  • A cooking zone beside the stove for pots, pans, cooking spoons, and the oils and spices you use most.
  • A cleaning zone around the sink, keeping dish soap, sponges, and towels within arm’s reach.
  • An everyday-dishes zone close to the dishwasher or table so unloading and setting the table take fewer steps.

The principle behind all of it is simple: store things where you use them. Put your most-used items at eye level and within easy reach. The prime real estate — the shelves between your shoulders and your hips — should hold daily dishes and glasses, not the slow cooker you pull out twice a year.

Relocate the seldom-used stuff

Specialty items — the turkey roaster, holiday platters, the second set of stemware — don’t deserve prime cabinet space. Move them to high shelves, the back of deep corner cabinets, or storage outside the kitchen entirely, like a basement or pantry closet. Freeing up reachable space for daily essentials is one of the most satisfying parts of this whole process.

Use a few smart organizers to make it stick

Now — and only now — you can address the storage gaps you noted earlier. Because you’ve already pared down, you’ll likely need far fewer products than you’d have guessed. The point of an organizer is to make a good system easier to maintain, not to cram in more stuff.

A handful of genuinely useful, low-effort upgrades:

  • Shelf risers let you reach a dinner plate without disturbing the salad plates stacked beside it, and they double your usable vertical space on a shelf.
  • Adjustable shelf heights are worth the patience — moving a shelf up or down an inch can transform how easily you grab everyday items.
  • Under-shelf holders reclaim that dead gap of air above your dishes. They’re handy for corralling small, scatter-prone items like stock cubes, spice packets, or salt and pepper that otherwise migrate all over the shelf.
  • Drawer dividers and bins keep utensils and gadgets from sliding into one tangled heap every time you open the drawer.

Measure your shelf depth and height before buying anything. A common letdown is ordering a clever-looking holder only to find your cabinet is too shallow for it — so know your dimensions and have a backup use in mind.

Get the donations and trash out the door today

This step is non-negotiable, and it’s where many afternoons quietly fail. Bags of “donate” items left sitting in the corner have a way of creeping back into the cabinets within a week. Finish the job: take out the trash, put the recycling in the bin, and load the donation box into your car immediately. If you can drop it off the same day, do it. If not, schedule the drop-off so it’s a commitment, not a vague intention.

Take a moment to look at your before-and-after, too. The visible payoff — clear shelves, items you can actually see and reach — is what motivates you to keep the system going.

If your kitchen is small, our guide to maximizing storage in a tiny kitchen picks up where this one leaves off.

Before you close the cabinet doors

Decluttering your kitchen cabinets in an afternoon comes down to a clear sequence: prep your space, empty everything out so you can see what you own, group like items, keep only what genuinely earns its place, and put the survivors back in functional zones with the daily essentials front and center. Add a couple of well-chosen organizers only after you’ve pared down, and get the donations out the door before you sit down.

Once it’s done, the maintenance is easy — a tidy cabinet practically stays tidy on its own, because there’s a logical home for everything and far less to put away. The next time you go looking for a measuring cup, it’ll be right where it should be.