How to Declutter Paper Clutter and Important Documents

Paper has a way of multiplying when you’re not looking. A few pieces of mail on the counter become a teetering stack, which becomes a drawer you’re afraid to open, which becomes three boxes in the closet you swear you’ll “get to someday.” The frustrating part is that most of that paper isn’t even important — it’s junk mail, expired coupons, and statements you can access online anytime. But buried somewhere in the chaos are the documents that genuinely matter, and that mix is exactly why paper clutter feels so paralyzing.

Here’s the encouraging part: paper is one of the most satisfying categories to declutter because the rules are clearer than you’d think. A surprisingly small percentage of your paper deserves a permanent home. Everything else can be recycled, shredded, or scanned. This guide walks you through a repeatable system to clear the backlog and stop the pile from rebuilding itself.

Stop the Inflow Before You Touch the Backlog

Here’s the mistake almost everyone makes: they spend a whole Saturday sorting the existing pile, feel triumphant, and then watch a new stack form within two weeks. If you don’t fix how paper enters your home, you’ll be decluttering the same documents forever.

The single highest-impact change is to create a habit of filtering mail the moment it comes through the door. Don’t set it on the kitchen table “for now.” Walk it straight to the recycling bin and dump the obvious trash before it ever touches a flat surface.

  • Recycle immediately: junk mail, catalogs, flyers, postcards from companies you don’t buy from, and the marketing inserts stuffed inside bills.
  • Open and strip down: toss envelopes and inserts as you open the mail, so only the actual document survives.
  • Route the keepers: bills and real correspondence go to one designated spot — a desk or command center — never the living room table.

Go paperless where it makes sense

Most banks, credit card companies, and utility providers let you switch to paperless statements with a few clicks. This is the closest thing to a permanent fix because it shuts off the source. You’ll get an email instead of an envelope, and the records live in your account login whenever you need them. Just be deliberate about it: turn on paperless billing in batches over a week or two so you don’t lose track of which accounts you’ve changed and accidentally miss a payment notice while you adjust.

Sort First, Decide Later: A Fast Triage System

When you finally face the backlog, the temptation is to make every decision at once — read this, file that, shred this, look up whether you still need that. That stop-start thinking is what makes paper sorting take all day. Instead, separate the sorting from the deciding.

A clean way to do this is the RAFT approach, which sorts every piece of paper into one of four piles without overthinking:

  1. Recycle — anything with no value and no sensitive information.
  2. Act — bills to pay, forms to sign, things requiring a response.
  3. File — documents you need to keep and reference.
  4. Toss/Shred — papers with personal data (account numbers, Social Security info) that need destroying, not just tossing.

The point is speed. In this first pass you’re only making four-way decisions — pick up a paper, drop it in a pile, move on. Don’t pay bills, don’t start filing, don’t fall down the rabbit hole of reading old letters. Once everything is in one of the four piles, your flat surfaces are clear and you’ve already shrunk the volume dramatically. Then you deal with each pile.

Knowing What to Keep (and for How Long)

This is the question that stalls most people: “What if I need this someday?” That fear is what fuels the boxes in the closet. The reality is that a small set of documents genuinely deserves long-term, original-copy storage, and the rest either has an expiration date or exists digitally somewhere already.

Documents worth keeping as physical originals

  • Identity and vital records: passports, birth and marriage certificates, Social Security cards.
  • Tax returns and supporting records: tax documents are the classic “keep” category. Hold onto returns and their backup paperwork for the period your tax authority can audit you — check your local guidelines, as rules vary by country. In the US, the IRS explains how long to keep tax records: three years covers most returns, but some situations call for longer.
  • Property and legal documents: deeds, titles, wills, estate documents, and loan paperwork.
  • Insurance policies and warranties that are currently active.

Documents you can usually let go

Monthly bank and credit card statements, paid utility bills, ATM receipts after they’ve cleared, expired warranties and manuals for items you no longer own, and old newsletters or printed articles. Most of these are available online if you ever need them, which means the paper copy is just taking up space.

If you’re genuinely unsure about a specific document, that uncertainty is a signal, not a verdict — set those items aside in a small “research later” stack rather than letting one ambiguous paper freeze your entire session. For anything legal, tax, or financial that you can’t confidently classify, a quick check with the relevant institution or a qualified professional beats hoarding “just in case.”

Build a Digital Filing Cabinet

Scanning is the move that lets you keep the information without keeping the paper. For the large category of documents you might want to reference someday but don’t need as physical originals — old contracts, receipts for tax write-offs, kids’ school records, medical summaries — scan or photograph them and store them in a single, searchable digital home.

You don’t need fancy equipment. Your phone’s camera, or a free scanning app that crops and sharpens automatically, is plenty for most documents. The key is consistency in how you save things so you can actually find them later.

  • Use one system, not five. Pick a tool — a note app like Evernote, a cloud drive folder structure, whatever you’ll actually open — and put everything there. Scattered files are clutter too.
  • Name files so future-you can search them. Something like “2024_TaxReturn” or “Insurance_Auto_Policy” beats “Scan_0042.”
  • Mirror simple categories: Financial, Medical, Home, Auto, Personal. Don’t over-engineer it with twenty subfolders.
  • Tame the email side too. Going paperless means statements arrive by email, so create labels or folders so those don’t pile up into a digital version of the same mess.
  • Back it up. Cloud storage protects against a dead hard drive; a second backup protects against a lost account. For irreplaceable originals like birth certificates, keep both the physical copy and a scan.

Set Up a Command Center So Paper Never Piles Again

The reason paper accumulates is that incoming documents have no assigned destination, so they land wherever there’s a flat surface. A simple command center solves this by giving every piece of paper a home the moment it enters.

A multi-slot mail organizer works beautifully here, and the secret is to keep the slots small. When the container is intentionally limited, it forces you to deal with the contents before they overflow rather than letting paper accumulate unchecked. A workable setup:

  • Inbox: anything that’s arrived but hasn’t been handled yet.
  • To File / To Shred: keepers and sensitive papers waiting for their next step.
  • Outbox: mail to send, forms to return, items leaving the house.
  • Action: bills to pay and things with a deadline.

The maintenance habit that holds it all together

Once a week — or whenever a slot starts filling — spend ten minutes processing the center. Pay the bills in the action slot and mark them paid so you know they’re done before filing. Shred the sensitive pile. File the keepers, or better yet scan them and recycle the paper. This little routine is the entire difference between a system that lasts and a one-time cleanout you’ll repeat next season.

Common Mistakes That Keep You Stuck

A few predictable traps trip people up every time they tackle paper. Knowing them in advance saves hours.

  • Reading while you sort. If you stop to read every letter and article, a 30-minute job becomes a three-hour nostalgia trip. Sort first, read never (or later).
  • Keeping statements you can access online. If the bank has it, you don’t need the paper. This single realization clears enormous volume.
  • Building a filing system too complicated to maintain. Five broad categories you’ll actually use beat thirty perfect ones you won’t.
  • Skipping the shredder. Don’t toss documents with account numbers or personal identifiers into open recycling. Keep a shred pile and clear it regularly.
  • Fixing the pile but not the inflow. Without the door-to-recycling habit and paperless statements, you’ll be right back where you started.

Cards, letters, and children’s artwork are a different challenge — see our step-by-step guide to decluttering sentimental items. And a 15-minute tidy-up each evening is the easiest way to stop new mail from piling up again.

Paper, simplified

Paper clutter feels overwhelming because it mixes a tiny amount of truly important documents with a mountain of disposable noise. Once you separate the two, the work gets simple: stop the inflow by recycling junk on arrival and going paperless, triage the backlog into fast four-way piles, keep only the originals that genuinely matter, scan the rest into one searchable digital home, and give incoming paper a permanent destination through a small command center.

Start today with the easiest win: grab the nearest stack, stand over the recycling bin, and clear the obvious junk in ten minutes. That first pass will show you just how little of your paper actually deserves to stay — and how achievable a paper-light home really is.

How to Declutter Your Kids’ Toys Without Tears

If you’ve ever stepped on a stray building block in the dark or opened a kitchen drawer to find a forgotten Play-Doh creature lurking inside, you already know the truth: toys multiply. They arrive through birthdays, party favor bags, fast-food meals, dentist visits, and the simple fact that kids accumulate stuff. The challenge isn’t just the volume — it’s that toys belong to small humans with big feelings, and clearing them out can trigger meltdowns if you’re not careful.

Decluttering kids’ toys doesn’t have to end in tears (theirs or yours). With the right approach — one that respects your child’s attachment while still moving clutter out the door — you can create a play space that’s calmer, easier to clean up, and genuinely more fun to use. Here’s how to do it without becoming the villain.

Start by gathering everything in one place

Before you can decide what stays and what goes, you need to see the full scope of what you’re dealing with. Grab a laundry basket or large tote and walk through your entire home collecting toys. Don’t just hit the playroom — check under beds, behind the couch, inside kitchen drawers, in the car, and in those random baskets where things “temporarily” land.

Bring all of it into one room and dump it out. Fair warning: this pile will almost certainly look worse than you imagined. That’s normal, and it’s actually the point. Seeing everything at once is a powerful reality check — for you and for older kids who think they “don’t have that many toys.” A mountain of plastic on the living room floor makes the case for decluttering far better than any lecture you could give.

Sort into clear categories

Once everything is in one spot, sort like with like. You’ll quickly notice patterns — three half-finished puzzle sets, a dozen orphaned figurines, broken crayons by the fistful. Common categories include:

  • Building toys — blocks, magnetic tiles, construction sets
  • Pretend play — kitchen items, dress-up, dolls, action figures
  • Art and craft supplies
  • Puzzles and games (check for complete sets here)
  • Vehicles — cars, trains, trucks
  • Stuffed animals
  • Books
  • Small odds and ends — the party-favor junk, the meal-toy trinkets, the broken bits

Sorting first makes the editing step dramatically easier, because you can see duplicates and gaps at a glance. It’s hard to argue for keeping the fourth incomplete board game when it’s sitting next to three others.

Decide what to keep, donate, and toss

Now comes the editing — the part that actually reduces clutter. Move quickly and trust your judgment. A toy generally earns its place if it’s played with regularly, is in good condition, has all its pieces, and is age-appropriate for your child right now.

Toys that have been outgrown, haven’t been touched in months, are broken beyond repair, or are the disposable fast-food variety can go. Set up three zones: keep, donate, and trash. Broken plastic and dried-up markers go straight in the trash; gently used items in good shape go to the donate pile for another family to enjoy.

The “toy purgatory” trick for the in-between stuff

Some toys are genuinely hard to call — especially larger items like a play kitchen or a ride-on car that your child might still love. For these, don’t agonize. Create a “toy purgatory”: a box or shelf somewhere out of sight, like the garage or a closet. If a few weeks pass and no one asks for the item, you have your answer, and you can donate it with confidence. If your child suddenly remembers and genuinely wants it, it’s easy to bring back out. This removes the pressure to make a perfect decision in the moment.

Decide how much to involve your kids

This is where the “without tears” part really lives. Whether your child should be present depends on their age and temperament.

When to declutter while they’re away

For younger children, and for the heavy lifting of clearing out obvious junk, it’s often kindest to do the work when they aren’t home. Move efficiently — treat it like a timed challenge and clear out the broken bits, the meal toys, and the things they’ve clearly outgrown. Most kids never notice these items are gone, because they weren’t actually playing with them. This spares everyone the emotional negotiation over a cracked plastic ring they’d otherwise insist they “love.”

When to bring them into the process

Older kids — roughly school-age and up — benefit from being part of the decision, especially for toys they have real opinions about. This builds the decluttering muscle they’ll use for life. A few approaches that reduce resistance:

  • Frame it as helping another child. “Some kids don’t have many toys — which ones could you share with them?” reframes letting go as generosity rather than loss.
  • Give a container limit, not a number. “Your stuffed animals need to fit in this bin” is far less stressful than “pick five to get rid of.”
  • Let them keep the genuine favorites without debate. Save your energy for the gray-area items. Fighting over a beloved lovey isn’t worth it.
  • Avoid being a killjoy. The goal is less clutter, not a sterile room. A kid who feels heard is far more cooperative next time.

Set up zones and storage that actually work

Decluttering only sticks if there’s a clear home for everything that stays. The most effective playrooms are organized into activity zones — a reading corner, an art area, a building space — so kids intuitively know where things go and where to play with them.

Store by size and use clear bins

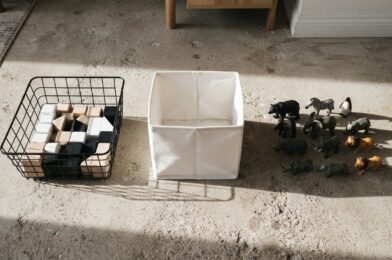
One of the smartest organizing principles is to store by size. Tiny toys with a million pieces are the worst clutter offenders, so give them small, contained homes rather than dumping them into giant bins where they vanish to the bottom. Clear bins are worth the investment: kids can see exactly what’s inside without dumping everything out to find one car, and cleanup becomes a simple sorting game.

A few storage tactics that hold up in real homes:

  • Use clear bins grouped by category so contents are visible at a glance.
  • Label everything — with words, pictures, or both — so even pre-readers know where things belong and cleanup is self-directed.
  • Keep frequently used toys at kid height and rarely used ones up high or out of reach.
  • Use wall space — hooks and pegboards — to get bulky items off the floor.

Try a toy library rotation

If your child has plenty of toys you want to keep, consider a rotation system that works like a library. Pack a portion of the toys into bins and store them away, leaving only a manageable selection out. Periodically swap a bin out for a fresh one. Controlling how many bins are accessible at a time keeps the play space tidy, and the rotation makes old toys feel exciting again — kids genuinely react to a returning bin like it’s brand new. Many parents find this single trick cuts daily clutter more than any one purge.

Make decluttering a recurring habit

A single big purge feels great, but toys creep back in. The families with consistently tidy playrooms aren’t doing one heroic cleanout a year — they’re editing regularly. Kids’ interests change fast; the obsession of last spring is forgotten by fall.

A practical rhythm is to declutter at least twice a year. Two natural anchor points work well: right before the winter holidays (clearing space for the inevitable new arrivals) and around the end of the school year. With younger kids who accumulate faster, three or four times a year may serve you better. The simplest cue, though, is your own eyes: when the space starts feeling cluttered and chaotic again, it’s time for a quick edit. These maintenance rounds are fast because you’re not starting from a mountain — you’re just trimming.

Intercept the clutter at the door

You can also slow the inflow. Quietly toss the truly disposable party-favor and meal-toy junk before it migrates into the toy bins. Adopt a loose “one in, one out” mindset around birthdays. And when grandparents ask what the kids want, suggest experiences or consumables over more plastic. Less clutter coming in means less to declutter later.

If the toys are just one part of a crowded house, the 15-minute tidy-up habit is an easy daily reset the whole family can join.

Keeping the toy pile under control

Tear-free toy decluttering is a repeatable process: gather everything in one place, sort it into categories, edit out the broken and outgrown items, and give what remains a clear, labeled home. Do the obvious clear-outs when little ones aren’t around, involve older kids in the gray-area decisions, and lean on tricks like toy purgatory and a library-style rotation to ease the emotional bumps.

Your next step is simple: grab one basket and start gathering. You don’t have to overhaul the whole house today — clear out a single category, set up a few labeled clear bins, and schedule your next edit for the change of season. A calmer, easier-to-clean play space is closer than the current pile on the floor would suggest.

How to Establish a Monthly Deep Cleaning Routine

Most of us have a vague sense of “deep cleaning” as something we do in a panic before guests arrive, or in one exhausting weekend marathon that leaves us too sore to enjoy the results. The problem with that approach isn’t effort—it’s timing. Grime, dust, and grease build up gradually whether you notice them or not, and tackling them all at once turns an ordinary chore into a dreaded event.

A monthly deep cleaning routine solves this by spreading the heavier work across the calendar so nothing ever has the chance to become overwhelming. Your weekly cleaning keeps surfaces presentable; your monthly routine handles the things weekly cleaning misses—light fixtures, baseboards, the inside of the oven, the back corners of the refrigerator. Done consistently, it’s the difference between a home that looks clean and one that genuinely is clean. Here’s how to build a system you’ll actually keep.

Understand What Belongs in a Monthly Routine (and What Doesn’t)

The single most common mistake people make is dumping every cleaning task into one giant monthly list. That’s how you end up with a four-hour Saturday you keep postponing. The smarter approach is to sort tasks by how quickly they get dirty.

Think in three tiers:

  • Weekly tasks handle visible, fast-accumulating mess: dusting surfaces, vacuuming, cleaning mirrors and doors, scrubbing bathrooms, mopping kitchen and bathroom floors, changing sheets, and emptying trash cans.
  • Monthly tasks handle the slower buildup you tend to look past: dusting light fixtures, wiping down baseboards and walls, cleaning out and organizing drawers and cabinets, quick-cleaning and organizing the refrigerator and freezer, cleaning the oven, and wiping down the exterior of appliances.
  • Seasonal tasks handle the heavy, infrequent jobs: washing curtains, vacuuming mattresses and under furniture, cleaning windows inside and out, polishing wood furniture, and doing a full closet or pantry purge.

When you pull the seasonal jobs out of your monthly plan, the monthly list suddenly becomes manageable. If you find yourself dreading the routine, that’s usually a sign a seasonal task has crept into the wrong tier.

Choose a Schedule That Fits How You Actually Live

There’s no single correct way to time a monthly routine. The right structure is the one you’ll repeat without negotiating with yourself every time. Three formats work well for most households.

The one-day approach

Pick one day a month—say, the first Saturday—and knock out the entire monthly list in a single session. This suits people who like closure and have a free morning. Budget two to three hours and put on music or a podcast. The risk is that if you miss your day, the whole routine slips a month, so keep a backup date in mind.

The weekly rotation

Instead of one big day, assign different monthly tasks to each week. For example: week one for cleaning inside kitchen appliances and disinfecting garbage cans; week two for wiping wall smudges and tidying medicine cabinets; week three for a deeper sweep of an outdoor living space; week four for a rotating seasonal item. Months with a fifth week get a bonus seasonal task. This spreads the load into 20- to 30-minute chunks and is far more sustainable for busy schedules.

The room-by-room approach

If you think spatially rather than by task type, assign whole rooms to different days—kitchen one day, bedrooms another, bathrooms another. On each room’s day you do its deeper tasks all at once, like stripping sheets, vacuuming, and dusting surfaces in the bedrooms. This keeps you mentally focused on one space and makes it easy to see when you’re finished.

If you work long hours and come home drained, don’t try to launch the full routine at once. Start with five to ten minutes of focused work and add a single task each week. A small habit you keep beats an ambitious plan you abandon.

Build Your Personalized Monthly Checklist

A written checklist is what turns good intentions into a routine. Walk through your home room by room and note the tasks that don’t get touched in your weekly cleaning. Here’s a solid starting framework you can adapt:

  1. Kitchen: Clean the oven, wipe down the exteriors of appliances, quick-clean and organize the refrigerator and freezer, disinfect the garbage can, and clean out and organize at least one drawer or cabinet.
  2. Bathrooms: Wipe down and tidy medicine cabinets, throw out expired products, wash bath mats, and note any products running low so you can restock.
  3. Living areas and bedrooms: Dust light fixtures and ceiling fans, wipe baseboards, spot-clean smudges and fingerprints on walls and doors, and dust surfaces that get skipped weekly.
  4. Whole house: Wipe down switch plates and door handles, and address one organizing zone—a junk drawer, a linen shelf, an entryway basket.

Don’t try to cram every cabinet and closet into a single month. Rotate them. Organize the spice drawer this month, the bathroom vanity next month, and the linen closet the month after. Spreading organizing tasks out keeps each session short and prevents the half-finished-project feeling that derails so many cleaning days.

Work in the Right Order and With the Right Tools

Sequence matters more than people expect. Cleaning out of order means redoing work—dust settles on a floor you just mopped, or oven cleaner drips onto a counter you already wiped.

Top to bottom, dry to wet

Always start high and finish low. Dust light fixtures and ceiling fans first, then work down to baseboards, and save floors for last so everything that falls gets cleaned up at the end. Within a surface, do dry tasks (dusting, vacuuming) before wet ones (wiping, mopping), so you’re not pushing damp dust around.

Let products do the labor

Some tasks reward patience. Oven cleaner and other treatments work best when you apply them, walk away, and let them dwell while you handle other tasks. The same goes for soaking refrigerator drawers in soapy water or letting a degreaser sit on a stovetop. Build this dwell time into your plan: apply the oven cleaner first thing, then go dust and wipe baseboards while it works.

Keep a simple, gathered kit

Assemble your supplies before you start so you’re not breaking momentum to hunt for a cloth. A practical kit includes microfiber cloths, an all-purpose cleaner, a glass cleaner, a degreaser for kitchen grease, an extendable duster for fixtures and fans, and a small brush for crevices. A homemade all-purpose mix works fine for most surfaces and keeps costs down.

Make the Routine Stick

The hardest part of any cleaning system isn’t the cleaning—it’s doing it again next month. A few deliberate habits make consistency far more likely.

  • Anchor it to a fixed date. Tie your deep clean to something you already remember, like the first weekend of the month or the day you pay a recurring bill. A floating “sometime this month” almost always becomes never.
  • Use a reusable checklist. Laminate a list or keep one in a notes app. Crossing off items is genuinely motivating, and it removes the mental effort of deciding what to do next.
  • Set a timer. Telling yourself a task will take a defined block of time lowers the resistance to starting. Most monthly tasks take far less time than the dread you’ve built up around them.
  • Don’t aim for perfect. A “good enough” clean you do every month beats a flawless clean you do twice a year. If you only get through three-quarters of the list, you’re still far ahead of where you’d be otherwise.
  • Recruit help. Assign rooms or specific tasks to other household members. A monthly deep clean is far less daunting when it’s shared.

If a particular task keeps getting skipped month after month, treat that as data. Either it’s genuinely seasonal and belongs on a less frequent rotation, or it needs to be broken into a smaller step. Adjust the routine to fit your life rather than forcing your life to fit the routine.

Common Mistakes That Sabotage the Routine

A few predictable pitfalls trip people up. Watch for these:

  • Overloading month one. Trying to deep clean the entire house the first month leads to burnout. Build up gradually.
  • Skipping the weekly foundation. A monthly deep clean only works if weekly maintenance handles the everyday mess. Without it, your monthly session turns into damage control instead of genuine deep cleaning.
  • Cleaning before decluttering. Wiping down a crowded cabinet without removing what doesn’t belong just rearranges the problem. Clear the clutter first, then clean the empty surface.
  • No system for finished tasks. Without a checklist, you lose track of what’s done and either repeat work or skip it entirely.

Making monthly deep cleaning a habit

A monthly deep cleaning routine isn’t about doing more work—it’s about doing the right work at the right interval so your home never slides into chaos. Pull the heavy seasonal jobs out of your monthly list, choose a schedule format that matches how you actually live, and write down a checklist you can reuse every month. Start small if you need to: even one deep-clean task per week compounds into a noticeably cleaner home.

Your next step is simple. Grab a piece of paper, walk through your home, and jot down the things your weekly cleaning never touches. That list, anchored to a fixed date on your calendar, is the entire foundation of a routine you can keep for years.

A Step-by-Step Guide to Cleaning Your Refrigerator

Your refrigerator is the hardest-working appliance in your kitchen, running around the clock to keep your food safe. Yet it’s also the one most of us avoid cleaning until a mystery smell or a sticky shelf forces our hand. The truth is that a neglected fridge doesn’t just look unpleasant — it can harbor odors, mold along the door seals, and the slow creep of forgotten leftovers that quietly spoil behind the ketchup.

Fortunately, a proper refrigerator cleaning isn’t complicated, and once you’ve done it methodically, keeping it that way takes only minutes a week. This guide walks you through the entire process step by step, with the practical details that actually make the job faster, easier, and longer-lasting.

Why a clean fridge is worth the effort

Beyond the obvious appeal of opening a fresh, organized fridge, regular cleaning serves a real purpose. Spills that sit harden over time and become far harder to remove. Crumbs and drips collect in the rubber door gasket, where they can lead to lingering odors and even mold growth. And clutter — that back row of half-used jars — makes it easy to lose track of what you have, which means wasted food and wasted money.

A good rhythm is a light cleaning of both the fridge and freezer sections about once a month, plus a more thorough deep clean seasonally. The monthly habit prevents grime from building up in the first place, so the deep cleans never feel overwhelming.

Gather your supplies before you start

Pulling everything together first means you won’t be hunting for a sponge mid-job with the fridge door hanging open. You don’t need specialty products — most of what works best is already under your sink.

  • Dish soap and hot water — your primary cleaning solution for shelves, drawers, and interior surfaces.
  • Baking soda — for making a gentle paste on stubborn stains, and for deodorizing afterward.
  • White vinegar — mixed equal parts with water, it’s a handy, food-safe way to cut residue and odors. It isn’t a disinfectant, though, so it won’t replace a sanitizer.
  • Two clean cloths or sponges — one for washing, one for rinsing or applying a vinegar solution.
  • Clean, dry towels — drying thoroughly is the step most people skip, and it matters.
  • A cooler or a sink filled with ice — to hold perishables while you work.
  • A soft-bristled brush or old toothbrush — for getting into gasket folds and tight corners.

A quick tip worth its weight: clean your fridge right before a grocery run, when it’s at its emptiest. You’ll have less food to manage and fewer items to find a temporary home for.

Empty the fridge and protect your food

Start by taking everything out. As you do, this is your first natural chance to declutter — check expiration dates and toss anything past its prime, plus those forgotten condiments and leftovers you’ll honestly never eat. Be ruthless here; an empty fridge is much easier to clean and to reorganize sensibly later.

Perishables are the concern while the fridge sits open. To keep them safe, move them into a cooler or pile them into a sink filled with ice. If your space is limited, a smart approach is to work in sections rather than emptying everything at once — clean one shelf, return its contents, then move to the next. This keeps cold food cold and stops you from feeling like you’ve made the whole job harder than it needs to be.

A useful trick for working fast

If you’re cleaning a single area at a time, set a short timer — around five minutes per section — and remove just the food from that zone. Working quickly and in chunks limits how long anything stays out of temperature and keeps the project feeling manageable instead of like an all-day ordeal.

Wash the removable shelves and drawers

Take out the shelves, drawers, and any removable bins. These are far easier to clean at the sink than inside the cramped fridge cavity. Wash them with hot, soapy water, just as you would dishes, then rinse and set them aside to dry completely.

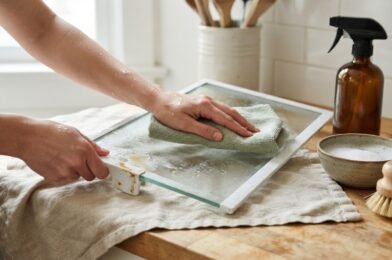
One important caution: let glass shelves come to room temperature before submerging them in hot water. Glass that’s still cold from the fridge can crack from sudden temperature change. Give them a few minutes on the counter first. While the parts dry, you’ll have clear, open access to the interior — which is exactly when the inside cleaning goes quickly.

Clean the interior — including the spots everyone forgets

With the fridge empty and the shelves out, wipe down all the interior surfaces. Dunk your sponge or cloth in the soapy water and wring it out well — you want it damp, not dripping. Excess water pooling in the bottom of the fridge just creates more drying work and can seep into places it shouldn’t.

Work from the top down so any drips fall onto surfaces you haven’t cleaned yet. Wipe the walls, the ceiling of the compartment, and the floor of the cavity.

Tackling stubborn, dried-on stains

For hardened spills or stains that won’t budge with a simple wipe, make a paste of baking soda and a little water. Apply it directly to the trouble spot, let it sit for several minutes to soften the mess, then wipe it away. This gentle abrasive lifts dried gunk without scratching the surface. Once the stain is gone, go over the area again with a clean, damp cloth to remove any baking soda residue.

Don’t skip the rubber gasket

The rubber door seal — the gasket — is the single most overlooked part of a fridge, and it’s a genuine magnet for crumbs, drips, and sticky residue. Left alone, that buildup leads to odors and mold, and a grimy gasket can even compromise how well the door seals. Wipe it down with a dishcloth dipped in warm water, working into the folds with your fingertip or a soft brush. Take your time here; it makes a bigger difference to freshness than you’d expect.

Rinse and dry thoroughly

After washing — and especially if you’ve used a soap or baking soda paste — go over the interior with a cloth dampened in plain clean water to remove any film. If you want to sanitize as well, use a food-safe kitchen sanitizer exactly as its label directs, then rinse. Then dry everything completely with a clean towel. A moisture-free interior discourages mold and keeps the fridge smelling fresh. The goal is squeaky clean and bone dry.

Refill smartly and keep it that way

Before you reload, check that the fridge is running at or below 40°F (4°C), the temperature the FDA recommends for safe food storage. Many fridges don’t display their real temperature, so an inexpensive appliance thermometer is the easiest way to know.

Putting everything back is your best opportunity to set up systems that prevent the next big mess. As you return items, check dates one more time and group similar things together so nothing disappears into a back corner again.

  1. Designate zones. Give condiments, dairy, produce, leftovers, and drinks their own consistent spots. When everything has a home, you can see what you have at a glance and waste far less food.
  2. Use clear bins. A few open containers corral loose packets, snacks, or jars and let you pull out a whole category at once — which also makes future cleaning a five-second job.
  3. Keep food covered. Store leftovers in sealed containers and wrap things tightly. This single habit dramatically reduces spills and odors between cleanings.
  4. Put a “use first” zone up front. Reserve one spot for items nearing their expiration so they get eaten instead of forgotten.
  5. Add a box of baking soda. Tucked in the back, it helps absorb odors between cleanings.

The habit that saves you the most work

Wipe up spills the moment they happen. A drip caught while it’s fresh takes one swipe; the same drip discovered a week later is a hardened, scrub-worthy stain. This tiny in-the-moment habit is what keeps a fridge from ever reaching the point where it needs an exhausting overhaul.

Doing the whole kitchen? Follow our step-by-step kitchen deep clean, and declutter your kitchen cabinets while everything is out.

The quick-reference version

A thorough refrigerator clean follows the same order every time: empty it, wash the removable shelves and drawers in hot soapy water, wipe the interior from top to bottom, pay special attention to the gasket, dry everything well, and refill thoughtfully while tossing anything past its prime. Done as a deep clean a few times a year and topped up with a quick monthly once-over, it never becomes a dreaded chore.

If your fridge is overdue, don’t wait for the perfect free afternoon. Pick the section that bothers you most — usually a sticky shelf or a crowded door — and clean just that today. A clean fridge starts with a single shelf, and the momentum tends to carry you the rest of the way.

How to Clean Your Home When You Have Pets

Anyone who shares their home with a dog, cat, or other furry companion knows the trade-off: unconditional love in exchange for a never-ending battle with fur, dander, muddy paw prints, and the occasional mystery puddle. Pets don’t have to mean a permanently grubby house, but they do change the math of cleaning. The strategies that work in a pet-free home simply aren’t enough when there’s a shedding Labrador or a counter-cruising cat in the picture.

Keeping a clean home with pets is less about cleaning harder and more about cleaning smarter. With the right tools, a few well-placed systems, and a routine that intercepts mess before it sets in, you can have both a tidy home and a happy animal. Here’s how to do it without losing your weekends to a vacuum cleaner.

Build a Pet-Smart Cleaning Toolkit

Before you tackle a single pet mess, set yourself up with the right gear. The single most important investment is a vacuum with a HEPA filter. Pet hair is only half the problem—the dander and microscopic allergens that come with it are what linger in the air and settle into soft surfaces. A HEPA filter actually captures those fine particles instead of recirculating them, which makes a noticeable difference in air quality, especially if anyone in the household has allergies.

Beyond the vacuum, the most valuable item in your arsenal is an enzyme-based cleaner. Unlike standard all-purpose sprays, enzyme cleaners break down the proteins in urine, vomit, and other organic messes, which is what eliminates odor rather than just masking it. This matters enormously with pets, because a smell you can’t detect is often still very obvious to your animal—and a spot that still smells like a bathroom invites repeat accidents.

A few other items worth keeping on hand:

  • Foam shaving cream (the plain foam type, not gel) is a surprisingly effective treatment for set-in stains like vomit or pet urine on rugs. Spray it on, let it foam for a minute or so, then wipe away with warm water.
  • White vinegar and baking soda—a pet-safe, budget-friendly duo for general cleaning and deodorizing. Baking soda sprinkled on carpet before vacuuming helps neutralize lingering odors.
  • Cleansing wipes or paper towels with a spray solution for quick surface wipe-downs.
  • A rubber squeegee or damp rubber glove, which drags embedded hair out of upholstery and carpet far better than a vacuum alone.
  • Baby wipes for cleaning hard-to-reach nooks, baseboards, and the grimy corners where fur collects.

Win the War on Pet Hair and Dander

Fur is the most relentless part of living with pets, and the only real answer is frequency. Vacuuming once a week is a recipe for tumbleweeds of hair under the furniture. Aim to vacuum high-traffic and high-shed areas several times a week, focusing on the spots where your pet sleeps, lounges, and enters the home.

Get hair off soft surfaces

Vacuums struggle with hair woven into upholstery and bedding. This is where a rubber squeegee or a damp rubber glove earns its keep—run it across the couch cushions and you’ll be amazed at how much fur balls up and lifts away. For washable items, toss pet beds, blankets, and slipcovers in the laundry regularly using a pet-safe detergent, and run a quick vacuum or lint roll over them between washes.

Manage dander in the air

Dander is lighter than hair and floats, settling on surfaces you might not think to clean. Wiping down baseboards, shelves, and the tops of door frames with a slightly damp cloth catches dander before it recirculates. Changing your HVAC filter more often than you would in a pet-free home also helps keep airborne allergens down.

Tackle Accidents and Stains the Right Way

When a pet has an accident, speed is everything. The longer a mess sits, the deeper it penetrates into carpet padding, grout, or upholstery fibers, and the harder it becomes to fully remove both the stain and the odor.

Here’s a reliable sequence for fresh messes:

  1. Blot, don’t rub. Press a clean cloth or paper towel into the spot to absorb as much liquid as possible. Rubbing only spreads the mess and pushes it deeper.
  2. Apply an enzyme cleaner generously. Saturate the area—not just the visible stain, but slightly beyond it—and let it sit for the time recommended on the label so the enzymes can break down the organic material.
  3. Blot again and let it dry. Avoid the temptation to scrub. For tougher set-in stains, foam shaving cream can be a powerful backup before or after the enzyme treatment.
  4. Confirm the odor is gone. If you can still smell anything once it dries, repeat the process. A lingering scent is an open invitation for your pet to return to the same spot.

A word of caution: avoid ammonia-based cleaners on pet urine. Urine contains ammonia, so cleaning with it can actually signal to your pet that the spot is an acceptable place to go again.

Keep Kitchens and Counters Genuinely Clean

This section is especially important for cat owners. Cats are notorious counter-walkers, and the same paws that step in a litter box can end up on the surfaces where you prepare and eat food. Even if you’ve trained your cat to stay off—or you simply allow it—it’s worth assuming that food-prep surfaces have been visited and treating them accordingly.

The simple habit that solves this: wipe counters before and after you put food on them. A cleansing wipe or a paper towel with cleaning solution takes seconds and removes invisible tracks of litter sand and bacteria. A few more kitchen practices that pay off:

  • Store cutting boards, knives, and other prep tools inside closed cupboards and drawers rather than leaving them out on the counter where paws can reach.
  • Wash food and water bowls daily, just as you’d wash your own dishes—bowls develop a slimy bacterial film faster than most people expect.
  • Keep pet food in sealed containers to avoid attracting pests and to contain the crumbs and dust that come with kibble.

Set Up Systems That Prevent Mess Before It Starts

The most effective pet cleaning happens before any cleaning is needed at all. Smart organization and a few strategic barriers dramatically cut down on how much mess actually reaches your floors and furniture.

Create a dedicated pet station

Designate a single cabinet, drawer, or bin for everything pet-related: food, treats, brushes, leashes, towels, and cleaning supplies for accidents. Containing it all in one place means you’re not chasing supplies around the house, and it keeps the visual clutter of pet gear from spreading. A pet station near your pet’s main living area makes daily maintenance frictionless—when the cleanup tools are right there, you actually use them.

Intercept dirt at the door

Most of the mud and outdoor debris in your home arrives on paws. A sturdy mat at every entrance, paired with a towel kept by the door for wiping paws after walks, stops a remarkable amount of grime from ever reaching your living room. For heavy shedders, brushing your pet outside or near the door—rather than in the middle of the living room—keeps loose fur from drifting through the house.

Keep Your Home Cleaning Pet-Safe

A clean home shouldn’t come at the cost of your pet’s health. Many common household cleaners contain chemicals that are harmful if a curious animal licks a freshly mopped floor or chews a wipe. Building pet safety into your routine is non-negotiable.

  • Store all cleaning products well out of reach—in a high cabinet or behind a childproof latch. This includes the enzyme cleaners and stain treatments you’ll be using regularly.
  • Lean on gentler options like vinegar and baking soda for everyday cleaning where you can. They’re effective deodorizers and far less worrying around animals.
  • Let treated surfaces dry fully before letting pets back in. Whether you’re mopping floors or spraying a counter, give the area time to dry so there’s nothing wet for paws or tongues to pick up.
  • Consider steam cleaning for deep cleans. Steam sanitizes carpets and upholstery with high heat instead of chemicals, which makes it a great pet-friendly choice for periodic deep cleaning.

If your pet ever ingests a cleaning product or shows signs of illness after exposure, contact your veterinarian or an animal poison control line right away. When choosing new products, it’s always worth a quick check of the label and, if you’re unsure, a conversation with your vet about what’s safe to use around your specific animal.

To keep pet hair from building up between big cleans, pair these habits with a simple daily cleaning routine and a weekly cleaning schedule.

Consistency beats heroics

Cleaning a home with pets is a game of consistency, not heroics. The households that stay clean aren’t the ones doing marathon scrub-downs—they’re the ones with a HEPA vacuum running a few times a week, an enzyme cleaner ready for instant accident response, a pet station keeping supplies organized, and a door routine that stops dirt before it spreads. Start with the two highest-impact moves: invest in a proper vacuum and keep an enzyme cleaner within arm’s reach. Build the rest of these habits in gradually, and you’ll find the daily upkeep shrinks until a clean, pet-friendly home feels effortless.

How to Maximize Storage in a Tiny Kitchen

A tiny kitchen forces a kind of honesty most rooms let you avoid. There’s nowhere to hide the bread maker you used twice, no spare drawer for the lids that don’t match any container you own. But here’s the encouraging part: small kitchens almost never have a true space problem. They have a system problem. The square footage is fixed, yet most cramped kitchens are wasting a third of their actual capacity in dead air above shelves, bare walls, and the awkward zone under the sink.

This guide walks through how to genuinely double the usefulness of a small kitchen — not with a renovation, but with smart decisions about what stays, where it lives, and how you use the vertical and hidden space you already own.

Start by Removing, Not Storing

The instinct in a tiny kitchen is to buy organizers immediately. Resist that. Every clever bin you add to hold things you don’t use just locks clutter in place more efficiently. The single highest-impact move is a ruthless edit of what’s in the room.

Professional chefs offer a useful reality check here: the advice from working kitchen pros is to stick with the basics — a few good knives and only the equipment you actually reach for. Most home cooks rotate through a surprisingly small core of tools. Everything else is taking up prime real estate it hasn’t earned.

How to run a fast kitchen edit

  • Pull everything out by category — all the mugs, then all the gadgets, then all the food containers. Seeing the full quantity in one place is the moment most people realize they own eight spatulas.
  • Apply the “this year” test. If you haven’t used an appliance or tool in the last twelve months, it’s a candidate to donate. Specialty single-use gadgets are usually the first to go.
  • Match every lid to a container. Food storage containers are a classic small-kitchen black hole. Recycle the orphans on both sides.
  • Be honest about duplicates. You need one good vegetable peeler, not three mediocre ones.
  • Donate, don’t relocate. Moving clutter to a closet in another room isn’t decluttering — it’s hiding the problem.

Only once the room holds what you truly use should you start thinking about storage solutions. Now the organizers you buy will serve the things that matter instead of preserving dead weight.

Look Up: The Vertical Space You’re Ignoring

Try a simple exercise before you buy anything: stand in the middle of the kitchen and look up. People reflexively think about kitchens in terms of floor area and counter inches, and they completely overlook the tall column of empty space stretching from countertop to ceiling.

That vertical zone is where a small kitchen’s hidden capacity lives. Walls, the sides of cabinets, the backs of doors, and the air above your existing shelves are all storage waiting to be claimed.

Open shelving and wall-mounted storage

Open shelves are a small-kitchen favorite because they turn bare wall into working storage while keeping everyday items visible and within reach. They suit dishes, glassware, frequently used small appliances, and attractive jars of staples. The trick is restraint — open shelving only looks good and stays functional when it isn’t crammed. Store what you reach for daily, and keep the styling minimal so it reads as tidy rather than chaotic.

If you don’t have free wall space for shelves, mount a rail or rack instead. A simple wall-mounted rail with S-hooks can carry utensils, mugs, measuring cups, and pot holders, freeing up a whole drawer in the process. The goal is to hang as many items as you reasonably can, because every item on the wall is an item no longer eating into a cupboard.

Don’t forget cabinet doors and sides

The inside of a cabinet door is one of the most underused surfaces in any kitchen. A slim over-the-door rack or a few adhesive hooks can hold cutting boards, pot lids, foil and wrap boxes, or cleaning supplies under the sink. The exposed end of a cabinet run can take hooks for aprons, towels, or a small spice rack.

Reclaim the Dead Space Inside Cabinets

Open most small-kitchen cupboards and you’ll find one or two fixed shelves with a tall gap of unused air above the plates and below the shelf above. That empty band is exactly where you double your storage — the same principle as adding a second hanging rod in a packed closet.

  • Under-shelf baskets slide onto an existing shelf and hang beneath it, instantly creating a second layer for mugs, napkins, or wraps in space that was previously just air.
  • Shelf risers or stacking shelves split a tall cabinet into two usable levels, so you can store glasses on top and short jars below without stacking precariously.
  • Tension rods are quietly one of the cleverest tools in a tiny kitchen. A simple tension pole fitted across a food cupboard can suspend a roll of paper towels, hold textiles, or — with a few hooks — hang light items so they’re always to hand. Stand one vertically in a cabinet and it becomes a divider for baking sheets and cutting boards.
  • Lazy Susans bring the contents of deep, awkward corner cabinets within reach, eliminating the “stuff lost at the back” problem.
  • Pull-out bins turn a deep shelf into a drawer you can actually see into — great for spices, snacks, or baking supplies that otherwise disappear.

One renter-friendly trick worth highlighting: a rolling cart or pull-out unit sized to fit a gap can hold an entire category — all your baking gear, or your complete spice collection — in a footprint you didn’t think was usable. Just make sure anything on wheels is secured or weighted at the bottom so it can’t tip, especially in a household with kids.

Make Drawers Work Harder

Some small kitchens have shockingly few drawers — sometimes just three for the entire room. When drawer space is that scarce, every inch has to be deliberate. A working parent packing school lunches five days a week genuinely needs a full drawer of food storage containers; someone who eats out most nights does not. Let your real routine decide what earns drawer space.

Practical drawer fixes

  • Use adjustable drawer dividers to give utensils, tools, and gadgets defined homes so they stop sliding into a tangled pile.
  • Store containers and lids together but separated — nest the containers and file the lids upright in a divider so they don’t avalanche.
  • File items vertically where you can. Standing food packets, dish towels, or even spice jars on their edge lets you see everything at a glance and fit far more in.
  • Reserve your best drawer — the one nearest where you cook — for the tools you touch every single day, not the ones you use once a month.

Aim for functionality over a magazine-perfect result. A drawer doesn’t need to look styled; it needs to let you find what you want in two seconds.

Borrow Counter Space You Didn’t Know You Had

Counter space is the rarest commodity in a tiny kitchen, and the frustrating thing is that two of your largest flat surfaces are usually off-limits during cooking. Your stovetop sits idle while you chop, and your sink is dead space the moment you’re not washing up.

You can borrow both temporarily:

  • Lay a large cutting board across the sink to create an instant prep surface, then lift it away when you need the basin again. Boards designed to span a sink make this a clean, stable setup.
  • Cover unused burners with a board or stove cover during prep to turn the cooktop into extra counter — just never with the burners on or hot.

These tricks don’t add permanent storage, but they relieve the counter congestion that makes a small kitchen feel impossible to work in, which is often the real day-to-day pain point.

Add Flexible Storage With a Pegboard

If you have a stretch of bare wall, a pegboard is one of the most adaptable solutions for a small kitchen. Made famous by chefs who hang their entire batterie de cuisine on the wall, it lets you arrange hooks, shelves, and holders exactly where you need them — and rearrange them as your needs change. Hang pots, pans, utensils, and even small baskets for odds and ends. Because the layout is fully customizable, a pegboard adapts to an awkward wall far better than fixed cabinetry ever could, and it keeps your most-used tools visible and grabbable.

Where to start in your tiny kitchen

A tiny kitchen rewards a clear order of operations. First, declutter so you’re only storing what you genuinely use — this alone often solves half the problem. Then go vertical, claiming walls, cabinet doors, and the empty air above your shelves with hooks, rails, under-shelf baskets, and tension rods. Finally, refine with drawer dividers, sink-and-stove prep tricks, and a pegboard for the tools you reach for constantly.

Start with the single cabinet or drawer that frustrates you most. Empty it, edit it, and add one well-chosen organizer to capture its wasted vertical space. That one visible win will show you how much capacity your kitchen had all along — and give you the momentum to do the rest.

How to Store Seasonal Clothes to Save Space

Twice a year, most of us run into the same problem: half the wardrobe is unwearable for the season, but it’s still taking up prime closet real estate. Wool sweaters crowd out sundresses in July, and bulky coats elbow shorts off the shelf in January. The fix isn’t a bigger closet — it’s a smarter system for getting off-season clothes out of the way without damaging them or losing track of what you own.

Done well, seasonal storage frees up surprising amounts of space, keeps your clothes in good shape, and makes the twice-yearly swap feel like a quick chore instead of a dreaded ordeal. Here’s exactly how to do it.

Start by storing less, not better

The biggest space-saving move happens before you buy a single bin. Every item you pack away is something you have to store, protect, and eventually unpack — so the off-season swap is the ideal moment to be honest about what’s earning its place.

A simple, reliable filter is the one-year rule: if you didn’t wear something during its entire last season, you almost certainly won’t miss it. This forces a real assessment of what you actually use versus what you keep “just in case.” Sort everything into keep, donate, and a small “maybe” pile, and resist the urge to store items purely out of guilt over what they cost.

If you find decisions hard to make in the moment, try the backward hanger trick during the season itself: turn all your hangers to face the wrong way, and flip each one forward only after you wear that item. By the end of the season, anything still backward is a clear candidate to let go. It removes the guesswork from “do I actually wear this?”

Clean everything before it goes into storage

This is the step people skip most often, and it’s the one that causes the most heartbreak months later. Storing clothes dirty is an open invitation to moths and other pests — they’re drawn to body oils, sweat, and food residue far more than to clean fabric. A sweater that looked fine when you folded it can come out in spring with holes or stains that have set permanently.

Before anything gets packed away:

  • Launder or dry-clean every item, even pieces you only wore once. Invisible oils and odors attract pests.
  • Check and empty all pockets — a forgotten receipt or candy can stain or draw insects.
  • Make sure everything is completely dry. Even slightly damp fabric trapped in a sealed container is a recipe for mildew.
  • Skip the starch and fabric softener residue where possible, since some finishes can yellow over long storage.

One important caveat: don’t store clothes in the plastic bags from the dry cleaner. Those bags trap moisture, prevent fabric from breathing, and can cause yellowing over time. Take garments out of the plastic before they go into long-term storage.

Choose containers that protect, then save space

It’s tempting to choose storage purely on how much it crams into a closet, but the priority order matters: protection first, space-saving second. A container that flattens your wardrobe to nothing is useless if it leaves your clothes musty or damaged.

Breathable bins and bags for most clothing

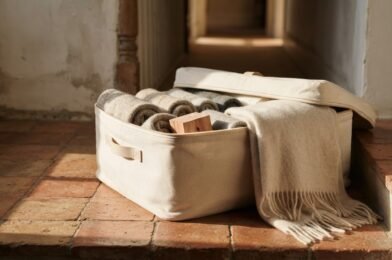
For the bulk of your folded items, opt for breathable storage — fabric bins, canvas containers, or plastic bins that aren’t fully airtight. Natural fibers like wool and cotton need a little airflow to stay fresh and avoid trapping humidity. Toss in a couple of cedar blocks or lavender sachets, both of which help deter moths naturally, and consider a dehumidifier pack to absorb stray moisture before you close the lid.

Garment bags for the pieces you hang

Not everything should be folded. Structured coats, blazers, delicate dresses, and anything prone to creasing do better on hangers. For these, use cotton garment bags rather than plastic — cotton lets the fabric breathe while still keeping dust off. Hang nicer pieces on wooden hangers inside their own bags so they keep their shape. A clever touch some organizers use: tape a small printed photo of the outfit to the outside of the bag so you instantly remember what’s inside without unzipping it.

Vacuum-sealed bags for the bulkiest items

Vacuum-sealed bags are the heavy hitters for space savings, shrinking down comforters, puffy jackets, and thick synthetic items dramatically. But use them selectively. They work beautifully for down, polyester fill, and other resilient synthetics, which bounce back after being compressed. Be more cautious with natural fibers like wool, cashmere, and leather — prolonged hard compression can crush the fibers and leave permanent creasing. For those, a loosely packed breathable bin is the safer choice.

Put your storage in the right place

Where you stash your bins matters as much as what’s in them. The single most important rule: off-season clothes should live somewhere cool and dry. Heat and humidity are what cause mold, mildew, and that unmistakable musty smell, so avoid damp basements, hot attics, and garages that swing between extremes. A climate-controlled interior space is ideal.

Some of the best spots hide in plain sight:

  • Top closet shelves. The upper reaches of a closet are perfect for items you won’t need for months. Adding a single extra shelf up high can create a whole new storage zone you weren’t using.
  • Under the bed. Low-profile bins slide neatly under most beds and keep clothes accessible but out of sight.
  • A guest closet or spare-room closet. If you have one that’s underused, it’s prime off-season territory.
  • The bottom of your main closet, behind everyday items, for a bin or two you can reach without a step stool.

Whatever you choose, don’t overcrowd your everyday closet with so much stored clothing that it interferes with daily use. The goal is to make this season’s wardrobe easier to navigate, not to trade one cramped space for another.

Make the future swap effortless with smart labeling

The difference between a storage system you’ll actually maintain and one you’ll abandon usually comes down to labeling. When everything is clearly marked, the twice-yearly swap takes minutes; when it’s a guessing game of unmarked bins, you avoid it entirely.

Label clearly and on the side that faces out, not just the top — you want to read a bin without pulling it down from a high shelf. Useful labeling approaches include:

  1. By season and category: “Winter – Sweaters,” “Summer – Shorts & Tanks.” Specific beats vague every time.
  2. By person in a multi-person household, so swaps don’t turn into a sorting marathon.
  3. With a contents photo taped to the bin or garment bag for pieces you might forget you own.
  4. With a quick inventory note inside the lid if a bin holds a mix of items.

It also helps to treat the swap as a planned project rather than a spontaneous afternoon scramble. Many people find it less overwhelming to do it in stages — pulling out the incoming season’s clothes one day and packing away the outgoing ones a few days later. Setting yourself up with a clear plan and a calm mindset turns a dreaded chore into something genuinely manageable.

Common mistakes that quietly ruin stored clothes

Even a good system can be undone by a few avoidable errors. Watch for these:

  • Packing clothes dirty. The number-one cause of pest damage and set-in stains. Always clean first.
  • Using dry-cleaner plastic for storage. It traps moisture and yellows fabric. Switch to cotton garment bags.
  • Sealing damp items. Trapped humidity in a closed bin breeds mildew fast.
  • Over-compressing delicate fibers. Vacuum bags are great for synthetics, risky for wool and cashmere.
  • Storing in attics or garages. Temperature and humidity swings damage fabric over months.
  • Skipping moth deterrents. A few cedar blocks or lavender sachets are cheap insurance.
  • Storing things you’ll never wear again. Declutter first so you’re only protecting clothes worth keeping.

Short on places to put the bins? Our guides to organizing a small bedroom and using vertical space in small rooms show where off-season storage can go.

Your seasonal swap checklist

To save space with seasonal clothing, follow a simple sequence: pare down what you store, clean everything thoroughly, choose protective-but-breathable containers, stash them somewhere cool and dry, and label clearly so next season’s swap is painless. Reserve vacuum bags for sturdy synthetics, give natural fibers room to breathe, and keep your everyday closet uncluttered.

If you only do one thing differently this season, make it this: launder every item before it goes into a labeled, breathable bin on a high shelf or under the bed. That single habit protects your clothes, reclaims real estate, and sets up a system you’ll happily keep using for years.

How to Organize a Small Bedroom With Limited Closet Space

A small bedroom with a tiny closet can feel like a daily negotiation: where do the off-season sweaters go, why is the floor always covered in shoes, and how does a room this size generate so much clutter? In reality, limited square footage isn’t actually the problem. The problem is almost always too much stuff competing for too little well-designed space. Once you fix both halves of that equation, even a cramped room with a single narrow closet can feel calm and functional.

This guide walks through the exact order I’d tackle it in—declutter first, then build storage upward and underneath, then make the closet itself work harder, and finally set up a rhythm so it stays that way. Follow it in sequence and you’ll get far better results than buying a pile of bins and hoping for the best.

Start by removing what shouldn’t be there

The single most effective thing you can do in a small bedroom costs nothing: take stuff out. Organizing clutter just rearranges your frustration. The goal is to return only what you actually use and genuinely want in the room.

The trick is to work in small, finishable sections so you don’t burn out or end up with a worse mess than you started with. Don’t dump your entire closet on the bed at 9 p.m.—that’s how people give up halfway through. Instead, pick one drawer, one shelf, or one section of hanging clothes and finish it completely before moving on.

A simple decluttering pass that works

  1. Clear the surfaces first. Nightstands, dressers, and windowsills are clutter magnets. Remove anything that doesn’t belong in a bedroom—dishes, paperwork, random electronics—and relocate it.
  2. Go category by category. Pull every item in one group (say, all your T-shirts) and handle them together. It’s much easier to make decisions when you can see you own fourteen of the same thing.
  3. Keep only what you use or love. If you haven’t worn it in a year and it doesn’t fit your life, it’s just taking up space you can’t afford.
  4. Question whether it even belongs in this room. Could blazers hang in an entry closet? Could rarely-worn shoes live by the front door or in the garage? Relocating whole categories elsewhere is one of the fastest ways to free up a small closet.

Decluttering before you organize isn’t optional busywork—it’s what makes every step that follows simpler and more effective. You can’t design good storage around an unknown quantity of belongings.

Build storage upward, not outward

In a small room, floor space is your scarcest resource, so your storage strategy should climb the walls instead of spreading across the floor. Vertical space is almost always underused.

Look at the empty real estate above your dressers, above the door, and in the gap between your top shelf and the ceiling. A few well-placed shelves can hold books, folded items, baskets, or decor that would otherwise eat into your nightstand and dresser tops.

  • Wall shelves above the dresser or bed create storage without consuming a single inch of floor.
  • An over-the-door organizer is ideal for shoes, accessories, scarves, or small items—it uses a surface that’s otherwise completely wasted. Hang one on the bedroom door or the closet door.
  • Hooks on the back of the door or on a free patch of wall hold bags, robes, tomorrow’s outfit, or a hat collection.
  • Baskets on a high shelf corral the lightweight, less-used things—spare bedding, off-season accessories—and look tidy doing it. Woven baskets keep an open shelf from feeling chaotic.

The principle to remember: every vertical surface is potential storage. Doors, the wall above furniture, and the air above your closet rod are all fair game.

Put the space under your bed to work

Under-bed storage is the secret weapon of the small bedroom, because it’s a large flat area you’re already paying for and probably ignoring. It’s the natural home for anything you don’t reach for daily.

This is the perfect spot for out-of-season clothing. Storing winter coats and sweaters under the bed during summer (and vice versa) effectively doubles your usable closet by removing half your wardrobe from competition. Flat under-bed bins or rolling drawers keep everything contained and dust-free.

One word of caution from experience: skip the vacuum-seal compression bags for clothes you care about. They save space, but garments come out badly wrinkled, and you’ll spend more time and money pressing them than the storage was worth. Stick to flat bins that let clothes lie naturally.

If your bed sits low to the ground, bed risers can buy you several extra inches of clearance—enough to fit proper storage boxes underneath.

Choose furniture that earns its footprint

When space is tight, every piece of furniture should do at least two jobs. A bed is just a bed; a bed with drawers is a dresser too. The smartest small-bedroom moves replace single-purpose items with double-duty ones.

Multi-tasking pieces worth considering

  • A small dresser as a nightstand. Instead of a tiny table that only holds a lamp, use a compact chest of drawers beside the bed. You get a surface and hidden storage in the same footprint.
  • A storage bench at the foot of the bed. It holds extra blankets or bulky items, gives you a place to sit while dressing, and tucks neatly against the bed frame.
  • A storage ottoman. Doubles as seating and a hidden bin for whatever doesn’t have a home yet.
  • A bed frame with built-in drawers. If you’re buying a new bed anyway, this is the highest-value storage upgrade in the room.

The mindset here is simple: when space is scarce, tuck storage into everything you can. You don’t need a separate piece for each function—you need pieces that combine functions.

Make a tiny closet hold more

A small closet rewards creativity. The goal is to find every usable inch—high, low, and side to side—and give each category of items a defined home so things stop turning into a jumbled pile.

Reclaim the height

Most closets waste vertical space. If you can move your clothes rod up a few inches, you’ll free up valuable room below for drawers or shelves. Add a shelf above the hanging area (or above the existing top shelf) for items you rarely touch. Down low, slide in open shelves or small drawers beneath shorter hanging garments like shirts and skirts—that dead space below them is prime storage.

Switch to slim hangers

This one small change makes a visible difference. Bulky plastic and wooden hangers crowd the rod; swapping to thin, non-slip velvet hangers lets you fit noticeably more clothing in the same width while keeping everything neat and aligned. It also stops shoulders from slipping off and creating that floor pile.

Give shoes a defined home

A shoe organizer—whether a hanging over-the-door style, a low shelf, or a rack on the closet floor—means each pair has a spot. When shoes have a designated home, you’re far less likely to kick them into a heap at the end of the day. Tidiness is mostly about reducing the friction of putting things away.

Free-fold to lighten the rod

If you have any spare room in your dresser, file-fold clothes (the KonMari method, where items stand upright on their edge rather than stacked flat). You’ll see everything at a glance, fit more per drawer, and can move some folded categories out of the closet to free up hanging space where it matters.

Keep it that way with a seasonal reset

Even the best-organized small bedroom drifts back toward clutter without a maintenance habit. The most practical rhythm for most people is a seasonal reset—roughly three to four times a year.

A reset is when you rotate your wardrobe: out-of-season clothes go into under-bed bins or a storage area like a closet shelf, basement, or garage, and the current season’s items come forward into easy reach. This single move keeps your closet from holding twice the clothing it should at any given time.

Pair the rotation with a quick decluttering pass. Because you’re already handling everything as you swap it, it’s the natural moment to pull out what you didn’t wear last season and let it go. A printable decluttering checklist or calendar can keep you honest if letting go is hard for you.

  • Swap in-season and off-season clothing between the closet and under-bed storage.
  • Cull anything you skipped over entirely last season.
  • Reset surfaces—clear the dresser top and nightstand back to essentials.
  • Refresh systems—wipe down shelves, empty the catch-all basket, and make sure every category still has a home.

Small room, smart storage

A small bedroom with limited closet space isn’t a storage problem so much as a too-much-stuff problem dressed up as one. Declutter first so you know exactly what you’re working with, then climb the walls and use the floor beneath your bed, choose furniture that does double duty, and squeeze every inch out of the closet with raised rods, slim hangers, and a real home for your shoes. Finish by locking in a seasonal reset so the system maintains itself. Start with a single drawer or shelf this week—that small, finished win is what makes the rest of the room feel possible.

A Step-by-Step Guide to Decluttering Your Garage

The garage has a way of becoming the household’s unofficial dumping ground. It’s where the holiday decorations live alongside the broken lawnmower, the bikes nobody’s ridden in two years, and that box of “I might need this someday” mystery items. Before long, you can’t park the car, you can’t find the tools, and you avoid even opening the door. Sound familiar?

Here’s the upside: a chaotic garage is one of the most satisfying spaces in the entire home to reclaim. Because so much of the clutter is genuinely disposable or donatable, you tend to see dramatic results fast. This guide walks you through the whole process — from the prep work that prevents burnout, to the sorting decisions that trip people up, to the storage systems that actually keep it organized long after the cleanup is done.

Start With a Plan, Not a Trash Bag

The single biggest mistake people make is diving in on a whim. They start pulling things out, run out of energy by noon, and end up with a garage that’s worse than when they started — now with half the contents strewn across the driveway. Decluttering a garage is a project, and projects need a little structure.

Begin by being honest about scope. A two-car garage that hasn’t been touched in five years is not an afternoon job. Block out a full day, or better yet a weekend, and check the weather forecast — you’ll want a dry day so you can spread everything out on the driveway or lawn.

Before you touch a single box, gather your supplies so you’re not interrupting your momentum later:

  • Trash bags and a few sturdy bins for sorting
  • A lidless trash can or open bin placed centrally — skipping even the small step of lifting a lid keeps you moving and reduces the temptation to second-guess
  • Cardboard boxes labeled Keep, Donate, Sell, and Relocate
  • Gloves, a broom, and a shop vac for the cleaning phase
  • A marker and masking tape or sticky notes for quick labeling

Decide upfront what your garage is actually for. Is it primarily for parking? A workshop? Sports and outdoor gear storage? This vision becomes your filter for every keep-or-toss decision that follows.

Empty, Sort, and Make the Hard Calls

The most effective approach is to pull everything out. It feels dramatic, but seeing your garage completely empty does two things: it shows you how much usable space you really have, and it forces you to handle every item rather than shuffling clutter from one corner to another.

As you remove items, sort them into your labeled categories immediately. Don’t create a vague “deal with later” pile — that pile is where decluttering projects go to die.

The four-category system

  1. Keep: Things you use, that work, and that genuinely belong in the garage. Tools, current sports equipment, lawn care gear, car supplies.
  2. Donate: Gently used items in working condition that someone else could benefit from — extra tools, outgrown bikes, camping gear you no longer use.
  3. Sell: Items with real resale value worth the effort of listing. Be ruthless here; if something’s been “worth selling” for three years and you still haven’t listed it, it probably belongs in donate.
  4. Toss/Recycle: Broken items, expired chemicals, dried-out paint, and the rusted-beyond-repair stuff you’ve been stepping over.

Common decision traps to watch for

A few categories of clutter cause more agonizing than they deserve. Keep these guidelines in mind:

  • The “might need it someday” item. If you haven’t used it in a year or more and can’t name a specific upcoming use, let it go. The cost of storing it usually outweighs the small chance you’ll need it.
  • Duplicate tools. Three hammers and a drawer of mismatched screwdrivers? Keep the best of each and donate the rest.
  • Sentimental boxes. The garage is a terrible place to store memories — humidity and pests destroy them. Move genuinely cherished items indoors and recycle the rest.
  • Hazardous materials. Old paint, pesticides, motor oil, and batteries shouldn’t go in the regular trash. Check with your local waste authority for a household hazardous waste drop-off, and never pour chemicals down a drain.

Clean and Repair the Empty Space

Here’s the step almost everyone skips, and it’s the one that makes the finished result feel transformative. With the garage empty, you have a rare opportunity to deep-clean and address small repairs before anything goes back in.

Sweep out the years of dust, cobwebs, and leaf litter. Vacuum the corners and along the baseboards. Wipe down shelving you plan to reuse. If the floor is stained or grimy, this is the moment to scrub or hose it down — you’ll never have easier access than right now.

Take a look at the space itself while it’s bare. Is the lighting adequate? A dim garage feels cluttered even when it’s tidy, and good lighting makes the space far more usable for projects. Note any wall studs you can anchor shelving into, check that the garage door operates smoothly, and patch any obvious entry points where pests or moisture get in. Letting the floor dry completely before reloading prevents trapping moisture under bins.

Build a Zoned, Vertical Storage System

This is where a decluttered garage becomes an organized garage that stays that way. The guiding principle: get things off the floor and group like with like. Floor clutter is what makes a garage unusable, so the goal is to push storage up the walls and overhead.

Reach for the walls and ceiling

Vertical storage is the secret weapon of every well-run garage. Your floor space is precious — ideally reserved for vehicles and a clear walking path — so make the walls and ceiling work for you:

  • Wall-mounted racks, slatwall, and pegboards are perfect for frequently grabbed tools like rakes, shovels, and drills. Mounting them at eye level keeps everything visible and within reach.
  • Overhead ceiling racks are ideal for lightweight but bulky seasonal items — plastic storage bins, ladders, holiday decorations — that you only touch a few times a year. This reclaims space that’s almost always wasted.
  • Sturdy shelving units along the walls keep bins organized and elevated off the concrete, away from potential water damage.

Create zones for how you actually use the space

Group related items into dedicated zones so you always know where things belong — and where to put them back. A typical setup includes:

  • A workbench hub where all your tools and project supplies live together, which prevents “project creep” from spreading screwdrivers across the whole garage
  • A lawn and garden zone for the mower, hose, fertilizer, and hand tools
  • A sports and recreation zone for bikes, balls, and gear
  • A seasonal storage zone for the items you rotate in and out

Smart solutions for awkward items

Sports equipment is notoriously hard to store because so much of it is either tall and skinny or round. Baseball bats, hockey sticks, fishing poles, and rakes don’t sit nicely on shelves, and balls roll away the moment you set them down. A clever, low-cost fix is to corral these in tall, sturdy, lidless bins or laundry hampers — the tall-skinnies stand upright together and the rounds stay contained.

Use clear bins and label everything

Whenever possible, store loose items in clear plastic bins so you can see the contents at a glance rather than opening five containers to find the extension cords. Then add a clear, descriptive label to each one. Labeling does more than help you find things — it tells everyone in the household exactly where an item goes back, which is half the battle in keeping the space clutter-free.

Keep It From Sliding Back Into Chaos

A garage doesn’t go from spotless to disaster overnight. It happens one “I’ll just set this here for now” at a time. The systems you’ve built do most of the maintenance work, but a little ongoing discipline keeps the entropy at bay.

  • Honor the zones. When you finish a project, put tools back in the workbench hub. The five seconds it takes is what prevents the next pile.
  • Adopt a one-in, one-out habit. When a new tool or piece of gear comes in, let something old go.
  • Do a quick seasonal reassessment. Twice a year — spring and fall are natural triggers — spend twenty minutes scanning for items that have crept in or no longer earn their space. Rotate seasonal gear into the easy-to-reach spots and overhead storage as needed.
  • Keep a donation box going. A standing box in the corner makes it effortless to set aside items as you notice them, rather than waiting for a once-a-year overhaul.

A garage that works for you

Decluttering your garage isn’t really about the stuff — it’s about reclaiming a space that works for you instead of against you. The formula is straightforward: plan before you start, empty everything out and make honest keep-or-let-go decisions, clean the bare space, then build a zoned system that gets items off the floor and onto the walls and ceiling. Clear bins and clear labels do the heavy lifting on staying organized.

If the whole thing feels overwhelming, don’t wait for the perfect free weekend — just start with the single worst corner. Pull it out, sort it into keep, donate, and toss, and put the keepers back with intention. One visible win is usually all the motivation you need to tackle the rest.

5 Common Decluttering Mistakes and How to Avoid Them

If you’ve ever spent a whole Saturday “decluttering” only to find your house looks exactly the same by Sunday night, you’re not lazy and you’re not bad at this. You’re almost certainly making one of a handful of predictable mistakes that quietly sabotage even the most motivated effort. Decluttering feels like it should be intuitive—just get rid of the stuff you don’t want, right?—but the process is full of small traps that turn a productive afternoon into a frustrating shuffle of belongings from one pile to another.

Thankfully, these mistakes are common precisely because they’re so easy to fix once you can name them. Below are the five I see derail people most often, along with the practical adjustments that actually move the needle. None of these require buying anything or following a rigid system—just a clearer understanding of what’s gone wrong and how to course-correct.

Mistake 1: Waiting to Feel Ready Instead of Starting Small

The single most common reason people don’t declutter is that the whole project feels too big to begin. You look at a cluttered garage or an overstuffed closet, your brain registers the scale of the work, and you decide to tackle it “when you have a free weekend.” That weekend rarely comes, and even when it does, the overwhelm hits the moment you open the door.

The fix is to shrink the starting point until it feels almost too easy. Instead of “the garage,” you declutter one shelf. Instead of “the whole kitchen,” you do the junk drawer. A small, finished win builds the momentum and confidence that a vague, enormous goal destroys.

Where to start when everything feels like too much

  • Pick a contained, low-emotion zone. A single drawer, the bathroom cabinet, or the area under the sink. You want a quick visible result, not a sentimental minefield.
  • Set a timer for 15 minutes. Knowing there’s a finish line removes the dread. You’ll often keep going past the buzzer—but you don’t have to.
  • Finish completely before moving on. One fully cleared, wiped-down drawer beats five half-sorted ones. Completion is what motivates you to come back tomorrow.

Starting small isn’t a compromise or a lesser version of “real” decluttering. It’s the strategy that lets people who’ve stalled for years finally get moving—and keep moving.

Mistake 2: Diving In Without a Plan or a Reason

Enthusiasm without direction is how you end up with twelve open piles, a living room that’s worse than when you started, and no energy left to deal with any of it. Decluttering without a plan means you make decisions on the fly, get distracted by every interesting object, and have no way to know when you’re “done.”

Before you touch anything, get clear on two things: what you’re decluttering and why. The “why” matters more than people expect. Are you clearing space because you’re moving? Trying to make mornings less chaotic? Reducing what you have to clean around? Your reason shapes your decisions. If your goal is a calmer morning routine, the entryway and the closet matter more than the basement.

Make a simple plan you’ll actually follow

  1. Write down your real motivation. One sentence is enough. “I want to be able to park in my garage” is a goal you can measure against.
  2. Choose one area at a time and define its edges clearly. “The hall closet” not “the hallway and maybe the closet and possibly that shelf.”
  3. Decide where things go before you start. Have a donate box, a trash bag, a “belongs elsewhere” basket, and a recycling spot ready. When you pick up an item, it has somewhere to land.
  4. Plan what happens to the stuff you remove. If you’re selling items to put money toward a goal, know where that money is going—otherwise it quietly disappears and you’ve simply moved clutter from your home to your car.

A plan turns an overwhelming chore into a sequence of small, defined tasks. It also protects you from the most demoralizing outcome of all: working hard for hours with nothing finished to show for it.

Mistake 3: Buying Organizing Containers Before You Declutter

This is the most seductive mistake because it feels like progress. You watch a few videos, get inspired, and head to the store for matching bins, drawer dividers, and pretty labeled baskets. The problem is that you’ve now spent money organizing clutter you haven’t even decided to keep.

Here’s the core principle every experienced organizer comes back to: organized clutter is still clutter. Containers don’t reduce what you own—they just hide it more attractively. And when you buy storage first, you tend to fill it, which means you keep things you’d otherwise have let go of simply because there’s now a labeled spot for them.

Decluttering always comes before organizing, and the order is not negotiable if you want lasting results. Once you’ve removed everything you don’t use or love, two things happen. First, you’ll need far fewer containers than you thought. Second, you’ll know the exact sizes and quantities to buy, because you’ll be shopping for what’s actually staying. Take measurements after you’ve pared down, then buy storage to fit—not the other way around.

Mistake 4: Handling Items Repeatedly and Postponing Decisions

Watch someone declutter slowly and you’ll notice a pattern: they pick something up, study it, set it back down, pick it up again ten minutes later, and never actually decide anything. Every time you touch an item without making a decision, you spend mental energy and gain nothing. Do that across a few hundred objects and you’ll be exhausted before you’ve made a dent.

The antidote is a simple rule often called “only handle it once”: touch it once. When you pick something up, decide its fate right then—keep, donate, trash, or relocate—and act on it immediately. Don’t reshuffle, don’t revisit, don’t admire it for the third time.

Keep your decisions moving

  • Limit your “maybe” pile. A small maybe pile is human; an enormous one means you’re just avoiding decisions. If everything is a maybe, nothing leaves your house.
  • Use a quick gut-check question. “Have I used this in the last year?” or “Would I buy this again today?” Trust your first answer instead of building a research project around a spatula.
  • Try a time-based test for tough calls. Some people find it helpful to give themselves only a few seconds to remember the last time they used an item. If nothing comes to mind quickly, that’s usually your answer.
  • Box up genuine maybes with a date. If you truly can’t decide, seal those items in a box, label it with today’s date, and store it out of sight. If you haven’t opened it in a few months, donate it unopened.

Decisiveness is a skill that improves with practice. The more decisions you make quickly, the easier the next one becomes—and the faster you’ll see the room actually empty out.

Mistake 5: Trying to Do It All Alone (and All at Once)

Two related errors live under this heading. The first is decluttering shared spaces and other people’s belongings in isolation. If you purge your partner’s or kids’ things without involving them, you’ll spark resentment and almost certainly end up re-buying or replacing things that mattered to someone. Decluttering a shared home works best as a conversation, not an ambush.

The second error is treating decluttering as a one-time marathon. People burn out trying to do the entire house in a single weekend, then never want to repeat the experience. Decluttering is far more sustainable as an ongoing rhythm than a heroic, exhausting event.

Build a system you can maintain

  • Bring others in early. Let family members make decisions about their own belongings. Even young kids can choose which toys to pass on when you frame it kindly.
  • Adopt a small repeatable habit. A simple approach is to regularly gather a dozen items to toss, a dozen to donate, and a dozen to return to their proper home. It’s manageable and keeps clutter from creeping back.
  • Schedule short maintenance sessions rather than waiting for crisis-level mess. Fifteen minutes a week beats two exhausting days a year.
  • Address the inflow. Understand why the clutter accumulated in the first place. If you don’t change your buying or storing habits, you’ll simply refill the space you just cleared.

Avoid these five and you’re halfway there

Most decluttering frustration doesn’t come from a lack of effort—it comes from these five fixable missteps: never starting because the job feels too big, working without a plan or a clear reason, buying containers before paring down, handling items endlessly without deciding, and going it alone in one exhausting push.

Pick the mistake that sounds most like you and fix that one first. If you’ve been stalled, start with a single drawer this week and set a 15-minute timer. If you tend to fizzle out, write down your one-sentence “why” before you begin. Small, deliberate corrections turn decluttering from a dreaded annual ordeal into a steady habit that actually keeps your home clear—and keeps it that way.