How to Use Vertical Space to Store More in Small Rooms

Most small rooms aren’t actually short on storage — they’re short on used storage. When floor space runs out, we tend to stop looking, even though there’s usually three or four feet of empty wall above every surface in the room. That blank vertical real estate is the single most underused asset in a small home, and learning to fill it intentionally is what separates a cramped room from a calm one.

The principle is simple: when you can’t go out, go up. But doing it well takes more than nailing a shelf to the wall and hoping for the best. Below is a practical, room-tested approach to turning vertical space into genuine, everyday storage — without making your walls look like a hardware aisle.

Start by reading the room from floor to ceiling

Before you buy a single organizer, spend five minutes looking at your room the way a storage planner would. Stand in the doorway and mentally divide each wall into three zones: low (floor to about knee height), middle (the prime, easy-reach zone), and high (above shoulder height). In most small rooms, the middle zone is crammed and the high zone is completely empty.

Your goal is to move infrequently used items up so the prime middle zone stays clear for the things you reach for daily. A few questions that make the plan obvious:

  • What do I use every day? Keep it in the easy-reach middle zone.
  • What do I use a few times a month? Push it high or low.
  • Where is there empty wall above a piece of furniture? That’s a shelf waiting to happen.
  • Which doors are doing nothing but opening and closing? Every one is a potential storage surface.

This quick audit prevents the most common mistake: buying vertical storage and then realizing it doesn’t fit your habits, so it sits empty while clutter piles up around it.

Shelves: the workhorse of vertical storage

Shelving is the highest-impact change you can make in a small room, because it adds usable square footage without taking up any floor at all. The trick is choosing the right type for the spot.

Floating shelves for clean, flexible walls

Floating shelves have no visible brackets, so they read as light and intentional rather than cluttered — important in a small space where heavy fixtures shrink the room visually. Mount one or two above a desk, nightstand, or sofa to hold books, a plant, or a small bin of supplies. Keep the depth modest (around 6 to 8 inches is plenty for most items) so the shelf doesn’t jut into the walkway or bonk anyone on the head.

One nuance people miss: group your floating shelves rather than scattering single shelves across multiple walls. A tidy cluster on one wall feels designed; lone shelves on every wall feel chaotic and make a small room feel busier than it is.

Closet shelves above the clothes bar

Small bedrooms almost always come with small closets, and the easiest fix is adding a shelf or two above the existing clothes rod. That dead space at the top of the closet can hold folded sweaters, off-season clothing, or labeled bins for things you rarely touch. If you store items up there in matching bins with front-facing labels, you keep the visual calm and you never have to dig.

Ladder shelves and tall narrow units

When you do have a little floor to spare, choose furniture that’s tall and narrow rather than wide and low. A ladder shelf or a slim bookcase uses a small footprint but climbs high, multiplying storage in the exact direction you have room to spare. Anchor any tall unit to the wall — in a small room it’s often near a bed or seating, and tip-overs are a genuine hazard.

Put your doors and walls to work

Doors are flat, vertical, and almost always wasted. The same goes for big empty stretches of wall. These are the cheapest wins in the whole strategy.

Over-the-door organizers

An over-the-door organizer instantly creates a wall of small compartments on a surface that was doing nothing. They’re not just for shoes — the clear-pocket versions are excellent for:

  • Cleaning supplies and spray bottles on a utility closet door
  • Craft and office odds and ends
  • Toiletries and travel-size bottles inside a bathroom door
  • Snacks or pantry packets on a kitchen door
  • Accessories, socks, or scarves on a bedroom closet door

Choose one with a rigid frame or a fitted bracket if your door gets a lot of slamming, since loosely hung organizers swing and bang.

Hooks — the most underrated tool you own

A few hooks on a wall is one of the simplest ways to store things vertically, and adhesive hooks like Command hooks work for far more than picture frames. Use them to hang bags, hats, headphones, robes, dog leashes, jewelry, kitchen utensils — anything with a loop or handle. Because they require no drilling, they’re ideal for renters and for testing a placement before committing to a permanent fixture.

The pro move is to hang things you’d otherwise pile. A tote bag on a hook is off the floor; the same bag dumped on a chair becomes the seed of a clutter pile.

Pegboards for endless flexibility

If you have a craft corner, a home office, a garage, or a hardworking kitchen wall, a pegboard turns a flat surface into fully customizable storage. The beauty is that you can rearrange hooks, baskets, and bins as your needs change — nothing is locked in. You don’t need a giant wall, either; even a modest pegboard mounted above a desk can hold supplies, free up drawer space, and double as decoration. Group items by category and leave a little breathing room so the board stays useful rather than overwhelming.

Stack up inside cabinets, drawers, and shelves

Vertical thinking shouldn’t stop at the walls. The empty air inside your cabinets and drawers is prime territory, and it’s where small items quietly waste the most space.

Stacking drawers and risers

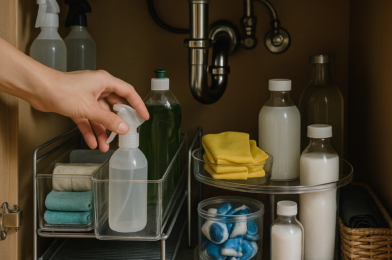
Under a kitchen sink or inside a deep cabinet, a single layer of items leaves a tall, hollow space above it. Acrylic or plastic stacking drawers let you store two or three layers in the same footprint — instantly doubling or tripling capacity — while keeping smaller items contained and easy to pull out. The same logic applies to shelf risers in cabinets and pantries: a riser creates a second tier so the back row isn’t buried behind the front.

Vertical filing instead of stacking

Counterintuitively, one of the best vertical tricks is to store flat items upright. File your cutting boards, baking sheets, and pan lids vertically in a rack so you can grab one without unstacking the whole pile. Do the same with folded clothing in a drawer — stand the items on edge like files so you can see every one at a glance. It’s “vertical” in the sense that you’re using the depth of the drawer as height.

Don’t forget the space under and over the bed

In a small bedroom, the bed is the biggest single object — and it hides two excellent storage zones.

Under the bed is ready-made for low, flat storage. Use shallow rolling bins or under-bed boxes for off-season clothes, extra linens, or shoes. Lidded or zippered containers keep dust out, and bins on casters slide in and out without crawling. If your frame sits low, bed risers lift it a few inches and unlock more clearance — a cheap upgrade that pays off immediately.

Above the bed is the high zone again: a single floating shelf or a slim cabinet mounted well above the headboard can hold books and decor that would otherwise eat up nightstand space. Just keep anything heavy off the wall directly over where you sleep.

Common mistakes that undo all your effort

Going vertical works beautifully until a few predictable errors creep in. Watch for these:

  • Overfilling the walls. Vertical storage should reduce visual noise, not add to it. Leave some blank wall so the room can breathe.
  • Storing daily items too high. If you need a step stool every morning, the system will fail. Reserve high zones for occasional-use items.
  • Skipping labels and containers. Open shelves full of loose stuff read as clutter. Bins and labels keep high storage looking deliberate.
  • Ignoring weight limits. Adhesive hooks and lightweight shelves have real limits; overload them and you’ll be patching drywall.
  • Treating it as one-and-done. Even the best system needs a regular reset. Do a quick weekly pass to return things to their spots and clear accumulating clutter before it spreads.

The bottom line

Small rooms feel cramped not because they lack storage, but because all the storage lives in the same crowded zone. The fix is to spread your belongings across the full height of the room — up onto shelves, onto doors and walls, into the stacked layers inside your cabinets, and under the bed — so the easy-reach middle stays clear and calm. Start with a single high-impact move this week: add one shelf above a doorway or desk, hang a row of hooks, or drop a stacking drawer set under the sink. Then keep a short weekly reset on the calendar so the vertical space you reclaimed stays working for you instead of quietly filling back up.
How to Organize a Linen Closet Step by Step

The linen closet is one of those spaces that quietly descends into chaos. It starts innocently enough—a folded set of sheets here, a spare bottle of shampoo there—and within a year you’re shoving a wad of mismatched pillowcases against the door just to get it closed. The problem isn’t that you own too much (though you might); it’s that the closet has no system, no logic, and no boundaries.

The good news is that a linen closet is one of the most satisfying spaces to organize because it’s small, contained, and the rules are simple once you know them. This is a project you can finish in a single afternoon, and the payoff—grabbing a clean towel without an avalanche—lasts for months. Here’s exactly how to do it, step by step.

Start by Emptying the Entire Closet

It’s tempting to “tidy in place”—straightening stacks and nudging things into corners. Resist that urge. You cannot organize a space you can’t fully see, and half-finished sorting almost always recreates the original mess.

Pull everything out and lay it on a bed or the floor nearby. As you empty the shelves, you’ll likely uncover items that have no business being there in the first place: holiday decorations, random electronics, gift bags, that bin of stuff you meant to take to the basement. Set those aside immediately—getting non-linen-closet items out of the equation is half the battle.

Wipe down the empty shelves while you’re at it. You may never see them this bare again, so take advantage of the clean slate.

Sort Ruthlessly Into Keep, Donate, and Toss

Now go through every single item and make a decision. The most common mistake here is keeping things “just in case.” Linens are bulky, and storage space is the real cost of hanging onto items you’ll never use.

As you sort, be honest about the condition of your textiles. Threadbare towels, faded sheets, and pilled blankets aren’t doing you any favors. Worn-out towels can be repurposed as cleaning rags or donated to animal shelters, which often accept them gratefully.

What to actually let go of

  • Sheet sets missing pieces. A fitted sheet with no matching flat sheet or pillowcases is dead weight. Match your sets as you sort and note what’s incomplete.
  • Towels that are stiff, frayed, or stained beyond rescue. If you wouldn’t hand it to a houseguest, it’s not earning its shelf space.
  • Sizes you no longer own. Got rid of the twin bed two years ago? The twin sheets can go too.
  • Expired or empty toiletries and medicine. If your linen closet doubles as a backup bathroom cabinet, this is where a shocking amount of clutter hides—old prescriptions, dried-up lotions, hotel shampoos you’ll never use.
  • Excess quantity. You don’t need eight sets of sheets per bed. Two to three per bed is plenty for most households.

Categorize Everything Before It Goes Back

This is the step that separates a closet that looks organized from one that stays organized. Before you put anything back, group your keep pile into clear categories.

For linens specifically, sort by size and type: King, Queen, Full, and Twin sheets in their own stacks, then bath towels, hand towels, washcloths, and blankets each in their own group. If you’ve been struggling to find matching sets, this sorting moment is where you’ll finally see what you have and what’s gone astray.

For everything else, think in terms of function: a group for medicine, a group for extra toiletries and soaps, a group for backup toilet paper and paper towels, a group for guest supplies. You’re essentially building “zones” before you’ve even touched a shelf.

A quick tip for keeping sheet sets together

One of the oldest and best tricks in the book: fold a complete sheet set and tuck the whole bundle inside one of its own pillowcases. Now the set lives as a single unit—no more orphaned fitted sheets, no more mystery of the disappearing pillowcase.

Assign Zones and Use Bins to Contain Small Items

Now you’ll put everything back, but with intention. Think about how you reach into the closet and what you grab most often.

The principle is straightforward: store things where it makes sense to use them. Items you reach for daily or weekly go at eye level and on the easiest shelves. Things you rarely touch go up high or down low.

  • Top shelves: Bulky, infrequently used items—extra pillows, seasonal blankets, spare comforters. These are out of the way but still accessible when guests arrive.
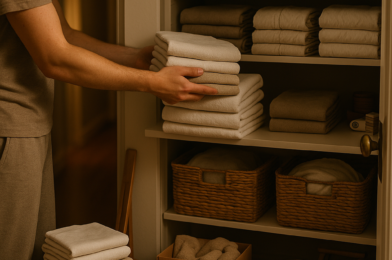
  • Middle shelves (the prime real estate): Your everyday towels and the sheet sets you use most. This is the zone you reach without thinking, so reserve it for daily life.
  • Lower shelves: Heavier bins and bulk supplies. A basket of loose toilet paper rolls works beautifully on a bottom shelf—pull the rolls out of their plastic packaging first so they stack neatly and look tidier.

Bins and baskets are your best friends

Loose small items are what turn a closet into a junk drawer. The fix is to corral them. Pull medicine, soaps, and toiletries out of their bulky retail packaging and group each category into its own labeled basket—one for medicine, one for backup toiletries, one for washcloths, and so on. When you want something, you pull out the whole basket, take what you need, and slide it back. Nothing slumps over or migrates.

Fabric bins work especially well for sheet sets. Labeling each bin by size—”Queen,” “King”—means you (and anyone else in the house) can grab the right set instantly without unfolding three wrong ones first.

Consider a Unified Look (and Why It Helps)

This part is optional, but it has a practical payoff beyond aesthetics. A linen closet where everything matches isn’t just prettier—it’s easier to maintain.

Many organizers swear by sticking to all-white sheets and towels. The reasoning is genuinely functional: white linens can be bleached without worrying about fading or staining, they always coordinate regardless of which set you grab, and a uniform palette makes the whole closet read as calm rather than cluttered. If you’ve ever stared at a jumble of mismatched colors and patterns, you know how visually noisy that is.

You don’t have to go fully white to get the benefit. Choosing a simple, cohesive theme—matching baskets, a consistent color story, uniform bins—creates a sense of order that makes the space feel maintained even when it’s not perfectly tidy. The visual consistency does a lot of quiet work.

Make the Top Shelves Reachable and the System Sustainable

An organized closet only stays organized if it’s easy to use. If your top shelf requires a treasure hunt for a step stool every time, you’ll start dumping things on lower shelves instead—and the system breaks down within weeks.

A small, foldable step stool stored right inside the closet solves this elegantly. It takes up almost no space and means the top shelves stay genuinely usable rather than becoming a no-man’s-land where things go to be forgotten.

Keep it from sliding back into chaos

The single most important habit for a lasting linen closet is the periodic edit. Every couple of months, do a quick pass through your toiletries and medicine—toss the expired and empty, and you’ll prevent the slow accumulation that wrecks the space over a year. It takes five minutes and saves you from ever needing a full overhaul again.

A few more habits that keep the system intact:

  • Refold and return. When laundry comes out of the dryer, fold it the same way every time and put it back in its assigned zone immediately.
  • One in, one out. Buy a new set of towels? Retire an old set the same day.
  • Respect the bins. If a basket is full, that’s your signal to declutter that category—not to start a new pile on top.
  • Keep labels visible. Labels aren’t just for show; they tell everyone in the household where things belong, which means the burden of tidiness doesn’t fall on you alone.

The Bottom Line

Organizing a linen closet comes down to five moves: empty it completely, sort honestly into keep–donate–toss, group what’s left into clear categories, assign zones with bins to contain the small stuff, and build in the habits that keep it that way. The bulky, rarely-used items go up high; your everyday towels and sheets claim the easy-to-reach middle; and a couple of labeled baskets tame everything that used to roam free.

Start this weekend by simply pulling everything out and matching your sheet sets—you’ll be surprised how much clarity that one step gives you. From there, the rest of the system practically builds itself, and you’ll have a closet that closes easily, looks calm, and actually stays that way.

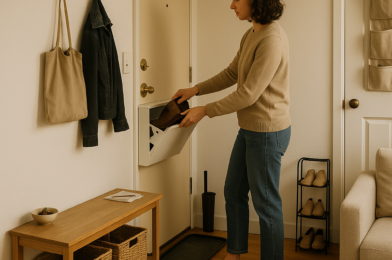
How to Store Shoes When You Have No Entryway

If your front door opens directly into your living room, your kitchen, or a hallway barely wide enough to turn around in, you already know the problem: shoes have to go somewhere, and that somewhere usually ends up being a growing pile by the door. Without a dedicated entryway, footwear creeps into every room, trips you on the way out, and makes even a tidy home feel chaotic the moment you walk in.

The good news is that you don’t need an entryway to have a calm, organized shoe situation. You need a system that uses the space you actually have — walls, under-bed gaps, closet interiors, and a few square feet of floor — and a habit that keeps shoes from multiplying. Here’s how to build both.

Start by deciding what actually lives near the door

The biggest mistake people make in small spaces is trying to store all their shoes in one spot near the entrance. You don’t need to. The shoes that need to be accessible at the door are the ones you reach for daily — your commuting pair, your everyday sneakers, the slip-ons you grab for the dog. That’s usually three to five pairs per person, not your entire collection.

Everything else — seasonal boots, dressy heels, hiking shoes, the sandals you wear twice a summer — can be stored elsewhere in the home, even somewhere less convenient. Separating “active” shoes from “stored” shoes instantly shrinks the problem you’re trying to solve at the door.

Before you buy a single organizer, do a quick declutter. Pull every pair you own into one place and be honest:

  • Toss or recycle anything broken, painfully uncomfortable, or worn past repair.
  • Donate shoes you haven’t worn in a year and won’t miss.
  • Keep what you genuinely wear, then sort those into “daily” and “occasional.”

It’s far easier to organize 15 pairs than 40. The decluttering step is the one most people skip, and it’s the one that makes every storage solution below actually work.

Go vertical: use the walls and the back of your door

When floor space is the thing you don’t have, the answer is almost always up. Vertical storage gives you a home for daily shoes without sacrificing the walking path you need by the entrance.

Over-the-door racks

An over-the-door shoe organizer is the single most underused tool for entryway-less homes. It hangs on the back of any standard door — your front door, a coat closet, even a bathroom door near the entrance — and holds anywhere from 12 to 24 pairs depending on the design. Pocketed fabric versions are great for flats, sneakers, and kids’ shoes; wire or metal over-door racks handle bulkier footwear better and don’t sag over time.

The trick is choosing the right door. If your front door swings against a wall, the back of it is prime real estate. If not, a nearby closet door works just as well.

Wall-mounted racks and shoe ladders

A leaning shoe ladder is one of the more stylish options out there — it props against the wall, takes up almost no floor footprint, and turns a row of shoes into something that looks intentional. Wall-mounted rails or angled shelves do the same thing while keeping the floor completely clear, which makes vacuuming and mopping far easier.

If you rent and can’t drill, look for tension-mounted or adhesive-backed options, and keep the weight light — these hold a few pairs of flats or sneakers, not a stack of winter boots.

Tall rotating or tiered racks

For small and studio apartments, a tall rotating shoe rack is a clever pick because it stores upward instead of outward. You get multiple tiers in a footprint not much larger than a single pair of shoes, and the spin makes it easy to see everything. Multi-tier vertical racks tucked into a corner do the same job at a lower price point.

Hide shoes in furniture you already need

When you have no entryway, your best storage often disguises itself as something else. The goal is dual-purpose furniture: pieces that earn their footprint by doing two jobs at once.

  • Storage benches: A bench with a lift-up seat or cubbies underneath gives you a place to sit while you put shoes on and a place to stash them. Position it against the wall closest to your door, even if that’s technically in your living room.
  • Storage ottomans: If a bench feels too utilitarian for a living room, an upholstered storage ottoman blends in as furniture while quietly holding several pairs inside.
  • Stackable shoe cabinets: Slim-profile shoe cabinets — sometimes called shoe dressers — tilt shoes into shallow drawers, so they project only a few inches from the wall. They’re ideal when you want shoes fully hidden and the surface up top doubles as a spot for keys and mail.
  • Console tables with baskets: A narrow console against a wall, with two or three large baskets tucked underneath, creates an instant “drop zone” that looks deliberate rather than messy.

Baskets deserve a special mention. A couple of large, sturdy baskets by the door are the lowest-effort solution that exists — shoes go in, the visual clutter disappears, and there’s no fiddling with slots or pockets. They’re especially forgiving for families and kids who won’t reliably line shoes up on a rack.

Reclaim the spaces you’re not using

The shoes that don’t need to live by the door can go almost anywhere — and most homes have hidden capacity people never think to use.

Under the bed

The gap under your bed is some of the most wasted storage in the house. Flat under-bed bins on wheels or shallow shoe boxes slide right in and keep off-season and occasional pairs out of sight but easy to retrieve. Clear bins or labeled boxes save you from dragging everything out to find one pair. If your bed sits low, bed risers can create the few extra inches you need.

An underused closet

If you have a coat closet, linen closet, or spare closet that’s only half-full, it can become a dedicated shoe zone. Add a tension rod with hanging shoe pockets, stack shoe cubbies on the floor, or fit a small tiered rack inside. Even claiming the floor of an existing bedroom closet for your stored shoes frees up the entry area for daily pairs only.

Unexpected gaps

Look for the dead spaces most people ignore. A pair of slim shoe stands tucked under a window ledge, a narrow rack beside the sofa, the empty stretch under a console or radiator shelf — these awkward spots are perfect for low-profile shoe storage precisely because nothing else fits there. The point is to spread shoes across several small, out-of-the-way places rather than forcing them all into one overcrowded spot.

Build a habit so the system actually sticks

Storage solves the where, but habits solve the why does this keep happening. The best rack in the world fails if shoes never make it into it.

  • Make the daily spot effortless. The easier it is to put shoes away, the more likely it happens. A basket you toss into beats a rack you have to align perfectly — especially for kids and anyone in a hurry.
  • Set a hard limit. Decide how many pairs are allowed in the entry zone (say, two per person). When it overflows, that’s your cue to relocate a pair to under-bed or closet storage.
  • Do a 30-second reset. Once a day — ideally before bed — put stray shoes back. It takes under a minute and stops the pile from ever forming.
  • Rotate seasonally. Twice a year, swap stored and active shoes so your prime door space always holds what you’re actually wearing now.

One more practical note: keep wet or muddy shoes off fabric and wood. A simple boot tray or a washable mat near the door catches drips and protects your floor and your storage furniture, which matters a lot more when your “entryway” is really the corner of your living room.

Common mistakes that keep small-space shoes messy

A few patterns sabotage even good intentions. Watch for these:

  • Buying storage before decluttering. You’ll size your solution to a collection you should have shrunk first.
  • Choosing storage that’s too fiddly. If putting a shoe away takes effort, it won’t happen consistently.
  • Trying to store everything at the door. Spread the load across the home instead.
  • Ignoring vertical and hidden space. Floor space is your scarcest resource — use walls, doors, and under-bed gaps first.
  • No designated landing spot. Without a clear “shoes go here,” they go everywhere.

The bottom line

You don’t need an entryway to keep shoes under control — you need a plan that matches your actual space. Start by decluttering, then keep only your daily pairs near the door using a bench, baskets, or an over-the-door rack. Push everything else into vertical and hidden storage: the back of a door, under your bed, a wall-mounted ladder, or an underused closet. Finally, protect the system with a 30-second daily reset and a firm cap on how many pairs live by the entrance.

Pick one solution from this article — even just adding two baskets by the door tonight — and build from there. A tidy entry zone in a home that doesn’t technically have an entry is entirely within reach.

How to Organize Under-Sink Cabinets for Easy Access

The cabinet under your sink might be the single most chaotic square foot of storage in your entire home. It’s an awkward space carved up by pipes, dampened by the occasional drip, and treated like a junk drawer for half-empty spray bottles, mystery sponges, and a tangle of plastic bags you swore you’d reuse. Every time you open it, something tips over.

The good news: this space responds incredibly well to a handful of smart moves. You don’t need a custom cabinet or a contractor — you need to think vertically, contain things in the right way, and put the items you actually reach for within arm’s reach. Here’s exactly how to do it.

Start by emptying the cabinet completely

It’s tempting to organize around what’s already in there, but that’s how you end up shuffling clutter from one corner to another. Pull everything out and set it on the floor or counter so you can see what you’re truly working with.

As you empty, sort items into quick piles:

  • Keep and use regularly — dish soap, your go-to all-purpose cleaner, sponges, dishwasher pods.
  • Keep but rarely use — specialty cleaners, oven cleaner, extra refills.
  • Relocate — items that drifted here but belong elsewhere (snacks, tools, batteries).
  • Toss or recycle — empties, dried-out cleaners, duplicate products, and that collection of crusty rags.

While the cabinet is empty, wipe down the base. This is also your chance to check for any signs of moisture or a slow leak around the pipes — a soft or discolored cabinet floor is worth addressing before you reload it. A clean, dry starting point makes everything that follows easier.

Protect the base before you put anything back

Under-sink cabinets get damp. Condensation, the occasional drip from a worn connection, and leak-prone cleaning bottles all take a toll on the cabinet floor over time. A protective layer is cheap insurance.

A simple rubber mat or a peel-and-stick liner cut to fit the base does two jobs at once: it shields the wood from water damage and gives bottles a grippier surface so they’re less likely to slide and topple. If a bottle does leak, you’ll spot it on the mat instead of discovering warped cabinet wood months later. Choose something you can lift out and rinse in the sink.

Go vertical to stop wasting the best space

Here’s the core principle that fixes most under-sink chaos: the problem isn’t a lack of space — it’s wasted space. When you line bottles up front-to-back, the ones in back become invisible and unreachable, and the gap between the tops of the bottles and the underside of the counter sits completely empty. That dead air is prime real estate.

Building upward reclaims it. The most effective tools for this are:

  • Pull-out drawers or sliding shelves — these bring everything in the back forward to you, so nothing gets buried. They’re the gold standard for access.
  • Tiered or two-shelf risers — adjustable metal or plastic shelves that often have legs designed to straddle the pipes, creating a second level for storage.
  • Stackable clear drawers — see-through units that let you stack two or three high while still being able to see and reach the contents.
  • A small rolling cart — if your cabinet is tall and open enough, a slim cart on wheels can slide in and pull out as a unit.

Working around the plumbing

The drainpipe and supply lines are the reason most off-the-shelf shelving doesn’t fit neatly. Before you buy anything, measure three things: the interior width, the interior depth, and the height clearance from the cabinet floor to the pipes. Then measure where the pipes actually sit, because a U-shaped or expandable organizer is designed to nest around them.

If your pipes are positioned dead center, look for two narrower units that flank them rather than one wide shelf. If the configuration is especially awkward, a pull-out drawer that occupies only the front portion of the cabinet — leaving the pipe area clear behind it — often works better than trying to bridge over the plumbing.

Sort into zones and contain wisely

Once you have vertical structure, group like with like so you’re not hunting. A typical under-sink cabinet breaks down into a few natural zones: dish-related items (soap, sponges, brushes), surface and glass cleaners, refills and backstock, and reusable bags or specialty supplies.

Choose the right containers

Containers help, but the wrong ones create new problems. A few guidelines worth following:

  • Favor clear over opaque. When you can see the contents at a glance, you stop buying duplicates and you actually use what you have. Clear bins and drawers earn their place here more than almost anywhere else in the house.
  • Skip oversized baskets. One giant bin sounds tidy, but it just becomes a deep pit where items pile on top of each other. You end up unloading half of it to reach the bottom. Smaller, purpose-grouped containers keep things accessible.
  • Use a shallow tray on top for small loose items. Sponges, scrub brushes, and odd little tools live best in a single shallow tray on the upper level, where they’re visible and easy to grab without digging.
  • Reserve one deeper bin for bulky, soft items. Reusable shopping bags, for instance, compress well and can live in a single deep container on the bottom rather than spilling everywhere.

A door-mounted caddy or a couple of adhesive hooks on the inside of the cabinet door are also worth considering — they’re perfect for a roll of trash bags, rubber gloves, or a small spray bottle, and they use space that would otherwise go untouched.

Put frequently used items where your hand lands first

Organization isn’t just about fitting everything in — it’s about access. The items you touch every day should be the easiest to reach, and the things you use twice a year can hide in the back or up high.

In practice, that means keeping your everyday cleaner, dish soap, and sponges on the top tier of your vertical unit or at the front of a pull-out drawer. Backstock, refills, and seasonal or rarely-used products go lower, deeper, or behind. This single habit eliminates the constant rummaging that makes under-sink storage feel so frustrating.

One more access-related tip: store spray bottles upright and slightly forward so the trigger heads don’t catch on the shelf above when you slide things out. It’s a small thing that prevents the daily knock-over.

Keep cleaning products safe

If small children or pets are part of your household, the under-sink cabinet deserves extra thought because it’s exactly the spot they can reach. A simple childproof cabinet latch is inexpensive and effective. Keep products in their original, labeled containers, and never decant cleaners into food or drink containers — accessibility should never come at the cost of safety. For specific guidance on any particular product, follow the manufacturer’s storage instructions on the label.

Common mistakes that undo your hard work

Even a well-organized cabinet can slide back into chaos. These are the pitfalls I see most often:

  • Over-buying. Bulk cleaning supplies seem like a deal until you have four bottles of the same thing crowding the space. Buy what you’ll use in a reasonable window.
  • Ignoring the vertical gap. If there’s empty air above your bottles, you haven’t finished. Add a shelf or riser.
  • Choosing organizers before measuring. Returning ill-fitting bins is a tax on impatience. Measure around the pipes first, every time.
  • Treating it as a one-time project. Take 90 seconds every few weeks to pull stray items, toss empties, and reset the zones. Maintenance is what keeps it functional.
  • Keeping things that don’t belong. Tools, paper goods, and snacks all tend to migrate here. Give them a real home elsewhere.

The bottom line

An organized under-sink cabinet comes down to four moves: empty it out and edit ruthlessly, protect the base with a liner or mat, build upward with pull-out drawers or tiered shelves to capture wasted vertical space, and place your most-used items where your hand naturally reaches. Keep your containers clear and appropriately sized — skip the one giant basket — and you’ll be able to see and grab what you need without unloading the whole cabinet.

Start this weekend with just the emptying and sorting step. Once you see the bare, clean space and know your exact measurements, the right organizers practically choose themselves — and you’ll have a cabinet that stays usable instead of one you dread opening.

How to Maximize Storage in a Tiny Kitchen

A tiny kitchen forces a kind of honesty most rooms let you avoid. There’s nowhere to hide the bread maker you used twice, no spare drawer for the lids that don’t match any container you own. But here’s the encouraging part: small kitchens almost never have a true space problem. They have a system problem. The square footage is fixed, yet most cramped kitchens are wasting a third of their actual capacity in dead air above shelves, bare walls, and the awkward zone under the sink.

This guide walks through how to genuinely double the usefulness of a small kitchen — not with a renovation, but with smart decisions about what stays, where it lives, and how you use the vertical and hidden space you already own.

Start by Removing, Not Storing

The instinct in a tiny kitchen is to buy organizers immediately. Resist that. Every clever bin you add to hold things you don’t use just locks clutter in place more efficiently. The single highest-impact move is a ruthless edit of what’s in the room.

Professional chefs offer a useful reality check here: the advice from working kitchen pros is to stick with the basics — a few good knives and only the equipment you actually reach for. Most home cooks rotate through a surprisingly small core of tools. Everything else is taking up prime real estate it hasn’t earned.

How to run a fast kitchen edit

  • Pull everything out by category — all the mugs, then all the gadgets, then all the food containers. Seeing the full quantity in one place is the moment most people realize they own eight spatulas.
  • Apply the “this year” test. If you haven’t used an appliance or tool in the last twelve months, it’s a candidate to donate. Specialty single-use gadgets are usually the first to go.
  • Match every lid to a container. Food storage containers are a classic small-kitchen black hole. Recycle the orphans on both sides.
  • Be honest about duplicates. You need one good vegetable peeler, not three mediocre ones.
  • Donate, don’t relocate. Moving clutter to a closet in another room isn’t decluttering — it’s hiding the problem.

Only once the room holds what you truly use should you start thinking about storage solutions. Now the organizers you buy will serve the things that matter instead of preserving dead weight.

Look Up: The Vertical Space You’re Ignoring

One of the most repeated pieces of advice from professional organizers is almost meditative: lie on the floor and look up. People reflexively think about kitchens in terms of floor area and counter inches, and they completely overlook the tall column of empty space stretching from countertop to ceiling.

That vertical zone is where a small kitchen’s hidden capacity lives. Walls, the sides of cabinets, the backs of doors, and the air above your existing shelves are all storage waiting to be claimed.

Open shelving and wall-mounted storage

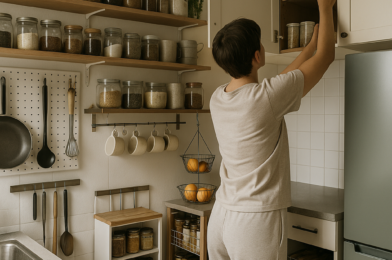
Open shelves are a small-kitchen favorite because they turn bare wall into working storage while keeping everyday items visible and within reach. They suit dishes, glassware, frequently used small appliances, and attractive jars of staples. The trick is restraint — open shelving only looks good and stays functional when it isn’t crammed. Store what you reach for daily, and keep the styling minimal so it reads as tidy rather than chaotic.

If you don’t have free wall space for shelves, mount a rail or rack instead. A simple wall-mounted rail with S-hooks can carry utensils, mugs, measuring cups, and pot holders, freeing up a whole drawer in the process. The goal is to hang as many items as you reasonably can, because every item on the wall is an item no longer eating into a cupboard.

Don’t forget cabinet doors and sides

The inside of a cabinet door is one of the most underused surfaces in any kitchen. A slim over-the-door rack or a few adhesive hooks can hold cutting boards, pot lids, foil and wrap boxes, or cleaning supplies under the sink. The exposed end of a cabinet run can take hooks for aprons, towels, or a small spice rack.

Reclaim the Dead Space Inside Cabinets

Open most small-kitchen cupboards and you’ll find one or two fixed shelves with a tall gap of unused air above the plates and below the shelf above. That empty band is exactly where you double your storage — the same principle as adding a second hanging rod in a packed closet.

  • Under-shelf baskets slide onto an existing shelf and hang beneath it, instantly creating a second layer for mugs, napkins, or wraps in space that was previously just air.
  • Shelf risers or stacking shelves split a tall cabinet into two usable levels, so you can store glasses on top and short jars below without stacking precariously.
  • Tension rods are quietly one of the cleverest tools in a tiny kitchen. A simple tension pole fitted across a food cupboard can suspend a roll of paper towels, hold textiles, or — with a few hooks — hang light items so they’re always to hand. Stand one vertically in a cabinet and it becomes a divider for baking sheets and cutting boards.
  • Lazy Susans bring the contents of deep, awkward corner cabinets within reach, eliminating the “stuff lost at the back” problem.
  • Pull-out bins turn a deep shelf into a drawer you can actually see into — great for spices, snacks, or baking supplies that otherwise disappear.

One renter-friendly trick worth highlighting: a rolling cart or pull-out unit sized to fit a gap can hold an entire category — all your baking gear, or your complete spice collection — in a footprint you didn’t think was usable. Just make sure anything on wheels is secured or weighted at the bottom so it can’t tip, especially in a household with kids.

Make Drawers Work Harder

Some small kitchens have shockingly few drawers — sometimes just three for the entire room. When drawer space is that scarce, every inch has to be deliberate. A working parent packing school lunches five days a week genuinely needs a full drawer of food storage containers; someone who eats out most nights does not. Let your real routine decide what earns drawer space.

Practical drawer fixes

  • Use adjustable drawer dividers to give utensils, tools, and gadgets defined homes so they stop sliding into a tangled pile.
  • Store containers and lids together but separated — nest the containers and file the lids upright in a divider so they don’t avalanche.
  • File items vertically where you can. Standing food packets, dish towels, or even spice jars on their edge lets you see everything at a glance and fit far more in.
  • Reserve your best drawer — the one nearest where you cook — for the tools you touch every single day, not the ones you use once a month.

Aim for functionality over a magazine-perfect result. A drawer doesn’t need to look styled; it needs to let you find what you want in two seconds.

Borrow Counter Space You Didn’t Know You Had

Counter space is the rarest commodity in a tiny kitchen, and the frustrating thing is that two of your largest flat surfaces are usually off-limits during cooking. Your stovetop sits idle while you chop, and your sink is dead space the moment you’re not washing up.

You can borrow both temporarily:

  • Lay a large cutting board across the sink to create an instant prep surface, then lift it away when you need the basin again. Boards designed to span a sink make this a clean, stable setup.
  • Cover unused burners with a board or stove cover during prep to turn the cooktop into extra counter — just never with the burners on or hot.

These tricks don’t add permanent storage, but they relieve the counter congestion that makes a small kitchen feel impossible to work in, which is often the real day-to-day pain point.

Add Flexible Storage With a Pegboard

If you have a stretch of bare wall, a pegboard is one of the most adaptable solutions for a small kitchen. Made famous by chefs who hang their entire batterie de cuisine on the wall, it lets you arrange hooks, shelves, and holders exactly where you need them — and rearrange them as your needs change. Hang pots, pans, utensils, and even small baskets for odds and ends. Because the layout is fully customizable, a pegboard adapts to an awkward wall far better than fixed cabinetry ever could, and it keeps your most-used tools visible and grabbable.

The Bottom Line

A tiny kitchen rewards a clear order of operations. First, declutter so you’re only storing what you genuinely use — this alone often solves half the problem. Then go vertical, claiming walls, cabinet doors, and the empty air above your shelves with hooks, rails, under-shelf baskets, and tension rods. Finally, refine with drawer dividers, sink-and-stove prep tricks, and a pegboard for the tools you reach for constantly.

Start with the single cabinet or drawer that frustrates you most. Empty it, edit it, and add one well-chosen organizer to capture its wasted vertical space. That one visible win will show you how much capacity your kitchen had all along — and give you the momentum to do the rest.

How to Store Seasonal Clothes to Save Space

Twice a year, most of us run into the same problem: half the wardrobe is unwearable for the season, but it’s still taking up prime closet real estate. Wool sweaters crowd out sundresses in July, and bulky coats elbow shorts off the shelf in January. The fix isn’t a bigger closet — it’s a smarter system for getting off-season clothes out of the way without damaging them or losing track of what you own.

Done well, seasonal storage frees up surprising amounts of space, keeps your clothes in good shape, and makes the twice-yearly swap feel like a quick chore instead of a dreaded ordeal. Here’s exactly how to do it.

Start by storing less, not better

The biggest space-saving move happens before you buy a single bin. Every item you pack away is something you have to store, protect, and eventually unpack — so the off-season swap is the ideal moment to be honest about what’s earning its place.

A simple, reliable filter is the one-year rule: if you didn’t wear something during its entire last season, you almost certainly won’t miss it. This forces a real assessment of what you actually use versus what you keep “just in case.” Sort everything into keep, donate, and a small “maybe” pile, and resist the urge to store items purely out of guilt over what they cost.

If you find decisions hard to make in the moment, try the backward hanger trick during the season itself: turn all your hangers to face the wrong way, and flip each one forward only after you wear that item. By the end of the season, anything still backward is a clear candidate to let go. It removes the guesswork from “do I actually wear this?”

Clean everything before it goes into storage

This is the step people skip most often, and it’s the one that causes the most heartbreak months later. Storing clothes dirty is an open invitation to moths and other pests — they’re drawn to body oils, sweat, and food residue far more than to clean fabric. A sweater that looked fine when you folded it can come out in spring with holes or stains that have set permanently.

Before anything gets packed away:

  • Launder or dry-clean every item, even pieces you only wore once. Invisible oils and odors attract pests.
  • Check and empty all pockets — a forgotten receipt or candy can stain or draw insects.
  • Make sure everything is completely dry. Even slightly damp fabric trapped in a sealed container is a recipe for mildew.
  • Skip the starch and fabric softener residue where possible, since some finishes can yellow over long storage.

One important caveat: don’t store clothes in the plastic bags from the dry cleaner. Those bags trap moisture, prevent fabric from breathing, and can cause yellowing over time. Take garments out of the plastic before they go into long-term storage.

Choose containers that protect, then save space

It’s tempting to choose storage purely on how much it crams into a closet, but the priority order matters: protection first, space-saving second. A container that flattens your wardrobe to nothing is useless if it leaves your clothes musty or damaged.

Breathable bins and bags for most clothing

For the bulk of your folded items, opt for breathable storage — fabric bins, canvas containers, or plastic bins that aren’t fully airtight. Natural fibers like wool and cotton need a little airflow to stay fresh and avoid trapping humidity. Toss in a couple of cedar blocks or lavender sachets, both of which help deter moths naturally, and consider a dehumidifier pack to absorb stray moisture before you close the lid.

Garment bags for the pieces you hang

Not everything should be folded. Structured coats, blazers, delicate dresses, and anything prone to creasing do better on hangers. For these, use cotton garment bags rather than plastic — cotton lets the fabric breathe while still keeping dust off. Hang nicer pieces on wooden hangers inside their own bags so they keep their shape. A clever touch some organizers use: tape a small printed photo of the outfit to the outside of the bag so you instantly remember what’s inside without unzipping it.

Vacuum-sealed bags for the bulkiest items

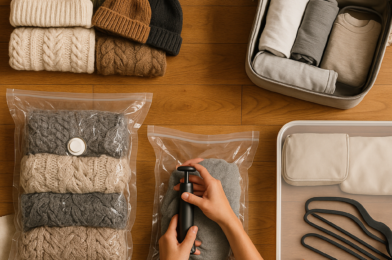
Vacuum-sealed bags are the heavy hitters for space savings, shrinking down comforters, puffy jackets, and thick synthetic items dramatically. But use them selectively. They work beautifully for down, polyester fill, and other resilient synthetics, which bounce back after being compressed. Be more cautious with natural fibers like wool, cashmere, and leather — prolonged hard compression can crush the fibers and leave permanent creasing. For those, a loosely packed breathable bin is the safer choice.

Put your storage in the right place

Where you stash your bins matters as much as what’s in them. The single most important rule: off-season clothes should live somewhere cool and dry. Heat and humidity are what cause mold, mildew, and that unmistakable musty smell, so avoid damp basements, hot attics, and garages that swing between extremes. A climate-controlled interior space is ideal.

Some of the best spots hide in plain sight:

  • Top closet shelves. The upper reaches of a closet are perfect for items you won’t need for months. Adding a single extra shelf up high can create a whole new storage zone you weren’t using.
  • Under the bed. Low-profile bins slide neatly under most beds and keep clothes accessible but out of sight.
  • A guest closet or spare-room closet. If you have one that’s underused, it’s prime off-season territory.
  • The bottom of your main closet, behind everyday items, for a bin or two you can reach without a step stool.

Whatever you choose, don’t overcrowd your everyday closet with so much stored clothing that it interferes with daily use. The goal is to make this season’s wardrobe easier to navigate, not to trade one cramped space for another.

Make the future swap effortless with smart labeling

The difference between a storage system you’ll actually maintain and one you’ll abandon usually comes down to labeling. When everything is clearly marked, the twice-yearly swap takes minutes; when it’s a guessing game of unmarked bins, you avoid it entirely.

Label clearly and on the side that faces out, not just the top — you want to read a bin without pulling it down from a high shelf. Useful labeling approaches include:

  1. By season and category: “Winter – Sweaters,” “Summer – Shorts & Tanks.” Specific beats vague every time.
  2. By person in a multi-person household, so swaps don’t turn into a sorting marathon.
  3. With a contents photo taped to the bin or garment bag for pieces you might forget you own.
  4. With a quick inventory note inside the lid if a bin holds a mix of items.

It also helps to treat the swap as a planned project rather than a spontaneous afternoon scramble. Many people find it less overwhelming to do it in stages — pulling out the incoming season’s clothes one day and packing away the outgoing ones a few days later. Setting yourself up with a clear plan and a calm mindset turns a dreaded chore into something genuinely manageable.

Common mistakes that quietly ruin stored clothes

Even a good system can be undone by a few avoidable errors. Watch for these:

  • Packing clothes dirty. The number-one cause of pest damage and set-in stains. Always clean first.
  • Using dry-cleaner plastic for storage. It traps moisture and yellows fabric. Switch to cotton garment bags.
  • Sealing damp items. Trapped humidity in a closed bin breeds mildew fast.
  • Over-compressing delicate fibers. Vacuum bags are great for synthetics, risky for wool and cashmere.
  • Storing in attics or garages. Temperature and humidity swings damage fabric over months.
  • Skipping moth deterrents. A few cedar blocks or lavender sachets are cheap insurance.
  • Storing things you’ll never wear again. Declutter first so you’re only protecting clothes worth keeping.

The bottom line

Saving space with seasonal clothing comes down to a simple sequence: pare down what you store, clean everything thoroughly, choose protective-but-breathable containers, stash them somewhere cool and dry, and label clearly so next season’s swap is painless. Reserve vacuum bags for sturdy synthetics, give natural fibers room to breathe, and keep your everyday closet uncluttered.

If you only do one thing differently this season, make it this: launder every item before it goes into a labeled, breathable bin on a high shelf or under the bed. That single habit protects your clothes, reclaims real estate, and sets up a system you’ll happily keep using for years.

How to Organize a Small Bedroom With Limited Closet Space

A small bedroom with a tiny closet can feel like a daily negotiation: where do the off-season sweaters go, why is the floor always covered in shoes, and how does a room this size generate so much clutter? The good news is that limited square footage isn’t actually the problem. The problem is almost always too much stuff competing for too little well-designed space. Once you fix both halves of that equation, even a cramped room with a single narrow closet can feel calm and functional.

This guide walks through the exact order I’d tackle it in—declutter first, then build storage upward and underneath, then make the closet itself work harder, and finally set up a rhythm so it stays that way. Follow it in sequence and you’ll get far better results than buying a pile of bins and hoping for the best.

Start by removing what shouldn’t be there

The single most effective thing you can do in a small bedroom costs nothing: take stuff out. Organizing clutter just rearranges your frustration. The goal is to return only what you actually use and genuinely want in the room.

The trick is to work in small, finishable sections so you don’t burn out or end up with a worse mess than you started with. Don’t dump your entire closet on the bed at 9 p.m.—that’s how people give up halfway through. Instead, pick one drawer, one shelf, or one section of hanging clothes and finish it completely before moving on.

A simple decluttering pass that works

  1. Clear the surfaces first. Nightstands, dressers, and windowsills are clutter magnets. Remove anything that doesn’t belong in a bedroom—dishes, paperwork, random electronics—and relocate it.
  2. Go category by category. Pull every item in one group (say, all your T-shirts) and handle them together. It’s much easier to make decisions when you can see you own fourteen of the same thing.
  3. Keep only what you use or love. If you haven’t worn it in a year and it doesn’t fit your life, it’s just taking up space you can’t afford.
  4. Question whether it even belongs in this room. Could blazers hang in an entry closet? Could rarely-worn shoes live by the front door or in the garage? Relocating whole categories elsewhere is one of the fastest ways to free up a small closet.

Decluttering before you organize isn’t optional busywork—it’s what makes every step that follows simpler and more effective. You can’t design good storage around an unknown quantity of belongings.

Build storage upward, not outward

In a small room, floor space is your scarcest resource, so your storage strategy should climb the walls instead of spreading across the floor. Vertical space is almost always underused.

Look at the empty real estate above your dressers, above the door, and in the gap between your top shelf and the ceiling. A few well-placed shelves can hold books, folded items, baskets, or decor that would otherwise eat into your nightstand and dresser tops.

  • Wall shelves above the dresser or bed create storage without consuming a single inch of floor.
  • An over-the-door organizer is ideal for shoes, accessories, scarves, or small items—it uses a surface that’s otherwise completely wasted. Hang one on the bedroom door or the closet door.
  • Hooks on the back of the door or on a free patch of wall hold bags, robes, tomorrow’s outfit, or a hat collection.
  • Baskets on a high shelf corral the lightweight, less-used things—spare bedding, off-season accessories—and look tidy doing it. Woven baskets keep an open shelf from feeling chaotic.

The principle to remember: every vertical surface is potential storage. Doors, the wall above furniture, and the air above your closet rod are all fair game.

Put the space under your bed to work

Under-bed storage is the secret weapon of the small bedroom, because it’s a large flat area you’re already paying for and probably ignoring. It’s the natural home for anything you don’t reach for daily.

This is the perfect spot for out-of-season clothing. Storing winter coats and sweaters under the bed during summer (and vice versa) effectively doubles your usable closet by removing half your wardrobe from competition. Flat under-bed bins or rolling drawers keep everything contained and dust-free.

One word of caution from experience: skip the vacuum-seal compression bags for clothes you care about. They save space, but garments come out badly wrinkled, and you’ll spend more time and money pressing them than the storage was worth. Stick to flat bins that let clothes lie naturally.

If your bed sits low to the ground, bed risers can buy you several extra inches of clearance—enough to fit proper storage boxes underneath.

Choose furniture that earns its footprint

When space is tight, every piece of furniture should do at least two jobs. A bed is just a bed; a bed with drawers is a dresser too. The smartest small-bedroom moves replace single-purpose items with double-duty ones.

Multi-tasking pieces worth considering

  • A small dresser as a nightstand. Instead of a tiny table that only holds a lamp, use a compact chest of drawers beside the bed. You get a surface and hidden storage in the same footprint.
  • A storage bench at the foot of the bed. It holds extra blankets or bulky items, gives you a place to sit while dressing, and tucks neatly against the bed frame.
  • A storage ottoman. Doubles as seating and a hidden bin for whatever doesn’t have a home yet.
  • A bed frame with built-in drawers. If you’re buying a new bed anyway, this is the highest-value storage upgrade in the room.

The mindset here is simple: when space is scarce, tuck storage into everything you can. You don’t need a separate piece for each function—you need pieces that combine functions.

Make a tiny closet hold more

A small closet rewards creativity. The goal is to find every usable inch—high, low, and side to side—and give each category of items a defined home so things stop turning into a jumbled pile.

Reclaim the height

Most closets waste vertical space. If you can move your clothes rod up a few inches, you’ll free up valuable room below for drawers or shelves. Add a shelf above the hanging area (or above the existing top shelf) for items you rarely touch. Down low, slide in open shelves or small drawers beneath shorter hanging garments like shirts and skirts—that dead space below them is prime storage.

Switch to slim hangers

This one small change makes a visible difference. Bulky plastic and wooden hangers crowd the rod; swapping to thin, non-slip velvet hangers lets you fit noticeably more clothing in the same width while keeping everything neat and aligned. It also stops shoulders from slipping off and creating that floor pile.

Give shoes a defined home

A shoe organizer—whether a hanging over-the-door style, a low shelf, or a rack on the closet floor—means each pair has a spot. When shoes have a designated home, you’re far less likely to kick them into a heap at the end of the day. Tidiness is mostly about reducing the friction of putting things away.

Free-fold to lighten the rod

If you have any spare room in your dresser, file-fold clothes (the KonMari method, where items stand upright on their edge rather than stacked flat). You’ll see everything at a glance, fit more per drawer, and can move some folded categories out of the closet to free up hanging space where it matters.

Keep it that way with a seasonal reset

Even the best-organized small bedroom drifts back toward clutter without a maintenance habit. The most practical rhythm for most people is a seasonal reset—roughly three to four times a year.

A reset is when you rotate your wardrobe: out-of-season clothes go into under-bed bins or a storage area like a closet shelf, basement, or garage, and the current season’s items come forward into easy reach. This single move keeps your closet from holding twice the clothing it should at any given time.

Pair the rotation with a quick decluttering pass. Because you’re already handling everything as you swap it, it’s the natural moment to pull out what you didn’t wear last season and let it go. A printable decluttering checklist or calendar can keep you honest if letting go is hard for you.

  • Swap in-season and off-season clothing between the closet and under-bed storage.
  • Cull anything you skipped over entirely last season.
  • Reset surfaces—clear the dresser top and nightstand back to essentials.
  • Refresh systems—wipe down shelves, empty the catch-all basket, and make sure every category still has a home.

The bottom line

A small bedroom with limited closet space isn’t a storage problem so much as a too-much-stuff problem dressed up as one. Declutter first so you know exactly what you’re working with, then climb the walls and use the floor beneath your bed, choose furniture that does double duty, and squeeze every inch out of the closet with raised rods, slim hangers, and a real home for your shoes. Finish by locking in a seasonal reset so the system maintains itself. Start with a single drawer or shelf this week—that small, finished win is what makes the rest of the room feel possible.