How to Establish a Monthly Deep Cleaning Routine

Most of us have a vague sense of “deep cleaning” as something we do in a panic before guests arrive, or in one exhausting weekend marathon that leaves us too sore to enjoy the results. The problem with that approach isn’t effort—it’s timing. Grime, dust, and grease build up gradually whether you notice them or not, and tackling them all at once turns an ordinary chore into a dreaded event.

A monthly deep cleaning routine solves this by spreading the heavier work across the calendar so nothing ever has the chance to become overwhelming. Your weekly cleaning keeps surfaces presentable; your monthly routine handles the things weekly cleaning misses—light fixtures, baseboards, the inside of the oven, the back corners of the refrigerator. Done consistently, it’s the difference between a home that looks clean and one that genuinely is clean. Here’s how to build a system you’ll actually keep.

Understand What Belongs in a Monthly Routine (and What Doesn’t)

The single most common mistake people make is dumping every cleaning task into one giant monthly list. That’s how you end up with a four-hour Saturday you keep postponing. The smarter approach is to sort tasks by how quickly they get dirty.

Think in three tiers:

  • Weekly tasks handle visible, fast-accumulating mess: dusting surfaces, vacuuming, cleaning mirrors and doors, scrubbing bathrooms, mopping kitchen and bathroom floors, changing sheets, and emptying trash cans.
  • Monthly tasks handle the slower buildup you tend to look past: dusting light fixtures, wiping down baseboards and walls, cleaning out and organizing drawers and cabinets, quick-cleaning and organizing the refrigerator and freezer, cleaning the oven, and wiping down the exterior of appliances.
  • Seasonal tasks handle the heavy, infrequent jobs: washing curtains, vacuuming mattresses and under furniture, cleaning windows inside and out, polishing wood furniture, and doing a full closet or pantry purge.

When you pull the seasonal jobs out of your monthly plan, the monthly list suddenly becomes manageable. If you find yourself dreading the routine, that’s usually a sign a seasonal task has crept into the wrong tier.

Choose a Schedule That Fits How You Actually Live

There’s no single correct way to time a monthly routine. The right structure is the one you’ll repeat without negotiating with yourself every time. Three formats work well for most households.

The one-day approach

Pick one day a month—say, the first Saturday—and knock out the entire monthly list in a single session. This suits people who like closure and have a free morning. Budget two to three hours and put on music or a podcast. The risk is that if you miss your day, the whole routine slips a month, so keep a backup date in mind.

The weekly rotation

Instead of one big day, assign different monthly tasks to each week. For example: week one for cleaning inside kitchen appliances and disinfecting garbage cans; week two for wiping wall smudges and tidying medicine cabinets; week three for a deeper sweep of an outdoor living space; week four for a rotating seasonal item. Months with a fifth week get a bonus seasonal task. This spreads the load into 20- to 30-minute chunks and is far more sustainable for busy schedules.

The room-by-room approach

If you think spatially rather than by task type, assign whole rooms to different days—kitchen one day, bedrooms another, bathrooms another. On each room’s day you do its deeper tasks all at once, like stripping sheets, vacuuming, and dusting surfaces in the bedrooms. This keeps you mentally focused on one space and makes it easy to see when you’re finished.

If you work long hours and come home drained, don’t try to launch the full routine at once. Start with five to ten minutes of focused work and add a single task each week. A small habit you keep beats an ambitious plan you abandon.

Build Your Personalized Monthly Checklist

A written checklist is what turns good intentions into a routine. Walk through your home room by room and note the tasks that don’t get touched in your weekly cleaning. Here’s a solid starting framework you can adapt:

  1. Kitchen: Clean the oven, wipe down the exteriors of appliances, quick-clean and organize the refrigerator and freezer, disinfect the garbage can, and clean out and organize at least one drawer or cabinet.
  2. Bathrooms: Wipe down and tidy medicine cabinets, throw out expired products, wash bath mats, and note any products running low so you can restock.
  3. Living areas and bedrooms: Dust light fixtures and ceiling fans, wipe baseboards, spot-clean smudges and fingerprints on walls and doors, and dust surfaces that get skipped weekly.
  4. Whole house: Wipe down switch plates and door handles, and address one organizing zone—a junk drawer, a linen shelf, an entryway basket.

Don’t try to cram every cabinet and closet into a single month. Rotate them. Organize the spice drawer this month, the bathroom vanity next month, and the linen closet the month after. Spreading organizing tasks out keeps each session short and prevents the half-finished-project feeling that derails so many cleaning days.

Work in the Right Order and With the Right Tools

Sequence matters more than people expect. Cleaning out of order means redoing work—dust settles on a floor you just mopped, or oven cleaner drips onto a counter you already wiped.

Top to bottom, dry to wet

Always start high and finish low. Dust light fixtures and ceiling fans first, then work down to baseboards, and save floors for last so everything that falls gets cleaned up at the end. Within a surface, do dry tasks (dusting, vacuuming) before wet ones (wiping, mopping), so you’re not pushing damp dust around.

Let products do the labor

Some tasks reward patience. Oven cleaner and other treatments work best when you apply them, walk away, and let them dwell while you handle other tasks. The same goes for soaking refrigerator drawers in soapy water or letting a degreaser sit on a stovetop. Build this dwell time into your plan: apply the oven cleaner first thing, then go dust and wipe baseboards while it works.

Keep a simple, gathered kit

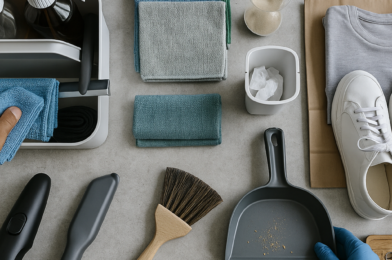
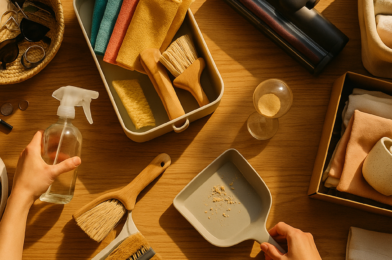
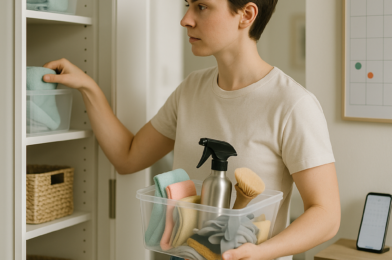
Assemble your supplies before you start so you’re not breaking momentum to hunt for a cloth. A practical kit includes microfiber cloths, an all-purpose cleaner, a glass cleaner, a degreaser for kitchen grease, an extendable duster for fixtures and fans, and a small brush for crevices. A homemade all-purpose mix works fine for most surfaces and keeps costs down.

Make the Routine Stick

The hardest part of any cleaning system isn’t the cleaning—it’s doing it again next month. A few deliberate habits make consistency far more likely.

  • Anchor it to a fixed date. Tie your deep clean to something you already remember, like the first weekend of the month or the day you pay a recurring bill. A floating “sometime this month” almost always becomes never.
  • Use a reusable checklist. Laminate a list or keep one in a notes app. Crossing off items is genuinely motivating, and it removes the mental effort of deciding what to do next.
  • Set a timer. Telling yourself a task will take a defined block of time lowers the resistance to starting. Most monthly tasks take far less time than the dread you’ve built up around them.
  • Don’t aim for perfect. A “good enough” clean you do every month beats a flawless clean you do twice a year. If you only get through three-quarters of the list, you’re still far ahead of where you’d be otherwise.
  • Recruit help. Assign rooms or specific tasks to other household members. A monthly deep clean is far less daunting when it’s shared.

If a particular task keeps getting skipped month after month, treat that as data. Either it’s genuinely seasonal and belongs on a less frequent rotation, or it needs to be broken into a smaller step. Adjust the routine to fit your life rather than forcing your life to fit the routine.

Common Mistakes That Sabotage the Routine

A few predictable pitfalls trip people up. Watch for these:

  • Overloading month one. Trying to deep clean the entire house the first month leads to burnout. Build up gradually.
  • Skipping the weekly foundation. A monthly deep clean only works if weekly maintenance handles the everyday mess. Without it, your monthly session turns into damage control instead of genuine deep cleaning.
  • Cleaning before decluttering. Wiping down a crowded cabinet without removing what doesn’t belong just rearranges the problem. Clear the clutter first, then clean the empty surface.
  • No system for finished tasks. Without a checklist, you lose track of what’s done and either repeat work or skip it entirely.

The Bottom Line

A monthly deep cleaning routine isn’t about doing more work—it’s about doing the right work at the right interval so your home never slides into chaos. Pull the heavy seasonal jobs out of your monthly list, choose a schedule format that matches how you actually live, and write down a checklist you can reuse every month. Start small if you need to: even one deep-clean task per week compounds into a noticeably cleaner home.

Your next step is simple. Grab a piece of paper, walk through your home, and jot down the things your weekly cleaning never touches. That list, anchored to a fixed date on your calendar, is the entire foundation of a routine you can keep for years.
A Step-by-Step Guide to Cleaning Your Refrigerator

Your refrigerator is the hardest-working appliance in your kitchen, running around the clock to keep your food safe. Yet it’s also the one most of us avoid cleaning until a mystery smell or a sticky shelf forces our hand. The truth is that a neglected fridge doesn’t just look unpleasant — it can harbor odors, mold along the door seals, and the slow creep of forgotten leftovers that quietly spoil behind the ketchup.

The good news? A proper refrigerator cleaning isn’t complicated, and once you’ve done it methodically, keeping it that way takes only minutes a week. This guide walks you through the entire process step by step, with the practical details that actually make the job faster, easier, and longer-lasting.

Why a clean fridge is worth the effort

Beyond the obvious appeal of opening a fresh, organized fridge, regular cleaning serves a real purpose. Spills that sit harden over time and become far harder to remove. Crumbs and drips collect in the rubber door gasket, where they can lead to lingering odors and even mold growth. And clutter — that back row of half-used jars — makes it easy to lose track of what you have, which means wasted food and wasted money.

A good rhythm is a light cleaning of both the fridge and freezer sections about once a month, plus a more thorough deep clean seasonally. The monthly habit prevents grime from building up in the first place, so the deep cleans never feel overwhelming.

Gather your supplies before you start

Pulling everything together first means you won’t be hunting for a sponge mid-job with the fridge door hanging open. You don’t need specialty products — most of what works best is already under your sink.

  • Dish soap and hot water — your primary cleaning solution for shelves, drawers, and interior surfaces.
  • Baking soda — for making a gentle paste on stubborn stains, and for deodorizing afterward.
  • White vinegar — mixed equal parts with water, it’s a reliable, food-safe option for wiping down surfaces if you prefer not to use disinfecting wipes.
  • Two clean cloths or sponges — one for washing, one for rinsing or applying a vinegar solution.
  • Clean, dry towels — drying thoroughly is the step most people skip, and it matters.
  • A cooler or a sink filled with ice — to hold perishables while you work.
  • A soft-bristled brush or old toothbrush — for getting into gasket folds and tight corners.

A quick tip worth its weight: clean your fridge right before a grocery run, when it’s at its emptiest. You’ll have less food to manage and fewer items to find a temporary home for.

Empty the fridge and protect your food

Start by taking everything out. As you do, this is your first natural chance to declutter — check expiration dates and toss anything past its prime, plus those forgotten condiments and leftovers you’ll honestly never eat. Be ruthless here; an empty fridge is much easier to clean and to reorganize sensibly later.

Perishables are the concern while the fridge sits open. To keep them safe, move them into a cooler or pile them into a sink filled with ice. If your space is limited, a smart approach is to work in sections rather than emptying everything at once — clean one shelf, return its contents, then move to the next. This keeps cold food cold and stops you from feeling like you’ve made the whole job harder than it needs to be.

A useful trick for working fast

If you’re cleaning a single area at a time, set a short timer — around five minutes per section — and remove just the food from that zone. Working quickly and in chunks limits how long anything stays out of temperature and keeps the project feeling manageable instead of like an all-day ordeal.

Wash the removable shelves and drawers

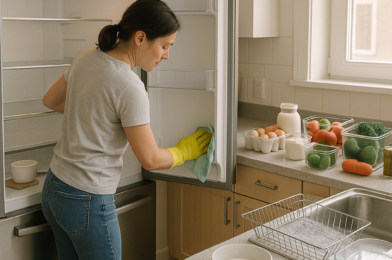
Take out the shelves, drawers, and any removable bins. These are far easier to clean at the sink than inside the cramped fridge cavity. Wash them with hot, soapy water, just as you would dishes, then rinse and set them aside to dry completely.

One important caution: let glass shelves come to room temperature before submerging them in hot water. Glass that’s still cold from the fridge can crack from sudden temperature change. Give them a few minutes on the counter first. While the parts dry, you’ll have clear, open access to the interior — which is exactly when the inside cleaning goes quickly.

Clean the interior — including the spots everyone forgets

With the fridge empty and the shelves out, wipe down all the interior surfaces. Dunk your sponge or cloth in the soapy water and wring it out well — you want it damp, not dripping. Excess water pooling in the bottom of the fridge just creates more drying work and can seep into places it shouldn’t.

Work from the top down so any drips fall onto surfaces you haven’t cleaned yet. Wipe the walls, the ceiling of the compartment, and the floor of the cavity.

Tackling stubborn, dried-on stains

For hardened spills or stains that won’t budge with a simple wipe, make a paste of baking soda and a little water. Apply it directly to the trouble spot, let it sit for several minutes to soften the mess, then wipe it away. This gentle abrasive lifts dried gunk without scratching the surface. Once the stain is gone, go over the area again with a clean, damp cloth to remove any baking soda residue.

Don’t skip the rubber gasket

The rubber door seal — the gasket — is the single most overlooked part of a fridge, and it’s a genuine magnet for crumbs, drips, and sticky residue. Left alone, that buildup leads to odors and mold, and a grimy gasket can even compromise how well the door seals. Wipe it down with a dishcloth dipped in warm water, working into the folds with your fingertip or a soft brush. Take your time here; it makes a bigger difference to freshness than you’d expect.

Rinse and dry thoroughly

After washing — and especially if you’ve used a soap or baking soda paste — go over the interior with a cloth dampened in plain clean water to remove any film. If you prefer a sanitizing pass, wipe surfaces with an equal-parts white vinegar and water solution. Then dry everything completely with a clean towel. A moisture-free interior discourages mold and keeps the fridge smelling fresh. The goal is squeaky clean and bone dry.

Refill smartly and keep it that way

Putting everything back is your best opportunity to set up systems that prevent the next big mess. As you return items, check dates one more time and group similar things together so nothing disappears into a back corner again.

  1. Designate zones. Give condiments, dairy, produce, leftovers, and drinks their own consistent spots. When everything has a home, you can see what you have at a glance and waste far less food.
  2. Use clear bins. A few open containers corral loose packets, snacks, or jars and let you pull out a whole category at once — which also makes future cleaning a five-second job.
  3. Keep food covered. Store leftovers in sealed containers and wrap things tightly. This single habit dramatically reduces spills and odors between cleanings.
  4. Put a “use first” zone up front. Reserve one spot for items nearing their expiration so they get eaten instead of forgotten.
  5. Add a box of baking soda. Tucked in the back, it helps absorb odors between cleanings.

The habit that saves you the most work

Wipe up spills the moment they happen. A drip caught while it’s fresh takes one swipe; the same drip discovered a week later is a hardened, scrub-worthy stain. This tiny in-the-moment habit is what keeps a fridge from ever reaching the point where it needs an exhausting overhaul.

The bottom line

Cleaning your refrigerator comes down to a simple sequence: empty it, wash the removable shelves and drawers in hot soapy water, wipe the interior from top to bottom, pay special attention to the gasket, dry everything well, and refill thoughtfully while tossing anything past its prime. Done as a deep clean a few times a year and topped up with a quick monthly once-over, it never becomes a dreaded chore.

If your fridge is overdue, don’t wait for the perfect free afternoon. Pick the section that bothers you most — usually a sticky shelf or a crowded door — and clean just that today. A clean fridge starts with a single shelf, and the momentum tends to carry you the rest of the way.

How to Clean Your Home When You Have Pets

Anyone who shares their home with a dog, cat, or other furry companion knows the trade-off: unconditional love in exchange for a never-ending battle with fur, dander, muddy paw prints, and the occasional mystery puddle. Pets don’t have to mean a permanently grubby house, but they do change the math of cleaning. The strategies that work in a pet-free home simply aren’t enough when there’s a shedding Labrador or a counter-cruising cat in the picture.

The good news is that keeping a clean home with pets is less about cleaning harder and more about cleaning smarter. With the right tools, a few well-placed systems, and a routine that intercepts mess before it sets in, you can have both a tidy home and a happy animal. Here’s how to do it without losing your weekends to a vacuum cleaner.

Build a Pet-Smart Cleaning Toolkit

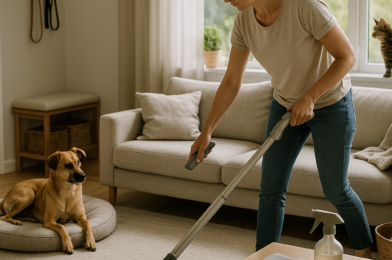
Before you tackle a single pet mess, set yourself up with the right gear. The single most important investment is a vacuum with a HEPA filter. Pet hair is only half the problem—the dander and microscopic allergens that come with it are what linger in the air and settle into soft surfaces. A HEPA filter actually captures those fine particles instead of recirculating them, which makes a noticeable difference in air quality, especially if anyone in the household has allergies.

Beyond the vacuum, the most valuable item in your arsenal is an enzyme-based cleaner. Unlike standard all-purpose sprays, enzyme cleaners break down the proteins in urine, vomit, and other organic messes, which is what eliminates odor rather than just masking it. This matters enormously with pets, because a smell you can’t detect is often still very obvious to your animal—and a spot that still smells like a bathroom invites repeat accidents.

A few other items worth keeping on hand:

  • Foam shaving cream (the plain foam type, not gel) is a surprisingly effective treatment for set-in stains like vomit or pet urine on rugs. Spray it on, let it foam for a minute or so, then wipe away with warm water.
  • White vinegar and baking soda—a pet-safe, budget-friendly duo for general cleaning and deodorizing. Baking soda sprinkled on carpet before vacuuming helps neutralize lingering odors.
  • Cleansing wipes or paper towels with a spray solution for quick surface wipe-downs.
  • A rubber squeegee or damp rubber glove, which drags embedded hair out of upholstery and carpet far better than a vacuum alone.
  • Baby wipes for cleaning hard-to-reach nooks, baseboards, and the grimy corners where fur collects.

Win the War on Pet Hair and Dander

Fur is the most relentless part of living with pets, and the only real answer is frequency. Vacuuming once a week is a recipe for tumbleweeds of hair under the furniture. Aim to vacuum high-traffic and high-shed areas several times a week, focusing on the spots where your pet sleeps, lounges, and enters the home.

Get hair off soft surfaces

Vacuums struggle with hair woven into upholstery and bedding. This is where a rubber squeegee or a damp rubber glove earns its keep—run it across the couch cushions and you’ll be amazed at how much fur balls up and lifts away. For washable items, toss pet beds, blankets, and slipcovers in the laundry regularly using a pet-safe detergent, and run a quick vacuum or lint roll over them between washes.

Manage dander in the air

Dander is lighter than hair and floats, settling on surfaces you might not think to clean. Wiping down baseboards, shelves, and the tops of door frames with a slightly damp cloth catches dander before it recirculates. Changing your HVAC filter more often than you would in a pet-free home also helps keep airborne allergens down.

Tackle Accidents and Stains the Right Way

When a pet has an accident, speed is everything. The longer a mess sits, the deeper it penetrates into carpet padding, grout, or upholstery fibers, and the harder it becomes to fully remove both the stain and the odor.

Here’s a reliable sequence for fresh messes:

  1. Blot, don’t rub. Press a clean cloth or paper towel into the spot to absorb as much liquid as possible. Rubbing only spreads the mess and pushes it deeper.
  2. Apply an enzyme cleaner generously. Saturate the area—not just the visible stain, but slightly beyond it—and let it sit for the time recommended on the label so the enzymes can break down the organic material.
  3. Blot again and let it dry. Avoid the temptation to scrub. For tougher set-in stains, foam shaving cream can be a powerful backup before or after the enzyme treatment.
  4. Confirm the odor is gone. If you can still smell anything once it dries, repeat the process. A lingering scent is an open invitation for your pet to return to the same spot.

A word of caution: avoid ammonia-based cleaners on pet urine. Urine contains ammonia, so cleaning with it can actually signal to your pet that the spot is an acceptable place to go again.

Keep Kitchens and Counters Genuinely Clean

This section is especially important for cat owners. Cats are notorious counter-walkers, and the same paws that step in a litter box can end up on the surfaces where you prepare and eat food. Even if you’ve trained your cat to stay off—or you simply allow it—it’s worth assuming that food-prep surfaces have been visited and treating them accordingly.

The simple habit that solves this: wipe counters before and after you put food on them. A cleansing wipe or a paper towel with cleaning solution takes seconds and removes invisible tracks of litter sand and bacteria. A few more kitchen practices that pay off:

  • Store cutting boards, knives, and other prep tools inside closed cupboards and drawers rather than leaving them out on the counter where paws can reach.
  • Wash food and water bowls daily, just as you’d wash your own dishes—bowls develop a slimy bacterial film faster than most people expect.
  • Keep pet food in sealed containers to avoid attracting pests and to contain the crumbs and dust that come with kibble.

Set Up Systems That Prevent Mess Before It Starts

The most effective pet cleaning happens before any cleaning is needed at all. Smart organization and a few strategic barriers dramatically cut down on how much mess actually reaches your floors and furniture.

Create a dedicated pet station

Designate a single cabinet, drawer, or bin for everything pet-related: food, treats, brushes, leashes, towels, and cleaning supplies for accidents. Containing it all in one place means you’re not chasing supplies around the house, and it keeps the visual clutter of pet gear from spreading. A pet station near your pet’s main living area makes daily maintenance frictionless—when the cleanup tools are right there, you actually use them.

Intercept dirt at the door

Most of the mud and outdoor debris in your home arrives on paws. A sturdy mat at every entrance, paired with a towel kept by the door for wiping paws after walks, stops a remarkable amount of grime from ever reaching your living room. For heavy shedders, brushing your pet outside or near the door—rather than in the middle of the living room—keeps loose fur from drifting through the house.

Keep Your Home Cleaning Pet-Safe

A clean home shouldn’t come at the cost of your pet’s health. Many common household cleaners contain chemicals that are harmful if a curious animal licks a freshly mopped floor or chews a wipe. Building pet safety into your routine is non-negotiable.

  • Store all cleaning products well out of reach—in a high cabinet or behind a childproof latch. This includes the enzyme cleaners and stain treatments you’ll be using regularly.
  • Lean on gentler options like vinegar and baking soda for everyday cleaning where you can. They’re effective deodorizers and far less worrying around animals.
  • Let treated surfaces dry fully before letting pets back in. Whether you’re mopping floors or spraying a counter, give the area time to dry so there’s nothing wet for paws or tongues to pick up.
  • Consider steam cleaning for deep cleans. Steam sanitizes carpets and upholstery with high heat instead of chemicals, which makes it a great pet-friendly choice for periodic deep cleaning.

If your pet ever ingests a cleaning product or shows signs of illness after exposure, contact your veterinarian or an animal poison control line right away. When choosing new products, it’s always worth a quick check of the label and, if you’re unsure, a conversation with your vet about what’s safe to use around your specific animal.

The Bottom Line

Cleaning a home with pets is a game of consistency, not heroics. The households that stay clean aren’t the ones doing marathon scrub-downs—they’re the ones with a HEPA vacuum running a few times a week, an enzyme cleaner ready for instant accident response, a pet station keeping supplies organized, and a door routine that stops dirt before it spreads. Start with the two highest-impact moves: invest in a proper vacuum and keep an enzyme cleaner within arm’s reach. Build the rest of these habits in gradually, and you’ll find the daily upkeep shrinks until a clean, pet-friendly home feels effortless.

A Beginner’s Guide to the 15-Minute Tidy-Up Habit

If you’ve ever looked around your home and felt that familiar wave of overwhelm — the kind that makes you want to close the door and pretend the clutter doesn’t exist — you’re not alone. The good news is that getting a handle on your space doesn’t require a free weekend, a label maker, or a Pinterest-worthy aesthetic. It just requires fifteen minutes and a willingness to start small.

The 15-minute tidy-up habit is exactly what it sounds like: a short, focused burst of decluttering that you repeat regularly. It’s not glamorous, but it’s effective precisely because it’s small. In this guide, I’ll walk you through how the habit works, why it sticks when bigger efforts fail, and how to build it into your day without it feeling like another chore on an endless list.

Why Fifteen Minutes Beats a Marathon Cleanout

Most of us approach decluttering the wrong way. We wait until the mess feels unbearable, then block off an entire Saturday to “deal with it all.” By hour two, we’re exhausted, surrounded by half-sorted piles, and more discouraged than when we started. That kind of all-or-nothing effort rarely sustains itself.

The 15-minute approach flips the logic. Instead of one heroic push, you make tiny, consistent progress. A timer creates a clear finish line, which makes the task feel manageable rather than open-ended. You know that no matter what, you’re done in fifteen minutes — so it’s easy to say yes to starting.

There’s an important truth underneath all this: decluttering is never truly “finished.” As long as you’re living, eating, buying, and bringing things into your home, clutter will accumulate. That’s not a personal failing — it’s just physics. A short daily habit accepts this reality instead of fighting it, which is exactly why it lasts.

How to Run a 15-Minute Tidy-Up Session

The mechanics are simple, but a few specific choices make the difference between spinning your wheels and seeing real results.

  1. Set a timer for 15 minutes. Use your phone, an oven timer, whatever. The hard stop matters as much as the start.
  2. Pick one small zone. Not a room — a zone. A single drawer, one shelf, the kitchen counter, the entryway table. The smaller, the better when you’re starting out.
  3. Clear the field first. Don’t dump the entire drawer onto the floor. Instead, do a quick “micro purge” — scan the area and pull out the obvious trash, duplicates, and things that clearly don’t belong. You’re skimming the easy wins before you dig into the harder decisions.
  4. Then organize what’s left. If you have time after the purge, pull out the remaining items and tidy them into place. Often the purge alone makes the space look dramatically better.
  5. Stop when the timer goes off. Even mid-task. Finishing on time trains your brain that this is sustainable, not punishing.

The magic question that speeds up decisions

When you’re holding an item and feeling stuck, ask yourself a simple question: “Do I actually use this, or am I just keeping it out of guilt or ‘just in case’?” Most clutter survives because we never pause to question it. Saying the question out loud forces a quick, honest answer so you can keep moving instead of agonizing over every spatula and stray cable.

Aim for Done, Not Perfect

This is the rule I wish someone had hammered into me years ago. Perfectionism is the enemy of progress. It’s incredibly easy to get sidetracked trying to make a drawer look magazine-ready — buying matching bins, color-coding, lining up everything just so. But that instinct slows you to a crawl and burns through your fifteen minutes before you’ve made any real dent.

Function and follow-through matter far more than aesthetics. A drawer that closes easily and holds only things you use is a win, even if the contents aren’t arranged in a pretty grid. You can always refine later. For now, your only goal is to make the space work better than it did before you started.

Here’s a practical mindset shift: think of each session as “good enough for today.” Tomorrow’s session can build on it. The habit is the asset, not any single perfect result.

Stay in One Zone (and Resist the Bounce)

The single biggest mistake beginners make is bouncing. You start in the bedroom, find a coffee mug that belongs in the kitchen, carry it to the kitchen, notice the counter is messy, start wiping it down, spot a bill that needs filing, head to the office… and twenty minutes later you’ve touched five rooms and finished none of them.

This scattered approach is how clutter creeps right back in. Pick one zone, commit to it for the full fifteen minutes, and let that be your win for the day. If you find an item that belongs elsewhere, put it in a small “relocate” pile or basket near you and deal with it at the very end — don’t leave the zone.

Good first zones for beginners

Some areas give you a satisfying, visible payoff quickly, which helps the habit take root. Try starting with:

  • A junk drawer — quick wins from tossing dead pens, expired coupons, and mystery keys.
  • One kitchen cabinet — the kitchen is one of the most cluttered, high-traffic spots in most homes, so progress here is felt immediately.
  • The entryway or drop zone — clearing the spot where shoes, mail, and bags pile up sets a calmer tone the moment you walk in.
  • The bathroom counter or medicine cabinet — small footprint, lots of expired or unused products to clear.
  • Your nightstand — a tiny, personal zone that makes your bedroom feel instantly more restful.

Turning Fifteen Minutes Into a Habit That Sticks

A single tidy-up session is helpful. A daily one transforms your home over weeks and months. The challenge is consistency, and the secret to consistency is making the habit nearly automatic.

Anchor it to something you already do

The easiest way to remember a new habit is to attach it to an existing one. Run your 15-minute tidy-up right after your morning coffee, while dinner simmers, or during a commercial break in your evening show. When the cue is something you already do every day, you don’t have to rely on willpower or memory.

Layer in tiny “maintenance” habits

Beyond the focused session, a handful of micro-habits keep clutter from rebuilding between tidy-ups. These take seconds, not minutes:

  • Put dirty clothes straight in the laundry bin instead of draping them over a chair or leaving them in a pile.
  • Make your bed every morning — it’s a small act that makes the whole bedroom feel orderly and gives you an early win for the day.
  • Do a quick “closing shift” on the kitchen each night: clear the counter, run the dishwasher, reset the space for tomorrow.
  • Deal with mail the day it arrives — recycle the junk immediately so paper never accumulates.

One reader-friendly tip on laundry: if you have a smaller washer, running a few loads across the week rather than saving everything for one giant weekend session keeps the laundry pile from ever becoming a clutter source in the first place. It frees up your weekend too.

Have a plan for the “out” pile

Decluttering only works if the discarded items actually leave your home. Keep a donation box in a closet or your trunk, and the moment it’s full, run it to a thrift store or donation center — ideally within a day or two so it doesn’t become its own pile of clutter.

Stacking Sessions Without Burning Out

Once the daily habit feels natural, you might be tempted to do more. That’s fine — but be strategic. Rather than randomly tackling whatever feels worst, work through your home in stages, hitting the most cluttered, high-impact areas first. Kitchen cabinets and entryways tend to deliver the most noticeable relief.

If you like structure, you can loosely map zones across the week — counters one day, a closet the next, the bathroom after that — so you eventually circle the whole home. Just keep your expectations realistic. Most of us lead busy lives full of interruptions, and the point of this habit is to fit into that reality, not to demand a perfect schedule. Breaking the work into small weekly targets is far more sustainable than trying to overhaul everything in a single month.

The Bottom Line

The 15-minute tidy-up habit works because it asks for so little and delivers so much over time. Set a timer, pick one small zone, clear the easy clutter first, and stop when the bell rings — aiming for done, not perfect. Anchor it to a daily routine, layer in a few seconds-long maintenance habits, and get your donations out the door promptly.

Your next step is simple: pick one zone right now — a single drawer or your nightstand — set a timer, and go. Fifteen minutes from now you’ll have your first win, and that’s all it takes to start building a home that stays manageable for the long haul.

How to Keep Your Bathroom Clean With a 10-Minute Routine

The bathroom is one of the hardest-working rooms in your home, and it shows. Toothpaste flecks on the mirror, water spots on the faucet, a damp towel draped over the door — it doesn’t take long for things to slide from “fine” to “I don’t want anyone to see this.” The good news? Keeping a bathroom clean doesn’t require a Saturday afternoon and a bucket of supplies. It requires consistency, and consistency is built on routines short enough that you’ll actually do them.

This is the case for a 10-minute bathroom routine: a tight, repeatable sequence that handles the daily grime before it turns into a weekend project. Done a few times a week, it keeps your bathroom in a permanent state of “good enough for guests” without ever feeling like a chore. Here’s exactly how to build it and run it.

Why 10 minutes beats a once-a-week deep clean

Most people treat bathroom cleaning as a single, dreaded event. You let it go for a week (or three), then spend an hour scrubbing built-up soap scum, hard-water deposits, and dust. The problem isn’t the cleaning itself — it’s the buildup. Grime that’s been sitting for days is bonded to the surface and takes real effort to remove.

A short, frequent routine flips that math. When you wipe a sink that was wiped two days ago, there’s almost nothing to remove. The cleaning professionals at Molly Maid make this exact point: breaking chores into small, manageable bursts focused on high-traffic areas keeps the whole home tidy with minimal effort, instead of facing one overwhelming weekly push. The bathroom is the perfect candidate because the same five or six surfaces collect mess every single day.

The goal of this routine isn’t a sterile, deep-cleaned space. It’s maintenance — keeping the room consistently presentable so that your occasional deep clean becomes faster and rarer.

Set up so the routine takes 10 minutes, not 25

The single biggest time-killer is hunting for supplies. If you have to walk to another room for a spray bottle, dig under the sink for a cloth, and find the floor brush, you’ve blown half your window before you’ve cleaned anything. Speed comes from setup.

Keep a minimal kit inside the bathroom

Store a tiny cleaning caddy in the bathroom itself — under the sink or in a cabinet. A Lazy Susan, as suggested by organizers at Bath Fitter, makes grabbing what you need effortless because everything spins to the front. You don’t need a dozen products. You need a small, reliable set:

  • An all-purpose spray cleaner. A mild universal cleaner can handle sinks, counters, and faucets — and gentle formulas are safe on most surfaces, including wood, marble, and laminate, so you don’t need a separate product per material.
  • A glass cleaner for the mirror (and faucets, which shine up nicely with it).
  • Two microfiber or dish cloths — one for wet wiping, one for drying and polishing.
  • A toilet bowl cleaner for the days you include the toilet.
  • A small handheld broom or a flat microfiber mop kept nearby for the floor.

Hang a trash bag before you start

One trick from the team at Just Bee that genuinely speeds things up: hang a small plastic bag on the door handle at the start. As you go, drop used paper towels, empty bottles, hair, and bathroom trash straight into it. When you’re done, you tie it off and toss it — no doubling back to empty a bin or carry handfuls of garbage out.

The 10-minute routine, step by step

Here’s the sequence I use. The order matters: you start the one task that needs to soak, then work top to bottom and clean-to-dirty so you never re-contaminate a surface you’ve already done. The floor goes last because that’s where everything falls.

  1. Minute 0 — Apply toilet cleaner and walk away. Squirt bowl cleaner under the rim and let it sit while you do everything else. Anything that needs to soak should go first so the chemistry works while you’re busy elsewhere.
  2. Minutes 1–3 — Clear and put away. Before wiping anything, reset the surfaces. Put the toothpaste back in the drawer, the hairbrush in its spot, the stray makeup in the bin. You can’t clean a counter buried in clutter, and a tidy surface is half the visual battle.
  3. Minutes 3–5 — Sink, counter, and faucet. Spray your all-purpose cleaner over the sink basin, the countertop, and the faucet, then wipe with your damp cloth. The faucet collects water spots and toothpaste splatter, so give it real attention. Dry the faucet with your second cloth to leave it streak-free.
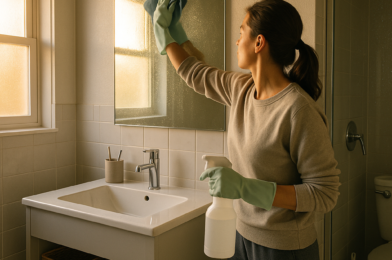
  4. Minutes 5–6 — Mirror. Bathroom mirrors are streak magnets — water spray, toothpaste, hairspray. Mist with glass cleaner and wipe in a tight S-pattern with a dry cloth. Even on your busiest day, 30 seconds here makes the whole room read as “clean.”
  5. Minutes 6–8 — Toilet. Come back to the bowl you started. Scrub under the rim and around the waterline with the brush, then flush. Wipe the seat, lid, and the top of the tank with a separate cloth or a disposable wipe — never the cloth you used on the sink.
  6. Minutes 8–9 — Towels and final reset. Hang damp towels so they actually dry, straighten the hand towel, and refold or replace as needed. A neatly hung towel does an outsized amount of work for how the room feels.
  7. Minutes 9–10 — Floor. Sweep or run the flat mop over the floor, focusing on the strip in front of the sink and toilet where dust and hair gather. Tie off your trash bag, and you’re done.

That’s the full version. On a rushed day, drop the toilet and floor and just do the put-away, sink, faucet, and mirror — about four minutes that keep the room looking maintained.

Build small habits that stretch the time between cleanings

The routine is the backbone, but a few in-the-moment habits dramatically reduce how dirty the bathroom gets in the first place. These take seconds and mean your 10-minute routine has less to fight against.

Use a daily shower spray

Soap scum and hard-water buildup on shower walls are the most labor-intensive thing in a bathroom to remove once they’ve set. A daily shower spray — the kind you mist on the walls right after bathing — keeps residue from bonding. As designer Emily Henderson notes, it won’t replace a real deep clean, but it meaningfully reduces the scrubbing you’ll face later. Products like Wet & Forget can be sprayed in the shower to cut down on heavy scrubbing entirely.

Wipe as you go

Keep a small stack of cloths or wipes within reach and clean the second you notice a mess — the splatter when you spit out toothpaste, the water ring under a bottle. A five-second wipe in the moment is a wipe you don’t have to do later.

Declutter the surfaces permanently

The fewer items sitting out, the faster every clean goes. Go through your makeup, grooming tools, lotions, and hair products and be honest about what you actually use — the team at Bath Fitter recommends starting any bathroom overhaul with decluttering. Move the daily essentials into a drawer or a small caddy and clear the rest off the counter. A near-empty surface takes ten seconds to wipe; a crowded one takes two minutes of moving bottles.

Common mistakes that quietly sabotage the routine

Even a good system fails if you fall into a few predictable traps. Watch for these:

  • Using one cloth for everything. The cloth that wiped the toilet should never touch the sink. Keep your toilet cloth visually distinct (a different color works) or use disposables for that step.
  • Skipping the dry step on the faucet and mirror. Wet cleaner left to air-dry leaves streaks and spots — the exact thing you were trying to remove. Always finish chrome and glass with a dry pass.
  • Cleaning bottom to top. If you mop the floor first and then wipe the counter, you’ll knock crumbs and spray onto a freshly cleaned floor. Top to bottom, every time.
  • Storing supplies far away. If the kit lives in the kitchen, the routine quietly dies. Keep it in the bathroom.
  • Trying to deep clean during your 10 minutes. This routine is maintenance. Don’t get sucked into scrubbing grout or descaling the showerhead — note it for a separate deep-clean session and stay on schedule.

The bottom line

A clean bathroom isn’t about heroic weekend effort — it’s about a short routine you can repeat without dreading it. Stock a small caddy inside the room, hang a trash bag, start the toilet soaking, and work top to bottom through the sink, faucet, mirror, toilet, towels, and floor. Layer in a daily shower spray and a clutter-free counter, and the buildup that makes deep cleans miserable never gets a chance to form.

Start tonight: spend two minutes assembling your kit and putting it where you’ll actually reach for it. Then run the routine three times this week. By the weekend, you’ll notice there’s almost nothing left to deep clean — which is the whole point.

How to Deep Clean Your Kitchen Step by Step

There’s a particular kind of dread that settles in when you open a cabinet and a stray lid clatters out, or you pull the toaster forward to find a small civilization of crumbs living behind it. A kitchen gets used harder than any other room in the house, which means grease, dust, and clutter accumulate faster than we notice. A proper deep clean isn’t just about appearances — it resets the space so your daily cooking feels easier and your surfaces actually stay clean longer.

This guide walks you through deep cleaning your kitchen the way someone who does it regularly would: working in a deliberate order, decluttering as you go, and tackling the spots most people skip. Set aside a couple of hours, put on a good playlist, and work through it section by section. You don’t have to finish it all in one sitting, but you’ll get the best result if you follow the sequence.

Gather your supplies and set the stage

The fastest way to derail a deep clean is to stop halfway through to hunt for a sponge. Before you wipe a single surface, pull together everything you’ll need so you can move without interruption.

A sink caddy is genuinely worth having here — it keeps your brushes, sponges, and scrubbers in one place and prevents them from cluttering the counter or the edge of the sink. Beyond that, assemble:

  • Microfiber cloths (several — you’ll go through more than you expect)
  • Warm water and dish soap, your everyday workhorses for most surfaces
  • A general-purpose or degreasing spray for cabinet fronts and the range
  • A non-scratch scrub sponge and a soft-bristle brush for grout and corners
  • A vacuum with a crevice attachment, plus a mop and bucket
  • Two boxes or bins: one for donate, one for toss

Clear the counters of everything portable and give yourself an empty staging surface — your kitchen table or a cleared section of counter — where you can set items down as you pull them out. Open a window if you can. Working top to bottom and clean-to-dirty is the core principle of an efficient deep clean, so let everything that follows respect that order.

Empty, declutter, and clean the cabinets and pantry

This is where the real difference happens, and it’s the step most people are tempted to skip. The instinct is to wipe around what’s already there. Resist it. Pull everything out. When a shelf is empty, you can see exactly what you own, clean every inch, and put things back with fresh eyes.

Sort as you empty

As items come out, make quick decisions. Toss anything expired — check pantry staples, spices that have lost their smell, and forgotten cans at the back. Set aside duplicates and single-use gadgets you never reach for: the garlic press, the apple corer, the lemon juicer, the third spatula. Be a little ruthless. The less you keep, the easier the kitchen is to maintain afterward. Chipped mugs, lidless containers, and that drawer of orphaned Tupperware bottoms can go.

Clean the empty surfaces

Once a cabinet or shelf is bare, knock out the loose crumbs and dust first — a cloth or the vacuum’s crevice tool works well. Then wipe down with a cloth dipped in warm, soapy water, getting into corners and along the front edges where grease tends to build up. Dry with a clean microfiber cloth so you don’t leave streaks or trap moisture. If you use shelf liners and they’re worn or grimy, now is the moment to replace them.

When you put things back, group like with like — baking supplies together, everyday dishes within easy reach, rarely used items up high or in the back. This small bit of intention is what keeps the space organized for months, not days.

Tackle the appliances

Appliances hold the most stubborn grime in the kitchen, so give them dedicated attention. Work from the inside out, and start the ones that need soak time first so you’re not standing around waiting.

Refrigerator

Before you begin, switch the fridge to vacation mode or unplug it if you’re doing a thorough job. Pull out everything, tossing expired condiments and anything fuzzy. Remove the shelves and drawers and wash them in warm soapy water — let glass shelves come to room temperature before hitting them with hot water so they don’t crack. Wipe the interior walls, dry everything, and reload. Don’t forget the rubber door gaskets, where crumbs and mildew hide, and the coils or vent at the back or bottom if you can reach them.

Oven and stovetop

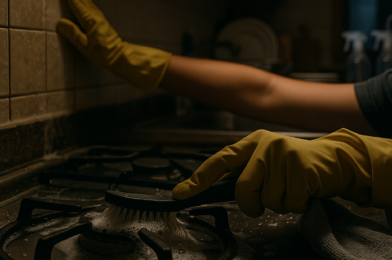
For the oven interior, you don’t need harsh chemicals or the self-cleaning cycle. A simple, effective approach: spray the inside with a solution of about two cups of water mixed with a couple tablespoons of dish soap, let it sit for around five minutes, then work it with a wet pumice stone. The combination of mild abrasion and degreasing handles baked-on residue well. For the inside of the oven door, a damp scrubbing pad cuts through the filmy buildup. Vacuum crumbs out of any warming drawer before replacing the racks.

On the stovetop, lift off grates and burner caps to soak in soapy water while you wipe the surface beneath. A degreasing spray and a non-scratch sponge handle most cooktops; for glass tops, a dedicated cooktop cleaner avoids scratching.

Microwave, dishwasher, and small appliances

  • Microwave: Heat a bowl of water with a slice of lemon for a couple of minutes; the steam loosens splatter so it wipes away with almost no effort.
  • Dishwasher: Clear the filter at the bottom, wipe the door seal, and run an empty hot cycle to freshen it.
  • Toaster, coffee maker, kettle: Empty crumb trays, descale where needed, and wipe exteriors. These get touched constantly and rarely get cleaned.

Scrub the sink, counters, and backsplash

With the cabinets and appliances done, move to the working surfaces. Clear the counters completely if you haven’t already — wiping around the canisters and the knife block doesn’t count.

Start with the backsplash, since it’s higher and anything you knock loose will fall onto the counter you’re about to clean anyway. Grease film loves backsplashes near the stove; a degreasing spray and a few minutes of dwell time make it wipe off easily. For tile, run a soft brush along the grout lines.

Next, the counters. Use the cleaner appropriate to your surface — gentle soap and water is safe for almost everything, while natural stone like granite or marble needs a stone-safe product rather than anything acidic. Pay attention to the seam where the counter meets the backsplash and the area right around the faucet base, where grime collects.

Save the sink for near the end of this stage, because it’s been catching everything you’ve rinsed. Scrub the basin, then clean the faucet and handles — a toothbrush is perfect for the crevices around the base and the aerator. A drain that smells can be freshened with baking soda followed by hot water. Wipe it all dry so the metal shines instead of spotting.

Finish at floor level

Floors come last, always. Every step before this — dusting shelves, scrubbing the oven, wiping counters — sends crumbs and grime downward. If you mop first, you’ll just be cleaning the floor twice.

Pull out anything portable that sits on the floor: the trash can, a stool, the dog’s bowls. Move lightweight appliances and check behind and beneath them, since the gap behind the fridge and under the stove edge collects an astonishing amount of debris. Then:

  1. Vacuum or sweep thoroughly, using the crevice tool along baseboards, under cabinet overhangs, and in corners.
  2. Wipe the baseboards and the kick plates beneath your lower cabinets — these are nearly always overlooked and gather a greasy dust film in a kitchen.
  3. Mop with a cleaner suited to your flooring, working from the far corner toward the doorway so you don’t trap yourself in a wet room.
  4. Empty and disinfect the trash can before it goes back, and pop in a fresh liner.

Let the floor dry fully before walking on it. This is a good moment to wash your cloths and sponges so your tools are ready for the next round.

Common mistakes that cost you the result

A few habits quietly undermine an otherwise solid deep clean. Watch for these:

  • Cleaning around clutter instead of removing it. If you don’t empty the shelf, you’re not deep cleaning — you’re tidying.
  • Working bottom to top. Mopping before you’ve dusted high shelves means redoing the floor.
  • Skipping the dwell time. Degreasers and oven sprays need a few minutes to break down grime. Spraying and immediately wiping wastes both the product and your effort.
  • Forgetting the touch points. Cabinet handles, the fridge door, light switches, and faucet levers get touched dozens of times a day and rarely get wiped.
  • Putting everything back. A deep clean is your best chance to declutter. If you reload every gadget you pulled out, you’ve missed half the benefit.

The bottom line

A deep clean works because of its order: gather your tools, empty and declutter the cabinets, conquer the appliances, scrub the surfaces top to bottom, and finish at the floor. Plan for two to three hours for an average kitchen, and remember that the decluttering you do along the way is what keeps the space easy to maintain afterward. Your next step is simple — schedule it. Block out an afternoon this week, set up your sink caddy and your two bins, and start by pulling everything out of one cabinet. The momentum will carry you through the rest.

5 Cleaning Mistakes That Make Your Home Look Messier

You spent the whole morning cleaning. The counters are wiped, the floors are mopped, the dishes are done — and yet, somehow, the room still feels off. Cluttered. Heavy. Not quite finished. If that frustration sounds familiar, you’re not imagining it. A home can be physically clean and still read as messy, and the gap between those two states usually comes down to a handful of habits that quietly work against you.

The good news: these aren’t signs of laziness or a lack of effort. More often they come from time pressure, picking up a bad habit somewhere along the way, or simply using the wrong approach for the job. Below are five of the most common cleaning mistakes that make a home look messier than it actually is — and the practical fixes that professional cleaners and seasoned organizers rely on instead.

1. Cleaning around clutter instead of clearing it first

This is the single biggest reason a freshly cleaned room still looks chaotic. When you wipe and dust around the stacks of mail, the random chargers, and the “I’ll deal with it later” pile on the dresser, you’re polishing the mess rather than removing it. The surfaces are technically clean, but the eye still registers visual noise everywhere it lands.

There’s an important distinction here that organizers make constantly: decluttering and cleaning are two different jobs, and they have to happen in that order. Organizing — finding a logical home for things and creating a sense of order — can only really work once you’ve cleared the excess and opened up some breathing room. Try to do both at once and you’ll spend twenty minutes shuffling the same objects from one surface to another.

How to fix it

  • Clear before you clean. Do a fast pass through the room and remove anything that doesn’t belong there. A labeled basket works beautifully: anything that lives in another room goes in, and you redistribute it at the end instead of breaking your rhythm.
  • Work one zone at a time. Empty a surface completely, wipe it down, then return only the things that truly belong on it. A clean nightstand with three intentional items always looks better than a cluttered one that was dusted around.
  • Be honest about what earns a spot. If an item has been sitting on the counter for two weeks with no home, the surface isn’t the problem — the missing storage decision is.

2. Not putting things back where they belong

A home stays tidy not because it gets one heroic deep clean a month, but because items consistently return to their assigned spots. When that habit slips, mess accumulates faster than any cleaning session can keep up with. The keys land on the counter, the scissors stay out, the kids’ books migrate to the couch — and within a day or two the room looks “messy” again even though nothing is actually dirty.

This is especially true in households with a lot of incoming stuff: toys, books, art supplies, school paperwork, mail. When your organizational systems drift even slightly off track, things spiral quickly. The fix isn’t more willpower — it’s making the “put it back” step effortless.

Build a system that does the work for you

  • Give every high-traffic item a home. If you don’t know where something goes, neither does anyone else in your house. Undecided items become clutter by default.
  • Put homes where you actually use things. A drop zone by the door for keys and bags beats a “neater” spot in another room that nobody walks to.
  • Do a five-minute reset daily. Tidying a little each day keeps surfaces from becoming overwhelming. Many people find that clear surfaces genuinely calm them — cluttered ones create a low hum of anxiety, and paring down quiets it.
  • Close the loop on baskets and bins. If your bins are overflowing or have no labels, the system has outgrown the space, and it’s time to declutter rather than buy more containers.

3. Leaving streaks, film, and residue behind

Sometimes the room isn’t cluttered at all — the cleaning itself just looks bad. Streaky floors, cloudy surfaces, and a hazy film on glass all telegraph “unfinished” even when you’ve put in real effort. And almost always, the culprit is product and technique, not effort.

Where it goes wrong

Two of the most common offenders involve mopping. If your floors dry streaky, the mop head is usually carrying too much water — it needs a harder wring-out before it touches the floor. If the floors dry cloudy or hazy instead, you’ve likely used too much cleaner in the bucket, leaving a residue behind that actually attracts more dirt. More product does not mean more clean; it frequently means more mess.

The same logic applies across the home. Overusing cleaning solution on counters, glass, and wood leaves a sticky or filmy layer that dulls the surface and grabs dust within hours. That dull, slightly dirty look you can’t quite explain is often just leftover product.

  • Wring the mop until it’s damp, not dripping. The floor should dry in a minute or two, not stay wet in puddles.
  • Dilute according to directions. The recommended amount is calibrated for a reason; doubling it doesn’t double the clean.
  • Use a clean, dry microfiber pass on glass and mirrors after your cleaner to lift the last of the film and prevent streaks.
  • Change your water when it turns gray. Mopping with dirty water just relocates grime in a thin, streaky layer.

4. Wiping cleaner off too fast (and skipping dwell time)

Here’s a subtle one that affects both cleanliness and appearance: spraying a surface and immediately wiping it dry. Most cleaners and disinfectants need time to sit and break down grime and germs — what professionals call dwell time. Wipe too soon and you’re essentially smearing the product around before it has done its job.

The visual result is a surface that looks “cleaned” but still has a faint film of grease or buildup, especially in kitchens and bathrooms. Over time that residue dulls finishes and makes everything look tired. The cleaning equivalent of rushing the job is doing it twice.

The simple fix

Spray, then walk away. Apply your cleaner, move on to another task in the room, and come back after a minute or two to wipe. The grime will lift with far less scrubbing, and you’ll get a genuinely clean surface instead of a redistributed one. Check the product label — many list the exact dwell time needed to work as intended, particularly for disinfecting.

5. Neglecting the tools that do your cleaning

Your cleaning machines and tools have to be clean themselves to make anything else clean. A vacuum with a clogged filter and a full canister loses suction and starts pushing dust around instead of capturing it. A mop head that never gets washed just paints dirt onto your floors. A grimy cloth smears more than it removes.

This is one of the most overlooked habits, and it’s purely maintenance — not glamorous, but the difference between a tool that works and one that’s actively making things worse.

Don’t forget vacuuming technique, either

Even a well-maintained vacuum underperforms with poor technique. Carpet fibers trap dirt from multiple angles, so vacuuming in only one direction leaves debris behind. Going over the carpet in a cross direction — first one way, then perpendicular to it — lifts noticeably more, and the surface looks fuller and cleaner afterward.

  • Empty the vacuum and check the filter regularly. A choked machine can’t pick up what it can’t pull in.
  • Wash mop heads and microfiber cloths frequently. A dirty tool guarantees a dirty result.
  • Replace cloths and sponges that are past their prime. They harbor grime and spread it.
  • Vacuum carpet in two directions for high-traffic areas to lift trapped debris.

The bottom line

A home that looks messy after you’ve cleaned it is rarely a dirt problem — it’s a systems problem. The mess usually traces back to cleaning around clutter, items without a home, product residue, rushed wiping, and neglected tools. None of these require more hours; they require a slightly smarter order of operations.

Start with the one that will move the needle most for you. If your surfaces are perpetually cluttered, spend a weekend giving your high-traffic items a real home before your next clean. If your floors and glass look dull, cut your product amount and wring that mop harder. Fix the system once, and the daily upkeep gets dramatically easier — that’s the whole point of cleaning smarter instead of harder.

How to Create a Weekly Cleaning Schedule for Busy Families

If your weeks blur together in a haze of school runs, work deadlines, and last-minute dinners, the idea of a “cleaning schedule” can feel like one more thing you’re destined to fail at. Most families don’t struggle because they’re lazy or messy — they struggle because they’re trying to clean the whole house in one exhausting marathon on a Saturday they’d rather spend doing literally anything else.

The fix isn’t more willpower. It’s a system that spreads the work across the week in small, predictable chunks, gets every capable person in the household involved, and forgives you when life happens. Below is a realistic framework you can adapt to your own home, plus the practical details that make a schedule actually stick instead of becoming a guilt-inducing list on the fridge.

Why a Daily-Plus-Weekly Approach Beats the Saturday Marathon

When you batch every cleaning task into one day, two things go wrong. First, the workload becomes so big that you procrastinate, and the mess compounds. Second, even when you do power through it, the house is “clean” for about 48 hours before it slides back to baseline.

A smarter structure breaks cleaning into daily maintenance (the small habits that stop messes from snowballing) and weekly focus tasks (one bigger job per day so nothing piles up). This is the core idea behind most sustainable routines: high-use areas like counters and floors get quick daily attention, while deeper jobs get assigned a specific day so they actually happen.

The payoff is psychological as much as practical. Instead of facing a four-hour cleanup, you face fifteen to twenty focused minutes. That’s a threshold a tired parent can actually clear on a Tuesday night.

A Realistic Weekly Cleaning Schedule You Can Steal

Here’s a template that assigns one focus area per weekday and keeps weekends mostly free. Adjust the days to fit your own rhythm — the structure matters more than the specific day names.

  • Monday — Kitchen reset: Wipe down counters and the stovetop, clean the sink, sweep or spot-mop the floor, and clear out anything expired from the fridge. Starting the week with a clean kitchen sets the tone.
  • Tuesday — Bathroom surfaces: Wipe sinks, faucets, mirrors, and toilets, and swap in fresh hand towels. You’re not deep-scrubbing grout every week — just resetting the surfaces people touch daily.
  • Wednesday — Vacuum and floors: Run the vacuum through common areas, high-traffic hallways, and the living room. Quick-mop hard floors if needed.
  • Thursday — Laundry day: Run loads from start to fully put away. A load that lives in the dryer for three days doesn’t count as done.
  • Friday — Quick clean and declutter: A light surface tidy plus a 10-minute clutter sweep so you head into the weekend with a calm, reset space.

The daily anchors that hold it all together

Underneath the weekly focus tasks, a few tiny daily habits do the heavy lifting. These take a couple of minutes each and prevent the mess that makes weekend cleaning feel impossible:

  • Wipe kitchen counters after dinner
  • Do a 5-minute clutter pickup before bed (everyone grabs a few of their own things)
  • Run and empty the dishwasher on a consistent rhythm
  • Check the floors for anything that needs a quick sweep
  • Make beds in the morning

None of these is a “chore” in the dreaded sense. They’re closer to brushing your teeth — small, automatic, and far less effort than dealing with the consequences of skipping them.

How to Adapt the Schedule to a Genuinely Packed Week

If you and your partner both work outside the home, leave early, get home late, and arrive exhausted, the standard advice to “just clean for an hour” is useless. A more workable approach is to bookend your day with tiny windows: 5 to 10 minutes before you leave and 5 to 10 minutes when you get home.

And if even the full daily list feels overwhelming, don’t try to adopt everything at once. Start with one task — say, a single load of laundry taken all the way to put-away, or just wiping the counters each night. Do that one thing consistently for a week. Then add one more. Within a month or two, you’ve quietly built a routine without ever feeling like you signed up for a second job.

The “when it needs doing” alternative

Rigid day assignments don’t suit everyone. Some people prefer to tie tasks to natural triggers instead of the calendar — for example, washing towels when the towel hamper is about halfway full rather than every Tuesday no matter what. A neat trick for laundry: start a load before breakfast, move it to the dryer at lunch, and put it away after work, so the whole cycle threads through your day without dominating it. If your week is unpredictable, this trigger-based style may stick better than a fixed grid. Use whichever genuinely matches how your brain works.

Getting the Whole Family to Actually Pitch In

A weekly schedule that depends entirely on one person isn’t a family system — it’s a burnout plan. The single biggest upgrade you can make is to ask for help and distribute the load, matched to age and ability.

The goal is for cleaning to feel like something the household does together, not a favor everyone grudgingly grants the person who “cares about it most.” Here’s a rough way to divide responsibilities:

  1. Toddlers and preschoolers: Put toys in a bin, carry their plate to the counter, “help” wipe a low surface. The point is the habit, not the result.
  2. Elementary-age kids: Make their own bed, tidy their room, set and clear the table, feed pets, sort laundry by color.
  3. Tweens and teens: Run a vacuum, load and unload the dishwasher, take out trash and recycling, manage their own laundry start to finish, wipe bathroom surfaces.
  4. Adults: The tasks requiring more judgment or muscle — deep cleaning, scheduling, and modeling the daily anchors so kids absorb them.

Make assignments visible. A chore chart on the fridge — where everyone passes it dozens of times a day — keeps the plan front of mind and removes the constant nagging. There are countless free printable cleaning checklists and chore chart templates you can download, edit, and stick somewhere obvious. Pick one you’ll actually look at.

Common Mistakes That Quietly Sabotage Your Schedule

Most cleaning schedules don’t fail because they’re badly designed. They fail because of a handful of predictable traps. Watch for these:

  • Cramming too much into one day. If Monday is “kitchen reset,” don’t also tack on the oven, the fridge coils, and the pantry. Those are monthly or seasonal jobs. Keep daily focus tasks genuinely small.
  • Treating laundry as “washed” instead of “put away.” The folding and the drawers are the actual finish line. Build that into the task or it never ends.
  • Going all-or-nothing. Missing a day is not failure. The whole point of spreading tasks across the week is that one skipped day barely matters — you just pick up the next one.
  • Buying complicated tools. A schedule shouldn’t require special equipment. Easy, grab-and-go tools — a spray bottle, microfiber cloths, a lightweight vacuum kept accessible — lower the friction to starting.
  • Not pacing yourself. If you try to overhaul your entire home and habits in one week, you’ll quit by Thursday. Add one task at a time.

Layering In Monthly and Seasonal Tasks Without Overwhelm

Your weekly schedule covers maintenance, but some jobs only need attention occasionally — and they don’t belong on a busy weeknight. The cleanest mental model is to think in tiers: daily (counters, floors, pickup), weekly (your focus-day tasks), monthly (things like baseboards, inside the microwave, light fixtures, wiping down the fridge), and seasonal (windows, deep carpet cleaning, decluttering closets).

Don’t try to track all four tiers in your head. Pick one weekend morning a month — or one quiet evening — to knock out a single monthly task. Rotate through your list so each area gets attention a few times a year. Because your daily and weekly habits keep the house at a good baseline, these deeper jobs become quick touch-ups rather than archaeological digs.

The Bottom Line

A weekly cleaning schedule for a busy family works when it’s realistic, shared, and forgiving. Spread the load across the week so no single day is daunting, anchor it with a few tiny daily habits, hand out age-appropriate tasks so it’s a team effort, and resist the urge to do everything at once.

Your next step is simple: pick one task to do consistently this week — counters every night, or one full load of laundry put away. Once that feels automatic, add the next. Print a checklist, stick it on the fridge, and let the system carry the weight your willpower shouldn’t have to.

A Beginner’s Guide to Speed Cleaning Your Home

There’s a specific kind of dread that comes with a messy house and almost no time to deal with it. Someone texts that they’re stopping by in 45 minutes, or you simply can’t take another evening of stepping over clutter on your way to the couch. Speed cleaning exists for exactly these moments — it’s the art of making your home look and feel dramatically better in a short, focused burst, rather than waiting for the mythical free weekend that never arrives.

But speed cleaning isn’t about scrubbing faster or cutting corners until your home falls apart. It’s about working in the right order, focusing on the changes that deliver the biggest visual payoff, and building a few repeatable habits so the mess never gets overwhelming again. This guide walks you through the mindset, the method, and a room-by-room game plan you can actually finish before the doorbell rings.

What speed cleaning actually means (and what it doesn’t)

First, a useful distinction. Decluttering, cleaning, and organizing are three different jobs, and speed cleaning only involves two of them. Decluttering is deciding what stays and what goes. Organizing is giving everything you keep a logical home. Cleaning is dealing with dirt — wiping, sweeping, scrubbing. As one professional organizer puts it, you can only truly organize after you’ve decluttered, because that’s when the empty space to work with finally appears.

Speed cleaning leans on the cleaning side, plus a fast pass of “putting away” rather than true organizing. You’re not making lifelong keep-or-toss decisions in a 30-minute sprint — that’s emotional, time-consuming work best saved for a dedicated session. During a speed clean, your job is simpler: get surfaces clear, get dirt gone, and get the room reading as calm. The deeper decluttering can come later.

Why does this matter? Because the most common speed-cleaning mistake is opening a drawer, finding a pile of mystery items, and disappearing down a decision rabbit hole for 20 minutes. Speed cleaning means you keep moving. Anything that requires a real decision gets set aside, not solved.

The five principles that make cleaning fast

Before you touch a sponge, internalize these. They’re the difference between frantic and efficient.

  • Top to bottom, dry to wet. Dust and crumbs fall downward, so clean high surfaces before low ones, and do dry tasks (dusting, clearing clutter) before wet ones (wiping, mopping). Otherwise you’ll re-dirty floors you just cleaned.
  • One direction around the room. Pick a corner and work clockwise. This stops you from crisscrossing, forgetting spots, or cleaning the same surface twice.
  • Clear before you clean. You can’t wipe a counter buried in clutter. Removing the stuff first is usually 70% of what makes a room look transformed.
  • Don’t leave the room mid-task. Every trip to put one item away in another room is a chance to get distracted. Use a basket or laundry hamper to collect everything that belongs elsewhere, and deal with it all at the end.
  • Set a timer. A 15- or 20-minute timer creates urgency and prevents the perfectionism that turns a quick tidy into a three-hour deep clean.

Your essential speed-cleaning kit

Half the battle is not wasting time hunting for supplies. Assemble a simple caddy you can grab and carry from room to room. You don’t need a cabinet full of specialty products — a few versatile basics outperform a dozen single-use sprays.

  • An all-purpose spray cleaner for most surfaces
  • A glass cleaner for mirrors and windows
  • A stack of microfiber cloths (they trap dust without chemicals and dry streak-free)
  • A bathroom cleaner or, in a pinch, dish soap — it cuts grease surprisingly well on tubs and sinks
  • A roll of paper towels for the jobs you don’t want touching your good cloths
  • One large basket or empty laundry hamper for the “belongs elsewhere” pile
  • A trash bag and, ideally, a second bag for recycling

Keep this caddy stocked and stored somewhere central. The simple act of not having to gather supplies shaves real minutes off every session.

The 30-minute whole-home blitz

This is the routine for the “guests are coming” scenario, where you want the maximum visible improvement in the minimum time. The trick is to focus only on the rooms and surfaces people actually see and use, in a sequence that builds momentum.

Minutes 0–10: The grab-and-clear sweep

Walk through your main living areas with your basket and trash bag. Move quickly. Toss obvious garbage, drop dishes by the sink, and put anything that belongs in another room into your basket. Don’t organize the basket — just collect. Clear every flat surface you can: coffee table, kitchen counter, entryway table. A clear surface reads as “clean” to the human eye even before you’ve wiped it. This single step does more visual work than anything else you’ll do.

Minutes 10–20: Wipe and shine the high-impact spots

Now that surfaces are clear, spray and wipe the ones that matter most. In the kitchen, that’s the counters, the stovetop, and the sink. In the bathroom, hit the sink, the faucet, and the mirror — a sparkling mirror makes a whole bathroom feel fresh. Wipe down the toilet exterior and give the bowl a quick swish if you have a few seconds. These are the surfaces guests notice and the ones that genuinely affect daily life.

Minutes 20–30: Floors and the final reset

Do a quick floor pass where it counts: a fast vacuum or sweep of the entryway, kitchen, and main walkway. Fluff the couch cushions and fold the throw blanket — soft furnishings looking tidy signals “this room is under control.” Finally, return your basket of collected items to their rooms, distributing them quickly. Empty the trash. Light a candle or open a window if you have one more minute; scent is the finishing touch people register before anything else.

A room-by-room cheat sheet for deeper sessions

When you have a bit more time — say a Saturday morning — you can rotate through rooms more thoroughly. The same top-to-bottom, clear-then-clean logic applies, but you go deeper. Here’s a sensible order and what to prioritize in each space.

Kitchen

Clear and wipe counters, then the stovetop and the front of the microwave. Wash or load any dishes. Wipe the fronts of the most-touched cabinets and appliance handles. Take out the trash and recycling. The kitchen sets the tone for the whole home, so it earns the first slot.

Bathrooms

Bathrooms reward a quick, consistent routine because the work stays small when you do it often. Clear the countertop, wipe the counter and sink, polish the mirror, clean the toilet bowl, seat, and base, and replace hand towels with a fresh set. Restock the toilet paper while you’re there and toss any empty product bottles. Done weekly, this stays a five-minute touch-up rather than a dreaded scrub-down.

Living areas and bedrooms

Clear surfaces, make the bed (it instantly tidies a bedroom), fluff and straighten cushions, and do a quick dust of the surfaces that show it most — coffee tables, nightstands, TV stands. Finish with a vacuum or sweep. Resist the urge to start sorting through the items you find; collect them in your basket and keep moving.

How to keep it clean once it’s clean

Speed cleaning works best as maintenance, not rescue. The reason a house spirals into chaos is usually that small messes never get reset, so they compound. A few lightweight daily habits keep the mess from ever reaching crisis level — which means your speed cleans get shorter and shorter.

  • Do an evening reset. Spend ten minutes each night returning things to their homes and clearing the kitchen. Many people who keep tidy homes swear by this single habit. Waking up to clean surfaces makes the whole next day feel manageable.
  • Clean as you go. Wipe the counter while dinner cooks. Squeegee the shower after you use it. These near-zero-effort moments prevent buildup that later requires real scrubbing.
  • Give everything a home. Clutter accumulates fastest when items have no designated spot. If you keep finding the same things piled on the same surface, that’s a sign those things need a permanent home nearby.
  • Tackle decluttering separately. When you do have time for real purging, go by category rather than by room. Gather all of one type of item — say, every coat or every pair of shoes from around the house — and decide together. Starting with things you’re not emotionally attached to builds confidence before you reach the sentimental stuff. This deeper work is what permanently lightens your speed-cleaning load.

Common mistakes that slow beginners down

A few habits quietly sabotage your speed. Watch for these: trying to deep clean and declutter in the same session, which guarantees you’ll run out of steam; cleaning room by room while constantly walking items elsewhere, which scatters your focus; and starting with the hardest, most cluttered space first, which drains your motivation before you’ve built any momentum. Begin somewhere quick and visible — a clear kitchen counter or a made bed gives you the early win that propels you through the rest.

The bottom line

Speed cleaning is less about moving fast and more about moving smart: clear surfaces before you wipe them, work top to bottom and in one direction, keep a stocked caddy within reach, and never leave the room mid-task. Save the big decisions — what to keep, where it lives — for dedicated decluttering sessions done by category. Then layer in a ten-minute evening reset, and you’ll find your home rarely needs rescuing in the first place. Your next step is simple: assemble your caddy tonight, set a 20-minute timer tomorrow, and run the grab-and-clear sweep. The momentum builds from there.

How to Build a Daily Cleaning Routine That Sticks

Most people don’t fail at cleaning because they’re lazy or disorganized. They fail because they treat cleaning as a one-time event—the all-day, top-to-bottom marathon that leaves you exhausted and resentful, only to watch the house slide back into chaos by Wednesday. A daily cleaning routine works on a completely different principle: small, repeated actions that never let mess accumulate in the first place.

The goal here isn’t a spotless showroom. It’s a home that feels under control every single day, maintained in minutes rather than hours. Below is a practical framework for building a routine that actually survives past the first enthusiastic week—and what to do when life inevitably gets in the way.

Why “a little every day” beats the weekend cleaning marathon

If you’ve ever spent an entire Saturday scrubbing toilets, mopping floors, and powering through laundry, you know the pattern: by the following weekend, you’re back to square one. The marathon approach treats cleaning as something you recover from rather than something you live with.

The alternative is splitting the work into a short daily task plus a rotating weekly focus. Spending 15 to 30 minutes a day on small maintenance—and reserving deeper jobs for designated days—means no single session ever feels overwhelming. You’re not fighting a week’s worth of buildup; you’re keeping a clean space clean. That’s a fundamentally easier task, and crucially, it’s one you can do even when you’re tired.

Anchor your routine to a specific time

The single biggest predictor of whether a routine sticks is when you do it. A vague intention to “clean more” evaporates the moment you’re busy. Instead, attach your cleaning to a moment that already exists in your day—a technique that helps your brain wire the behavior into an automatic habit.

Pick a consistent trigger: right after breakfast, while your morning coffee brews, or as part of your wind-down before bed. The trigger matters more than the exact clock time, because it ties the new habit to something you already do without thinking.

For people with packed schedules

If you leave early and come home exhausted, don’t try to carve out a big block. A genuinely realistic approach is to split it: spend 5 to 10 minutes before you leave for work and another 5 to 10 minutes when you get home. The morning slot keeps the day from starting in clutter; the evening slot resets the space before you sleep. Two tiny sessions are far more sustainable than one you’ll keep postponing.

Start with one task, then build

The most common mistake is trying to install a full routine overnight. You write out an ambitious daily checklist, follow it for three days, miss one day, feel like you’ve failed, and abandon the whole thing. Routines aren’t built by willpower—they’re built by stacking small wins.

Start with a single daily task. Just one. Do it every day until it feels automatic, then add the next one. A sensible order to layer them in:

  1. Make the bed. It takes two minutes and instantly makes the whole bedroom read as “tidy,” which sets the tone for the rest of the day.
  2. Wipe the kitchen counters. Food-contact surfaces need daily attention—uncleaned kitchen surfaces can harbor germs that cause food-borne illness, so this one is about hygiene, not just looks.
  3. Do a quick clutter sweep. Walk through your main rooms and put stray items back where they belong.
  4. Run one load of laundry start to finish—washed, dried, folded, and put away. The “put away” part is what people skip, which is how clean laundry ends up living on a chair for a week.
  5. Check the floors. A quick sweep or vacuum of high-traffic areas, focusing on the kitchen.

Add one new habit roughly every week. Within a month or two, what felt like a long list becomes a sequence you barely think about.

Focus on the “waistline down” and your high-traffic zones

You don’t need to clean everything every day. The areas that make a home feel dirty are predictable, so target those. A useful rule of thumb: think about everything from the waistline down—floors and countertops. These are the surfaces that collect crumbs, dust, and daily grime, and they’re the ones guests (and your own eyes) notice first.

Find your personal “trouble spot”

Beyond the universal zones, every home has a high-traffic area that, when messy, makes the entire space feel chaotic. For a lot of people it’s the front entryway—a dumping ground for shoes, jackets, bags, and mail. The fix is a habit, not a deep clean: the moment you walk in, your stuff gets put away. Boots, coat, keys, the things you carried in—they go to their home immediately rather than piling by the door.

Identify the one spot that drives you crazy when it’s cluttered, and make resetting it part of your daily pass. That’s often the difference between a home that “feels clean” and one that doesn’t, regardless of how scrubbed everything else is.

The two-minute shine that punches above its weight

Some small tasks have an outsized payoff. Cleaning the kitchen sink is a perfect example: a powdered cleanser, a sponge, 30 seconds to scrub and rinse, then buff it dry. An empty, gleaming sink makes the whole kitchen feel clean even if you didn’t touch anything else. Look for these high-leverage moments in your own home—they let you “fake” a tidy space when you’re short on time.

Use a timer and work one small area at a time

Open-ended cleaning expands to fill all available dread. Setting a timer for 10 or 15 minutes does two things: it keeps the session short enough to stay enjoyable, and it gives you a hard stop so the task never balloons into an afternoon. When the timer goes off, you’re done—guilt-free.

Within that window, resist the urge to bounce around the whole house. Pick one small area: a single drawer, one shelf, a section of countertop. Go through each item and make an immediate decision—keep, trash, donate, or relocate. The discipline here is avoiding the “maybe” pile, because “maybe” piles don’t reduce clutter; they just move it to a new spot where it grows. A quick yes-or-no on every item is what actually clears space.

Build in a weekly layer so daily stays light

Daily maintenance keeps the surface clean, but some jobs genuinely don’t need to happen every day. The trick is to assign them to specific days so they get done without bloating your daily routine. A workable rhythm is your short daily task plus one rotating focus each day—roughly 30 to 60 minutes total when a weekly job is in play.

  • Monday: Bathrooms—toilets, sinks, mirrors.
  • Tuesday: Dusting surfaces and light fixtures.
  • Wednesday: Floors—a proper vacuum and mop.
  • Thursday: Kitchen deep-touch—appliances, inside the microwave, fridge check.
  • Friday: Catch-all and laundry—the lingering tasks that didn’t fit elsewhere.

Adjust the days to your life. Someone who hosts on weekends might shift floors to Friday. The point isn’t the exact schedule—it’s that every recurring job has a home on the calendar, so nothing silently piles up and nothing has to be tackled all at once.

How to keep it going when motivation fades

Motivation is not a strategy. Every routine hits the day you don’t feel like it, and that day determines whether the habit survives. A few principles make the difference:

  • Lower the bar on bad days. If the full routine feels impossible, do the single most important task—usually wiping counters or a quick clutter pickup—and call it a win. Doing something tiny keeps the chain unbroken; skipping entirely is what breaks habits.
  • Don’t try to “catch up” after a missed day. Just resume your normal routine. Trying to make up for lost time turns a small gap into a punishing marathon and reinforces the all-or-nothing thinking you’re trying to escape.
  • Make it pleasant. Put on music or a podcast. A 15-minute timed session paired with something you enjoy stops feeling like a chore.
  • Keep supplies where you use them. A cleanser and sponge stored at the sink, a cloth in the bathroom. The less friction between “I should” and “I can,” the more likely you’ll act.

The bottom line

A daily cleaning routine that sticks isn’t about doing more—it’s about doing less, more consistently. Anchor a short session to a fixed point in your day, start with a single task like making the bed or wiping the counters, and add one new habit each week. Set a timer, work one small area at a time, and let a simple weekly schedule handle the deeper jobs so your daily load stays light.

Your next step is small on purpose: choose one task and one time, and do it tomorrow. Then do it the day after. Within a few weeks, you won’t be deciding whether to clean—you’ll just be doing it, and your home will quietly stay in order without ever demanding a whole lost weekend again.