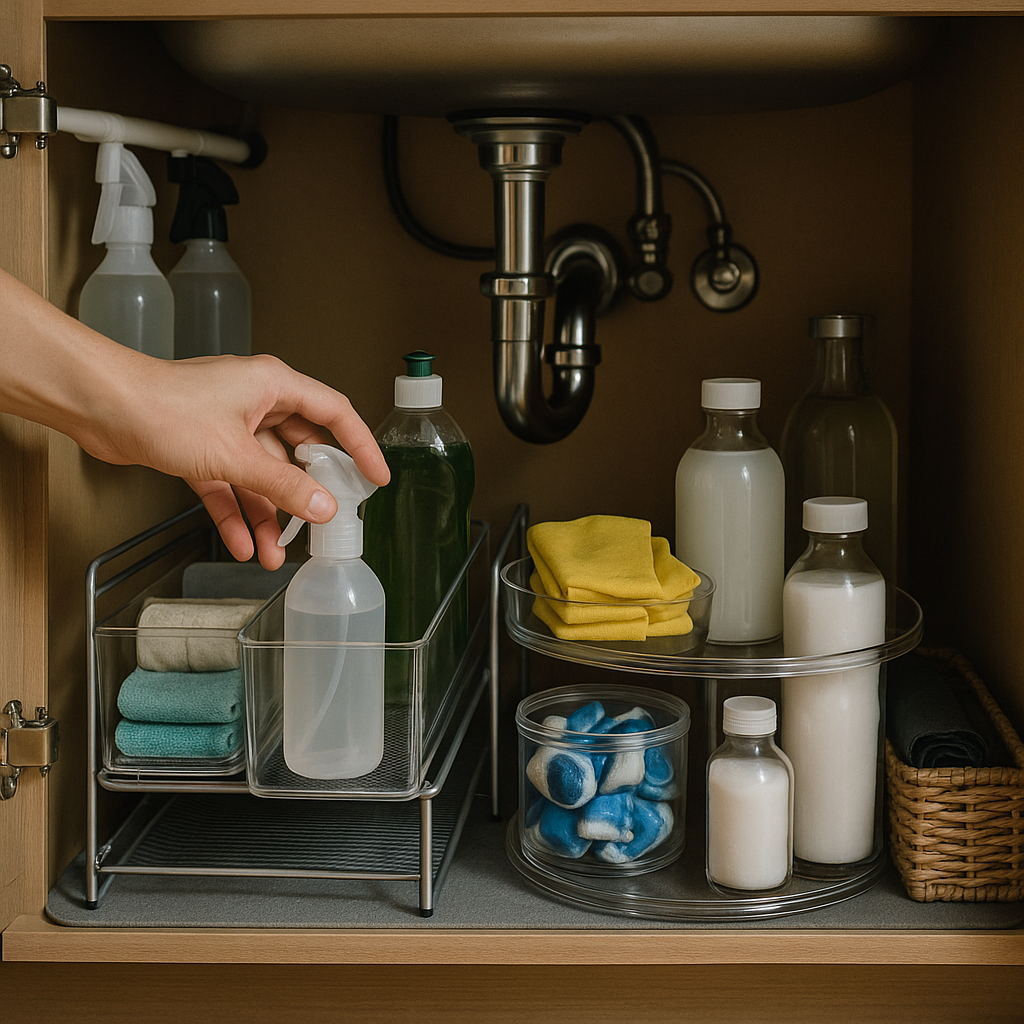
The cabinet under your sink might be the single most chaotic square foot of storage in your entire home. It’s an awkward space carved up by pipes, dampened by the occasional drip, and treated like a junk drawer for half-empty spray bottles, mystery sponges, and a tangle of plastic bags you swore you’d reuse. Every time you open it, something tips over.
The good news: this space responds incredibly well to a handful of smart moves. You don’t need a custom cabinet or a contractor — you need to think vertically, contain things in the right way, and put the items you actually reach for within arm’s reach. Here’s exactly how to do it.
Start by emptying the cabinet completely
It’s tempting to organize around what’s already in there, but that’s how you end up shuffling clutter from one corner to another. Pull everything out and set it on the floor or counter so you can see what you’re truly working with.
As you empty, sort items into quick piles:
- Keep and use regularly — dish soap, your go-to all-purpose cleaner, sponges, dishwasher pods.
- Keep but rarely use — specialty cleaners, oven cleaner, extra refills.
- Relocate — items that drifted here but belong elsewhere (snacks, tools, batteries).
- Toss or recycle — empties, dried-out cleaners, duplicate products, and that collection of crusty rags.
While the cabinet is empty, wipe down the base. This is also your chance to check for any signs of moisture or a slow leak around the pipes — a soft or discolored cabinet floor is worth addressing before you reload it. A clean, dry starting point makes everything that follows easier.
Protect the base before you put anything back
Under-sink cabinets get damp. Condensation, the occasional drip from a worn connection, and leak-prone cleaning bottles all take a toll on the cabinet floor over time. A protective layer is cheap insurance.
A simple rubber mat or a peel-and-stick liner cut to fit the base does two jobs at once: it shields the wood from water damage and gives bottles a grippier surface so they’re less likely to slide and topple. If a bottle does leak, you’ll spot it on the mat instead of discovering warped cabinet wood months later. Choose something you can lift out and rinse in the sink.
Go vertical to stop wasting the best space
Here’s the core principle that fixes most under-sink chaos: the problem isn’t a lack of space — it’s wasted space. When you line bottles up front-to-back, the ones in back become invisible and unreachable, and the gap between the tops of the bottles and the underside of the counter sits completely empty. That dead air is prime real estate.
Building upward reclaims it. The most effective tools for this are:
- Pull-out drawers or sliding shelves — these bring everything in the back forward to you, so nothing gets buried. They’re the gold standard for access.
- Tiered or two-shelf risers — adjustable metal or plastic shelves that often have legs designed to straddle the pipes, creating a second level for storage.
- Stackable clear drawers — see-through units that let you stack two or three high while still being able to see and reach the contents.
- A small rolling cart — if your cabinet is tall and open enough, a slim cart on wheels can slide in and pull out as a unit.
Working around the plumbing
The drainpipe and supply lines are the reason most off-the-shelf shelving doesn’t fit neatly. Before you buy anything, measure three things: the interior width, the interior depth, and the height clearance from the cabinet floor to the pipes. Then measure where the pipes actually sit, because a U-shaped or expandable organizer is designed to nest around them.
If your pipes are positioned dead center, look for two narrower units that flank them rather than one wide shelf. If the configuration is especially awkward, a pull-out drawer that occupies only the front portion of the cabinet — leaving the pipe area clear behind it — often works better than trying to bridge over the plumbing.
Sort into zones and contain wisely
Once you have vertical structure, group like with like so you’re not hunting. A typical under-sink cabinet breaks down into a few natural zones: dish-related items (soap, sponges, brushes), surface and glass cleaners, refills and backstock, and reusable bags or specialty supplies.
Choose the right containers
Containers help, but the wrong ones create new problems. A few guidelines worth following:
- Favor clear over opaque. When you can see the contents at a glance, you stop buying duplicates and you actually use what you have. Clear bins and drawers earn their place here more than almost anywhere else in the house.
- Skip oversized baskets. One giant bin sounds tidy, but it just becomes a deep pit where items pile on top of each other. You end up unloading half of it to reach the bottom. Smaller, purpose-grouped containers keep things accessible.
- Use a shallow tray on top for small loose items. Sponges, scrub brushes, and odd little tools live best in a single shallow tray on the upper level, where they’re visible and easy to grab without digging.
- Reserve one deeper bin for bulky, soft items. Reusable shopping bags, for instance, compress well and can live in a single deep container on the bottom rather than spilling everywhere.
A door-mounted caddy or a couple of adhesive hooks on the inside of the cabinet door are also worth considering — they’re perfect for a roll of trash bags, rubber gloves, or a small spray bottle, and they use space that would otherwise go untouched.
Put frequently used items where your hand lands first
Organization isn’t just about fitting everything in — it’s about access. The items you touch every day should be the easiest to reach, and the things you use twice a year can hide in the back or up high.
In practice, that means keeping your everyday cleaner, dish soap, and sponges on the top tier of your vertical unit or at the front of a pull-out drawer. Backstock, refills, and seasonal or rarely-used products go lower, deeper, or behind. This single habit eliminates the constant rummaging that makes under-sink storage feel so frustrating.
One more access-related tip: store spray bottles upright and slightly forward so the trigger heads don’t catch on the shelf above when you slide things out. It’s a small thing that prevents the daily knock-over.
Keep cleaning products safe
If small children or pets are part of your household, the under-sink cabinet deserves extra thought because it’s exactly the spot they can reach. A simple childproof cabinet latch is inexpensive and effective. Keep products in their original, labeled containers, and never decant cleaners into food or drink containers — accessibility should never come at the cost of safety. For specific guidance on any particular product, follow the manufacturer’s storage instructions on the label.
Common mistakes that undo your hard work
Even a well-organized cabinet can slide back into chaos. These are the pitfalls I see most often:
- Over-buying. Bulk cleaning supplies seem like a deal until you have four bottles of the same thing crowding the space. Buy what you’ll use in a reasonable window.
- Ignoring the vertical gap. If there’s empty air above your bottles, you haven’t finished. Add a shelf or riser.
- Choosing organizers before measuring. Returning ill-fitting bins is a tax on impatience. Measure around the pipes first, every time.
- Treating it as a one-time project. Take 90 seconds every few weeks to pull stray items, toss empties, and reset the zones. Maintenance is what keeps it functional.
- Keeping things that don’t belong. Tools, paper goods, and snacks all tend to migrate here. Give them a real home elsewhere.
The bottom line
An organized under-sink cabinet comes down to four moves: empty it out and edit ruthlessly, protect the base with a liner or mat, build upward with pull-out drawers or tiered shelves to capture wasted vertical space, and place your most-used items where your hand naturally reaches. Keep your containers clear and appropriately sized — skip the one giant basket — and you’ll be able to see and grab what you need without unloading the whole cabinet.
Start this weekend with just the emptying and sorting step. Once you see the bare, clean space and know your exact measurements, the right organizers practically choose themselves — and you’ll have a cabinet that stays usable instead of one you dread opening.