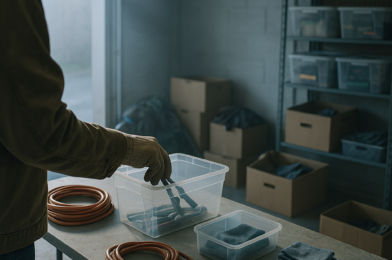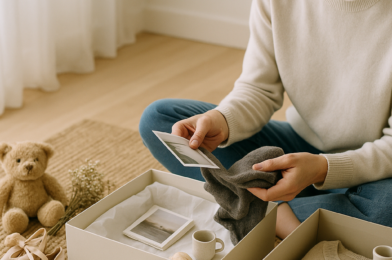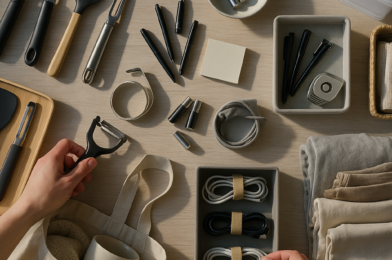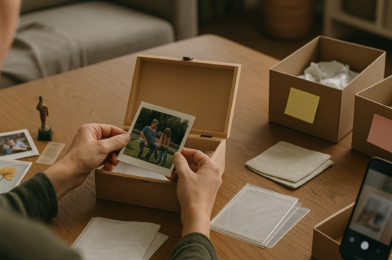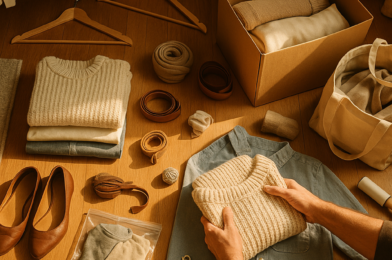
How to Store Seasonal Clothes to Save Space

Twice a year, most of us run into the same problem: half the wardrobe is unwearable for the season, but it’s still taking up prime closet real estate. Wool sweaters crowd out sundresses in July, and bulky coats elbow shorts off the shelf in January. The fix isn’t a bigger closet — it’s a smarter system for getting off-season clothes out of the way without damaging them or losing track of what you own.

Done well, seasonal storage frees up surprising amounts of space, keeps your clothes in good shape, and makes the twice-yearly swap feel like a quick chore instead of a dreaded ordeal. Here’s exactly how to do it.

Start by storing less, not better

The biggest space-saving move happens before you buy a single bin. Every item you pack away is something you have to store, protect, and eventually unpack — so the off-season swap is the ideal moment to be honest about what’s earning its place.

A simple, reliable filter is the one-year rule: if you didn’t wear something during its entire last season, you almost certainly won’t miss it. This forces a real assessment of what you actually use versus what you keep “just in case.” Sort everything into keep, donate, and a small “maybe” pile, and resist the urge to store items purely out of guilt over what they cost.

If you find decisions hard to make in the moment, try the backward hanger trick during the season itself: turn all your hangers to face the wrong way, and flip each one forward only after you wear that item. By the end of the season, anything still backward is a clear candidate to let go. It removes the guesswork from “do I actually wear this?”

Clean everything before it goes into storage

This is the step people skip most often, and it’s the one that causes the most heartbreak months later. Storing clothes dirty is an open invitation to moths and other pests — they’re drawn to body oils, sweat, and food residue far more than to clean fabric. A sweater that looked fine when you folded it can come out in spring with holes or stains that have set permanently.

Before anything gets packed away:

  • Launder or dry-clean every item, even pieces you only wore once. Invisible oils and odors attract pests.
  • Check and empty all pockets — a forgotten receipt or candy can stain or draw insects.
  • Make sure everything is completely dry. Even slightly damp fabric trapped in a sealed container is a recipe for mildew.
  • Skip the starch and fabric softener residue where possible, since some finishes can yellow over long storage.

One important caveat: don’t store clothes in the plastic bags from the dry cleaner. Those bags trap moisture, prevent fabric from breathing, and can cause yellowing over time. Take garments out of the plastic before they go into long-term storage.

Choose containers that protect, then save space

It’s tempting to choose storage purely on how much it crams into a closet, but the priority order matters: protection first, space-saving second. A container that flattens your wardrobe to nothing is useless if it leaves your clothes musty or damaged.

Breathable bins and bags for most clothing

For the bulk of your folded items, opt for breathable storage — fabric bins, canvas containers, or plastic bins that aren’t fully airtight. Natural fibers like wool and cotton need a little airflow to stay fresh and avoid trapping humidity. Toss in a couple of cedar blocks or lavender sachets, both of which help deter moths naturally, and consider a dehumidifier pack to absorb stray moisture before you close the lid.

Garment bags for the pieces you hang

Not everything should be folded. Structured coats, blazers, delicate dresses, and anything prone to creasing do better on hangers. For these, use cotton garment bags rather than plastic — cotton lets the fabric breathe while still keeping dust off. Hang nicer pieces on wooden hangers inside their own bags so they keep their shape. A clever touch some organizers use: tape a small printed photo of the outfit to the outside of the bag so you instantly remember what’s inside without unzipping it.

Vacuum-sealed bags for the bulkiest items

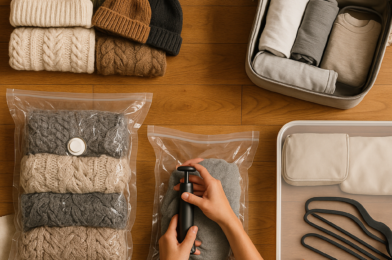
Vacuum-sealed bags are the heavy hitters for space savings, shrinking down comforters, puffy jackets, and thick synthetic items dramatically. But use them selectively. They work beautifully for down, polyester fill, and other resilient synthetics, which bounce back after being compressed. Be more cautious with natural fibers like wool, cashmere, and leather — prolonged hard compression can crush the fibers and leave permanent creasing. For those, a loosely packed breathable bin is the safer choice.

Put your storage in the right place

Where you stash your bins matters as much as what’s in them. The single most important rule: off-season clothes should live somewhere cool and dry. Heat and humidity are what cause mold, mildew, and that unmistakable musty smell, so avoid damp basements, hot attics, and garages that swing between extremes. A climate-controlled interior space is ideal.

Some of the best spots hide in plain sight:

  • Top closet shelves. The upper reaches of a closet are perfect for items you won’t need for months. Adding a single extra shelf up high can create a whole new storage zone you weren’t using.
  • Under the bed. Low-profile bins slide neatly under most beds and keep clothes accessible but out of sight.
  • A guest closet or spare-room closet. If you have one that’s underused, it’s prime off-season territory.
  • The bottom of your main closet, behind everyday items, for a bin or two you can reach without a step stool.

Whatever you choose, don’t overcrowd your everyday closet with so much stored clothing that it interferes with daily use. The goal is to make this season’s wardrobe easier to navigate, not to trade one cramped space for another.

Make the future swap effortless with smart labeling

The difference between a storage system you’ll actually maintain and one you’ll abandon usually comes down to labeling. When everything is clearly marked, the twice-yearly swap takes minutes; when it’s a guessing game of unmarked bins, you avoid it entirely.

Label clearly and on the side that faces out, not just the top — you want to read a bin without pulling it down from a high shelf. Useful labeling approaches include:

  1. By season and category: “Winter – Sweaters,” “Summer – Shorts & Tanks.” Specific beats vague every time.
  2. By person in a multi-person household, so swaps don’t turn into a sorting marathon.
  3. With a contents photo taped to the bin or garment bag for pieces you might forget you own.
  4. With a quick inventory note inside the lid if a bin holds a mix of items.

It also helps to treat the swap as a planned project rather than a spontaneous afternoon scramble. Many people find it less overwhelming to do it in stages — pulling out the incoming season’s clothes one day and packing away the outgoing ones a few days later. Setting yourself up with a clear plan and a calm mindset turns a dreaded chore into something genuinely manageable.

Common mistakes that quietly ruin stored clothes

Even a good system can be undone by a few avoidable errors. Watch for these:

  • Packing clothes dirty. The number-one cause of pest damage and set-in stains. Always clean first.
  • Using dry-cleaner plastic for storage. It traps moisture and yellows fabric. Switch to cotton garment bags.
  • Sealing damp items. Trapped humidity in a closed bin breeds mildew fast.
  • Over-compressing delicate fibers. Vacuum bags are great for synthetics, risky for wool and cashmere.
  • Storing in attics or garages. Temperature and humidity swings damage fabric over months.
  • Skipping moth deterrents. A few cedar blocks or lavender sachets are cheap insurance.
  • Storing things you’ll never wear again. Declutter first so you’re only protecting clothes worth keeping.

The bottom line

Saving space with seasonal clothing comes down to a simple sequence: pare down what you store, clean everything thoroughly, choose protective-but-breathable containers, stash them somewhere cool and dry, and label clearly so next season’s swap is painless. Reserve vacuum bags for sturdy synthetics, give natural fibers room to breathe, and keep your everyday closet uncluttered.

If you only do one thing differently this season, make it this: launder every item before it goes into a labeled, breathable bin on a high shelf or under the bed. That single habit protects your clothes, reclaims real estate, and sets up a system you’ll happily keep using for years.


How to Clean Your Home When You Have Pets

Anyone who shares their home with a dog, cat, or other furry companion knows the trade-off: unconditional love in exchange for a never-ending battle with fur, dander, muddy paw prints, and the occasional mystery puddle. Pets don’t have to mean a permanently grubby house, but they do change the math of cleaning. The strategies that work in a pet-free home simply aren’t enough when there’s a shedding Labrador or a counter-cruising cat in the picture.

The good news is that keeping a clean home with pets is less about cleaning harder and more about cleaning smarter. With the right tools, a few well-placed systems, and a routine that intercepts mess before it sets in, you can have both a tidy home and a happy animal. Here’s how to do it without losing your weekends to a vacuum cleaner.

Build a Pet-Smart Cleaning Toolkit

Before you tackle a single pet mess, set yourself up with the right gear. The single most important investment is a vacuum with a HEPA filter. Pet hair is only half the problem—the dander and microscopic allergens that come with it are what linger in the air and settle into soft surfaces. A HEPA filter actually captures those fine particles instead of recirculating them, which makes a noticeable difference in air quality, especially if anyone in the household has allergies.

Beyond the vacuum, the most valuable item in your arsenal is an enzyme-based cleaner. Unlike standard all-purpose sprays, enzyme cleaners break down the proteins in urine, vomit, and other organic messes, which is what eliminates odor rather than just masking it. This matters enormously with pets, because a smell you can’t detect is often still very obvious to your animal—and a spot that still smells like a bathroom invites repeat accidents.

A few other items worth keeping on hand:

  • Foam shaving cream (the plain foam type, not gel) is a surprisingly effective treatment for set-in stains like vomit or pet urine on rugs. Spray it on, let it foam for a minute or so, then wipe away with warm water.
  • White vinegar and baking soda—a pet-safe, budget-friendly duo for general cleaning and deodorizing. Baking soda sprinkled on carpet before vacuuming helps neutralize lingering odors.
  • Cleansing wipes or paper towels with a spray solution for quick surface wipe-downs.
  • A rubber squeegee or damp rubber glove, which drags embedded hair out of upholstery and carpet far better than a vacuum alone.
  • Baby wipes for cleaning hard-to-reach nooks, baseboards, and the grimy corners where fur collects.

Win the War on Pet Hair and Dander

Fur is the most relentless part of living with pets, and the only real answer is frequency. Vacuuming once a week is a recipe for tumbleweeds of hair under the furniture. Aim to vacuum high-traffic and high-shed areas several times a week, focusing on the spots where your pet sleeps, lounges, and enters the home.

Get hair off soft surfaces

Vacuums struggle with hair woven into upholstery and bedding. This is where a rubber squeegee or a damp rubber glove earns its keep—run it across the couch cushions and you’ll be amazed at how much fur balls up and lifts away. For washable items, toss pet beds, blankets, and slipcovers in the laundry regularly using a pet-safe detergent, and run a quick vacuum or lint roll over them between washes.

Manage dander in the air

Dander is lighter than hair and floats, settling on surfaces you might not think to clean. Wiping down baseboards, shelves, and the tops of door frames with a slightly damp cloth catches dander before it recirculates. Changing your HVAC filter more often than you would in a pet-free home also helps keep airborne allergens down.

Tackle Accidents and Stains the Right Way

When a pet has an accident, speed is everything. The longer a mess sits, the deeper it penetrates into carpet padding, grout, or upholstery fibers, and the harder it becomes to fully remove both the stain and the odor.

Here’s a reliable sequence for fresh messes:

  1. Blot, don’t rub. Press a clean cloth or paper towel into the spot to absorb as much liquid as possible. Rubbing only spreads the mess and pushes it deeper.
  2. Apply an enzyme cleaner generously. Saturate the area—not just the visible stain, but slightly beyond it—and let it sit for the time recommended on the label so the enzymes can break down the organic material.
  3. Blot again and let it dry. Avoid the temptation to scrub. For tougher set-in stains, foam shaving cream can be a powerful backup before or after the enzyme treatment.
  4. Confirm the odor is gone. If you can still smell anything once it dries, repeat the process. A lingering scent is an open invitation for your pet to return to the same spot.

A word of caution: avoid ammonia-based cleaners on pet urine. Urine contains ammonia, so cleaning with it can actually signal to your pet that the spot is an acceptable place to go again.

Keep Kitchens and Counters Genuinely Clean

This section is especially important for cat owners. Cats are notorious counter-walkers, and the same paws that step in a litter box can end up on the surfaces where you prepare and eat food. Even if you’ve trained your cat to stay off—or you simply allow it—it’s worth assuming that food-prep surfaces have been visited and treating them accordingly.

The simple habit that solves this: wipe counters before and after you put food on them. A cleansing wipe or a paper towel with cleaning solution takes seconds and removes invisible tracks of litter sand and bacteria. A few more kitchen practices that pay off:

  • Store cutting boards, knives, and other prep tools inside closed cupboards and drawers rather than leaving them out on the counter where paws can reach.
  • Wash food and water bowls daily, just as you’d wash your own dishes—bowls develop a slimy bacterial film faster than most people expect.
  • Keep pet food in sealed containers to avoid attracting pests and to contain the crumbs and dust that come with kibble.

Set Up Systems That Prevent Mess Before It Starts

The most effective pet cleaning happens before any cleaning is needed at all. Smart organization and a few strategic barriers dramatically cut down on how much mess actually reaches your floors and furniture.

Create a dedicated pet station

Designate a single cabinet, drawer, or bin for everything pet-related: food, treats, brushes, leashes, towels, and cleaning supplies for accidents. Containing it all in one place means you’re not chasing supplies around the house, and it keeps the visual clutter of pet gear from spreading. A pet station near your pet’s main living area makes daily maintenance frictionless—when the cleanup tools are right there, you actually use them.

Intercept dirt at the door

Most of the mud and outdoor debris in your home arrives on paws. A sturdy mat at every entrance, paired with a towel kept by the door for wiping paws after walks, stops a remarkable amount of grime from ever reaching your living room. For heavy shedders, brushing your pet outside or near the door—rather than in the middle of the living room—keeps loose fur from drifting through the house.

Keep Your Home Cleaning Pet-Safe

A clean home shouldn’t come at the cost of your pet’s health. Many common household cleaners contain chemicals that are harmful if a curious animal licks a freshly mopped floor or chews a wipe. Building pet safety into your routine is non-negotiable.

  • Store all cleaning products well out of reach—in a high cabinet or behind a childproof latch. This includes the enzyme cleaners and stain treatments you’ll be using regularly.
  • Lean on gentler options like vinegar and baking soda for everyday cleaning where you can. They’re effective deodorizers and far less worrying around animals.
  • Let treated surfaces dry fully before letting pets back in. Whether you’re mopping floors or spraying a counter, give the area time to dry so there’s nothing wet for paws or tongues to pick up.
  • Consider steam cleaning for deep cleans. Steam sanitizes carpets and upholstery with high heat instead of chemicals, which makes it a great pet-friendly choice for periodic deep cleaning.

If your pet ever ingests a cleaning product or shows signs of illness after exposure, contact your veterinarian or an animal poison control line right away. When choosing new products, it’s always worth a quick check of the label and, if you’re unsure, a conversation with your vet about what’s safe to use around your specific animal.

The Bottom Line

Cleaning a home with pets is a game of consistency, not heroics. The households that stay clean aren’t the ones doing marathon scrub-downs—they’re the ones with a HEPA vacuum running a few times a week, an enzyme cleaner ready for instant accident response, a pet station keeping supplies organized, and a door routine that stops dirt before it spreads. Start with the two highest-impact moves: invest in a proper vacuum and keep an enzyme cleaner within arm’s reach. Build the rest of these habits in gradually, and you’ll find the daily upkeep shrinks until a clean, pet-friendly home feels effortless.

How to Organize a Small Bedroom With Limited Closet Space

A small bedroom with a tiny closet can feel like a daily negotiation: where do the off-season sweaters go, why is the floor always covered in shoes, and how does a room this size generate so much clutter? The good news is that limited square footage isn’t actually the problem. The problem is almost always too much stuff competing for too little well-designed space. Once you fix both halves of that equation, even a cramped room with a single narrow closet can feel calm and functional.

This guide walks through the exact order I’d tackle it in—declutter first, then build storage upward and underneath, then make the closet itself work harder, and finally set up a rhythm so it stays that way. Follow it in sequence and you’ll get far better results than buying a pile of bins and hoping for the best.

Start by removing what shouldn’t be there

The single most effective thing you can do in a small bedroom costs nothing: take stuff out. Organizing clutter just rearranges your frustration. The goal is to return only what you actually use and genuinely want in the room.

The trick is to work in small, finishable sections so you don’t burn out or end up with a worse mess than you started with. Don’t dump your entire closet on the bed at 9 p.m.—that’s how people give up halfway through. Instead, pick one drawer, one shelf, or one section of hanging clothes and finish it completely before moving on.

A simple decluttering pass that works

  1. Clear the surfaces first. Nightstands, dressers, and windowsills are clutter magnets. Remove anything that doesn’t belong in a bedroom—dishes, paperwork, random electronics—and relocate it.
  2. Go category by category. Pull every item in one group (say, all your T-shirts) and handle them together. It’s much easier to make decisions when you can see you own fourteen of the same thing.
  3. Keep only what you use or love. If you haven’t worn it in a year and it doesn’t fit your life, it’s just taking up space you can’t afford.
  4. Question whether it even belongs in this room. Could blazers hang in an entry closet? Could rarely-worn shoes live by the front door or in the garage? Relocating whole categories elsewhere is one of the fastest ways to free up a small closet.

Decluttering before you organize isn’t optional busywork—it’s what makes every step that follows simpler and more effective. You can’t design good storage around an unknown quantity of belongings.

Build storage upward, not outward

In a small room, floor space is your scarcest resource, so your storage strategy should climb the walls instead of spreading across the floor. Vertical space is almost always underused.

Look at the empty real estate above your dressers, above the door, and in the gap between your top shelf and the ceiling. A few well-placed shelves can hold books, folded items, baskets, or decor that would otherwise eat into your nightstand and dresser tops.

  • Wall shelves above the dresser or bed create storage without consuming a single inch of floor.
  • An over-the-door organizer is ideal for shoes, accessories, scarves, or small items—it uses a surface that’s otherwise completely wasted. Hang one on the bedroom door or the closet door.
  • Hooks on the back of the door or on a free patch of wall hold bags, robes, tomorrow’s outfit, or a hat collection.
  • Baskets on a high shelf corral the lightweight, less-used things—spare bedding, off-season accessories—and look tidy doing it. Woven baskets keep an open shelf from feeling chaotic.

The principle to remember: every vertical surface is potential storage. Doors, the wall above furniture, and the air above your closet rod are all fair game.

Put the space under your bed to work

Under-bed storage is the secret weapon of the small bedroom, because it’s a large flat area you’re already paying for and probably ignoring. It’s the natural home for anything you don’t reach for daily.

This is the perfect spot for out-of-season clothing. Storing winter coats and sweaters under the bed during summer (and vice versa) effectively doubles your usable closet by removing half your wardrobe from competition. Flat under-bed bins or rolling drawers keep everything contained and dust-free.

One word of caution from experience: skip the vacuum-seal compression bags for clothes you care about. They save space, but garments come out badly wrinkled, and you’ll spend more time and money pressing them than the storage was worth. Stick to flat bins that let clothes lie naturally.

If your bed sits low to the ground, bed risers can buy you several extra inches of clearance—enough to fit proper storage boxes underneath.

Choose furniture that earns its footprint

When space is tight, every piece of furniture should do at least two jobs. A bed is just a bed; a bed with drawers is a dresser too. The smartest small-bedroom moves replace single-purpose items with double-duty ones.

Multi-tasking pieces worth considering

  • A small dresser as a nightstand. Instead of a tiny table that only holds a lamp, use a compact chest of drawers beside the bed. You get a surface and hidden storage in the same footprint.
  • A storage bench at the foot of the bed. It holds extra blankets or bulky items, gives you a place to sit while dressing, and tucks neatly against the bed frame.
  • A storage ottoman. Doubles as seating and a hidden bin for whatever doesn’t have a home yet.
  • A bed frame with built-in drawers. If you’re buying a new bed anyway, this is the highest-value storage upgrade in the room.

The mindset here is simple: when space is scarce, tuck storage into everything you can. You don’t need a separate piece for each function—you need pieces that combine functions.

Make a tiny closet hold more

A small closet rewards creativity. The goal is to find every usable inch—high, low, and side to side—and give each category of items a defined home so things stop turning into a jumbled pile.

Reclaim the height

Most closets waste vertical space. If you can move your clothes rod up a few inches, you’ll free up valuable room below for drawers or shelves. Add a shelf above the hanging area (or above the existing top shelf) for items you rarely touch. Down low, slide in open shelves or small drawers beneath shorter hanging garments like shirts and skirts—that dead space below them is prime storage.

Switch to slim hangers

This one small change makes a visible difference. Bulky plastic and wooden hangers crowd the rod; swapping to thin, non-slip velvet hangers lets you fit noticeably more clothing in the same width while keeping everything neat and aligned. It also stops shoulders from slipping off and creating that floor pile.

Give shoes a defined home

A shoe organizer—whether a hanging over-the-door style, a low shelf, or a rack on the closet floor—means each pair has a spot. When shoes have a designated home, you’re far less likely to kick them into a heap at the end of the day. Tidiness is mostly about reducing the friction of putting things away.

Free-fold to lighten the rod

If you have any spare room in your dresser, file-fold clothes (the KonMari method, where items stand upright on their edge rather than stacked flat). You’ll see everything at a glance, fit more per drawer, and can move some folded categories out of the closet to free up hanging space where it matters.

Keep it that way with a seasonal reset

Even the best-organized small bedroom drifts back toward clutter without a maintenance habit. The most practical rhythm for most people is a seasonal reset—roughly three to four times a year.

A reset is when you rotate your wardrobe: out-of-season clothes go into under-bed bins or a storage area like a closet shelf, basement, or garage, and the current season’s items come forward into easy reach. This single move keeps your closet from holding twice the clothing it should at any given time.

Pair the rotation with a quick decluttering pass. Because you’re already handling everything as you swap it, it’s the natural moment to pull out what you didn’t wear last season and let it go. A printable decluttering checklist or calendar can keep you honest if letting go is hard for you.

  • Swap in-season and off-season clothing between the closet and under-bed storage.
  • Cull anything you skipped over entirely last season.
  • Reset surfaces—clear the dresser top and nightstand back to essentials.
  • Refresh systems—wipe down shelves, empty the catch-all basket, and make sure every category still has a home.

The bottom line

A small bedroom with limited closet space isn’t a storage problem so much as a too-much-stuff problem dressed up as one. Declutter first so you know exactly what you’re working with, then climb the walls and use the floor beneath your bed, choose furniture that does double duty, and squeeze every inch out of the closet with raised rods, slim hangers, and a real home for your shoes. Finish by locking in a seasonal reset so the system maintains itself. Start with a single drawer or shelf this week—that small, finished win is what makes the rest of the room feel possible.

A Step-by-Step Guide to Decluttering Your Garage

The garage has a way of becoming the household’s unofficial dumping ground. It’s where the holiday decorations live alongside the broken lawnmower, the bikes nobody’s ridden in two years, and that box of “I might need this someday” mystery items. Before long, you can’t park the car, you can’t find the tools, and you avoid even opening the door. Sound familiar?

The good news is that a chaotic garage is one of the most satisfying spaces in the entire home to reclaim. Because so much of the clutter is genuinely disposable or donatable, you tend to see dramatic results fast. This guide walks you through the whole process — from the prep work that prevents burnout, to the sorting decisions that trip people up, to the storage systems that actually keep it organized long after the cleanup is done.

Start With a Plan, Not a Trash Bag

The single biggest mistake people make is diving in on a whim. They start pulling things out, run out of energy by noon, and end up with a garage that’s worse than when they started — now with half the contents strewn across the driveway. Decluttering a garage is a project, and projects need a little structure.

Begin by being honest about scope. A two-car garage that hasn’t been touched in five years is not an afternoon job. Block out a full day, or better yet a weekend, and check the weather forecast — you’ll want a dry day so you can spread everything out on the driveway or lawn.

Before you touch a single box, gather your supplies so you’re not interrupting your momentum later:

  • Trash bags and a few sturdy bins for sorting
  • A lidless trash can or open bin placed centrally — skipping even the small step of lifting a lid keeps you moving and reduces the temptation to second-guess
  • Cardboard boxes labeled Keep, Donate, Sell, and Relocate
  • Gloves, a broom, and a shop vac for the cleaning phase
  • A marker and masking tape or sticky notes for quick labeling

Decide upfront what your garage is actually for. Is it primarily for parking? A workshop? Sports and outdoor gear storage? This vision becomes your filter for every keep-or-toss decision that follows.

Empty, Sort, and Make the Hard Calls

The most effective approach is to pull everything out. It feels dramatic, but seeing your garage completely empty does two things: it shows you how much usable space you really have, and it forces you to handle every item rather than shuffling clutter from one corner to another.

As you remove items, sort them into your labeled categories immediately. Don’t create a vague “deal with later” pile — that pile is where decluttering projects go to die.

The four-category system

  1. Keep: Things you use, that work, and that genuinely belong in the garage. Tools, current sports equipment, lawn care gear, car supplies.
  2. Donate: Gently used items in working condition that someone else could benefit from — extra tools, outgrown bikes, camping gear you no longer use.
  3. Sell: Items with real resale value worth the effort of listing. Be ruthless here; if something’s been “worth selling” for three years and you still haven’t listed it, it probably belongs in donate.
  4. Toss/Recycle: Broken items, expired chemicals, dried-out paint, and the rusted-beyond-repair stuff you’ve been stepping over.

Common decision traps to watch for

A few categories of clutter cause more agonizing than they deserve. Keep these guidelines in mind:

  • The “might need it someday” item. If you haven’t used it in a year or more and can’t name a specific upcoming use, let it go. The cost of storing it usually outweighs the small chance you’ll need it.
  • Duplicate tools. Three hammers and a drawer of mismatched screwdrivers? Keep the best of each and donate the rest.
  • Sentimental boxes. The garage is a terrible place to store memories — humidity and pests destroy them. Move genuinely cherished items indoors and recycle the rest.
  • Hazardous materials. Old paint, pesticides, motor oil, and batteries shouldn’t go in the regular trash. Check with your local waste authority for a household hazardous-waste drop-off, and never pour chemicals down a drain.

Clean and Repair the Empty Space

Here’s the step almost everyone skips, and it’s the one that makes the finished result feel transformative. With the garage empty, you have a rare opportunity to deep-clean and address small repairs before anything goes back in.

Sweep out the years of dust, cobwebs, and leaf litter. Vacuum the corners and along the baseboards. Wipe down shelving you plan to reuse. If the floor is stained or grimy, this is the moment to scrub or hose it down — you’ll never have easier access than right now.

Take a look at the space itself while it’s bare. Is the lighting adequate? A dim garage feels cluttered even when it’s tidy, and good lighting makes the space far more usable for projects. Note any wall studs you can anchor shelving into, check that the garage door operates smoothly, and patch any obvious entry points where pests or moisture get in. Letting the floor dry completely before reloading prevents trapping moisture under bins.

Build a Zoned, Vertical Storage System

This is where a decluttered garage becomes an organized garage that stays that way. The guiding principle: get things off the floor and group like with like. Floor clutter is what makes a garage unusable, so the goal is to push storage up the walls and overhead.

Reach for the walls and ceiling

Vertical storage is the secret weapon of every well-run garage. Your floor space is precious — ideally reserved for vehicles and a clear walking path — so make the walls and ceiling work for you:

  • Wall-mounted racks, slatwall, and pegboards are perfect for frequently grabbed tools like rakes, shovels, and drills. Mounting them at eye level keeps everything visible and within reach.
  • Overhead ceiling racks are ideal for lightweight but bulky seasonal items — plastic storage bins, ladders, holiday decorations — that you only touch a few times a year. This reclaims space that’s almost always wasted.
  • Sturdy shelving units along the walls keep bins organized and elevated off the concrete, away from potential water damage.

Create zones for how you actually use the space

Group related items into dedicated zones so you always know where things belong — and where to put them back. A typical setup includes:

  • A workbench hub where all your tools and project supplies live together, which prevents “project creep” from spreading screwdrivers across the whole garage
  • A lawn and garden zone for the mower, hose, fertilizer, and hand tools
  • A sports and recreation zone for bikes, balls, and gear
  • A seasonal storage zone for the items you rotate in and out

Smart solutions for awkward items

Sports equipment is notoriously hard to store because so much of it is either tall and skinny or round. Baseball bats, hockey sticks, fishing poles, and rakes don’t sit nicely on shelves, and balls roll away the moment you set them down. A clever, low-cost fix is to corral these in tall, sturdy, lidless bins or laundry hampers — the tall-skinnies stand upright together and the rounds stay contained.

Use clear bins and label everything

Whenever possible, store loose items in clear plastic bins so you can see the contents at a glance rather than opening five containers to find the extension cords. Then add a clear, descriptive label to each one. Labeling does more than help you find things — it tells everyone in the household exactly where an item goes back, which is half the battle in keeping the space clutter-free.

Keep It From Sliding Back Into Chaos

A garage doesn’t go from spotless to disaster overnight. It happens one “I’ll just set this here for now” at a time. The systems you’ve built do most of the maintenance work, but a little ongoing discipline keeps the entropy at bay.

  • Honor the zones. When you finish a project, put tools back in the workbench hub. The five seconds it takes is what prevents the next pile.
  • Adopt a one-in, one-out habit. When a new tool or piece of gear comes in, let something old go.
  • Do a quick seasonal reassessment. Twice a year — spring and fall are natural triggers — spend twenty minutes scanning for items that have crept in or no longer earn their space. Rotate seasonal gear into the easy-to-reach spots and overhead storage as needed.
  • Keep a donation box going. A standing box in the corner makes it effortless to set aside items as you notice them, rather than waiting for a once-a-year overhaul.

The Bottom Line

Decluttering your garage isn’t really about the stuff — it’s about reclaiming a space that works for you instead of against you. The formula is straightforward: plan before you start, empty everything out and make honest keep-or-let-go decisions, clean the bare space, then build a zoned system that gets items off the floor and onto the walls and ceiling. Clear bins and clear labels do the heavy lifting on staying organized.

If the whole thing feels overwhelming, don’t wait for the perfect free weekend — just start with the single worst corner. Pull it out, sort it into keep, donate, and toss, and put the keepers back with intention. One visible win is usually all the motivation you need to tackle the rest.

How to Decide What to Keep When Decluttering Sentimental Items

Sentimental clutter is the final boss of decluttering. You can blitz through a wardrobe of jeans that no longer fit and a drawer of mismatched Tupperware lids, but the box of your grandmother’s letters, your child’s first drawings, and the ticket stub from a concert that changed your life? That’s a different kind of decision. These items aren’t just stuff—they feel like the physical anchors of who we are and who we’ve loved.

The good news: deciding what to keep doesn’t have to mean cold, ruthless purging. With the right questions and a clear system, you can preserve what genuinely matters, release what’s only weighing you down, and feel lighter instead of guilty. Here’s how to do it.

Why Sentimental Items Deserve a Different Strategy

There’s a reason Marie Kondo’s famous method saves sentimental items for last—after clothes, books, papers, and miscellaneous belongings. By the time you reach the keepsakes, you’ve practiced the muscle of letting go on lower-stakes items. You’ve felt what it’s like to release something and survive it. That practice matters, because sentimental decisions are emotional, not logical, and you want some momentum behind you before you tackle them.

So if you’re staring down a basement full of memory boxes right now and feeling paralyzed, the first move is counterintuitive: step away from the sentimental items and declutter something easier first. Clear out the kitchen gadgets or the linen closet. You’ll arrive at the hard stuff calmer, more decisive, and with a real sense of what “keep” versus “let go” feels like in your body.

The Core Question: Can the Memory Survive Without the Object?

Here is the single most useful question for sorting sentimental items: Will I still remember this moment without keeping the physical thing?

Most memories don’t actually live inside objects. They live inside us. The object is a trigger, but it isn’t the only possible trigger. A wedding bouquet, for example, doesn’t store your wedding day—your mind does, and so do your photos, your spouse, and the story you tell about it. Once you separate the memory from the thing, a lot of “I could never get rid of this” items suddenly become optional.

Try running each item through a quick mental checklist:

  • Is this actually sentimental, or just hard to throw away? Guilt, obligation, and “it was expensive” are not the same as genuine sentiment. Be honest about why you’re holding on.
  • Does it evoke a genuinely positive memory? Some items carry sadness, stress, or a relationship you’ve outgrown. You’re allowed to release those.
  • Can I preserve the memory another way? A photo, a video, or a written-down story may capture everything you need.
  • Would I buy or seek this out today if I didn’t already own it? A surprisingly clarifying gut check.

If the memory can live on through a photograph and a sentence in your journal, you have permission to let the object go. The memory isn’t going anywhere.

Digitize to Keep the Story Without the Stuff

Digitizing is the modern decluttering superpower. Before cloud storage, holding onto physical keepsakes was the only way to preserve them. Now you can keep a tangible reminder without using a single square foot of shelf space.

This is especially powerful for items that are bulky, fragile, or impractical to store but emotionally meaningful: kids’ artwork, school papers, greeting cards, certificates, old letters, and trophies. You’re not erasing the memory—you’re moving it somewhere it can actually be enjoyed.

What to digitize and how

  • Children’s artwork and schoolwork: Photograph each piece flat in good light. For a special touch, photograph your child holding their favorite pieces so the photo captures both the art and how small their hands were.
  • Cards and letters: Scan or photograph them. If the handwriting itself is what matters, a clear image preserves it perfectly.
  • Trophies, medals, and bulky awards: Take a photo, then let the physical object go. The achievement happened; the dust-collecting plastic isn’t what made it real.
  • T-shirts and clothing with memories: Photograph them, or have a batch turned into a single memory quilt so dozens of shirts become one usable item.

A word of caution: digitizing only works if you actually look at the files later. Create a clearly labeled folder—or better, an annual photo book—so your digital memories don’t become an invisible, forgotten pile. The goal is to enjoy them more, not to hide them in a hard drive you never open.

Set a Physical Limit Before You Start

Decisions get easier when there’s a container telling you when to stop. Without a limit, “I’ll just keep this one too” repeats itself until you’re back where you started.

A simple, effective approach is the memory box system: one sturdy bin per family member. Everything truly worth keeping has to fit inside that person’s box. When the box is full, keeping something new means letting something else go. This turns abstract sentimentality into a concrete, manageable game—and it forces you to identify your most treasured items rather than keeping everything at the same low priority.

A few tips for making the limit work:

  • Choose the box first, then fill it. Picking the container before you sort sets the boundary in advance, so you’re curating rather than accumulating.
  • Give kids’ boxes some breathing room. If you’re setting up boxes for young children, leave space—they’ll add meaningful items as they grow, and you don’t want to fill the box before they’ve had their childhood.
  • Label each box clearly. Names on boxes also serve a practical purpose down the line: if something happens to you, your family knows you intended those items for them, and they can decide for themselves what to keep. You’ve designated it; the choice becomes theirs, guilt-free.

Favor Items You Actually Use or Will Display

Sentiment and function aren’t opposites—and items that do both earn their place easily. If you inherited a beautiful carving set from your parents, let it replace the unremarkable one you bought out of necessity. Now you use the meaningful object every holiday instead of hiding it in a drawer. The memory becomes part of your daily life rather than a sealed-up relic.

Two practical filters help here:

The “would I display it?” test

If something genuinely brings you joy, you should be able to find a place to display or use it. If it’s not worthy of a spot on a shelf, a wall, or in regular rotation—and you can’t make room for it—that’s a strong signal it can go. A treasured item deserves to be seen, not stuffed in a tote in the garage.

The “am I living in reality?” test

Be honest about the future you’re keeping things for. Holding onto clothes that no longer fit “in case” is rarely realistic—and even if your circumstances change, you’ll likely want new things rather than the dated ones. The same logic applies to puzzles missing pieces, broken keepsakes, and items waiting for a repair that’s never coming. Anything you haven’t touched in a couple of years is usually ready to move on, sentiment or not.

Handling Guilt, Gifts, and Inherited Items

The hardest sentimental clutter usually isn’t yours by choice—it’s a gift you feel obligated to keep or an inheritance loaded with grief. A few reframes help:

  • A gift’s job was finished the moment it was given. It expressed love and was received. Keeping it forever isn’t a requirement of having appreciated it.
  • You are not the family museum. Inheriting everything from a loved one’s home isn’t honoring them—it’s often just transferring a burden. Keep the few pieces that genuinely connect you to them, and release the rest with gratitude.
  • Offer items to others before donating. A sibling or cousin may treasure something you don’t. Passing it along keeps it “in the family” while clearing your space.
  • Letting go is not forgetting. Releasing your grandmother’s entire china set while keeping one cup and saucer still honors her—and the one cup you’ll actually use means more than twelve you never unbox.

If grief is making decisions feel impossible, it’s okay to pause. Set those items aside in a clearly labeled box and revisit them in a few months when the emotions are less raw. Decluttering should never become a source of trauma—give yourself permission to go at a humane pace.

The Bottom Line

Deciding what to keep when decluttering sentimental items comes down to a handful of clear principles: warm up on easier categories first, ask whether the memory can survive without the object, digitize what you can, and give yourself a physical limit so the decisions have an end point. Favor the items you’ll actually use or display, stay grounded in your real life, and treat gifts and inheritances with compassion rather than obligation.

Your next step is small and concrete: get one bin. Choose a single box, label it with your name, and decide that the items earning a spot inside are the ones that truly tell your story. Then start digitizing the rest. You’ll be amazed how much lighter you feel—and how much more you’ll cherish the few things you chose to keep.

5 Common Decluttering Mistakes and How to Avoid Them

If you’ve ever spent a whole Saturday “decluttering” only to find your house looks exactly the same by Sunday night, you’re not lazy and you’re not bad at this. You’re almost certainly making one of a handful of predictable mistakes that quietly sabotage even the most motivated effort. Decluttering feels like it should be intuitive—just get rid of the stuff you don’t want, right?—but the process is full of small traps that turn a productive afternoon into a frustrating shuffle of belongings from one pile to another.

The good news is that these mistakes are common precisely because they’re so easy to fix once you can name them. Below are the five I see derail people most often, along with the practical adjustments that actually move the needle. None of these require buying anything or following a rigid system—just a clearer understanding of what’s gone wrong and how to course-correct.

Mistake 1: Waiting to Feel Ready Instead of Starting Small

The single most common reason people don’t declutter is that the whole project feels too big to begin. You look at a cluttered garage or an overstuffed closet, your brain registers the scale of the work, and you decide to tackle it “when you have a free weekend.” That weekend rarely comes, and even when it does, the overwhelm hits the moment you open the door.

The fix is to shrink the starting point until it feels almost too easy. Instead of “the garage,” you declutter one shelf. Instead of “the whole kitchen,” you do the junk drawer. A small, finished win builds the momentum and confidence that a vague, enormous goal destroys.

Where to start when everything feels like too much

  • Pick a contained, low-emotion zone. A single drawer, the bathroom cabinet, or the area under the sink. You want a quick visible result, not a sentimental minefield.
  • Set a timer for 15 minutes. Knowing there’s a finish line removes the dread. You’ll often keep going past the buzzer—but you don’t have to.
  • Finish completely before moving on. One fully cleared, wiped-down drawer beats five half-sorted ones. Completion is what motivates you to come back tomorrow.

Starting small isn’t a compromise or a lesser version of “real” decluttering. It’s the strategy that lets people who’ve stalled for years finally get moving—and keep moving.

Mistake 2: Diving In Without a Plan or a Reason

Enthusiasm without direction is how you end up with twelve open piles, a living room that’s worse than when you started, and no energy left to deal with any of it. Decluttering without a plan means you make decisions on the fly, get distracted by every interesting object, and have no way to know when you’re “done.”

Before you touch anything, get clear on two things: what you’re decluttering and why. The “why” matters more than people expect. Are you clearing space because you’re moving? Trying to make mornings less chaotic? Reducing what you have to clean around? Your reason shapes your decisions. If your goal is a calmer morning routine, the entryway and the closet matter more than the basement.

Make a simple plan you’ll actually follow

  1. Write down your real motivation. One sentence is enough. “I want to be able to park in my garage” is a goal you can measure against.
  2. Choose one area at a time and define its edges clearly. “The hall closet” not “the hallway and maybe the closet and possibly that shelf.”
  3. Decide where things go before you start. Have a donate box, a trash bag, a “belongs elsewhere” basket, and a recycling spot ready. When you pick up an item, it has somewhere to land.
  4. Plan what happens to the stuff you remove. If you’re selling items to put money toward a goal, know where that money is going—otherwise it quietly disappears and you’ve simply moved clutter from your home to your car.

A plan turns an overwhelming chore into a sequence of small, defined tasks. It also protects you from the most demoralizing outcome of all: working hard for hours with nothing finished to show for it.

Mistake 3: Buying Organizing Containers Before You Declutter

This is the most seductive mistake because it feels like progress. You watch a few videos, get inspired, and head to the store for matching bins, drawer dividers, and pretty labeled baskets. The problem is that you’ve now spent money organizing clutter you haven’t even decided to keep.

Here’s the core principle every experienced organizer comes back to: organized clutter is still clutter. Containers don’t reduce what you own—they just hide it more attractively. And when you buy storage first, you tend to fill it, which means you keep things you’d otherwise have let go of simply because there’s now a labeled spot for them.

Decluttering always comes before organizing, and the order is not negotiable if you want lasting results. Once you’ve removed everything you don’t use or love, two things happen. First, you’ll need far fewer containers than you thought. Second, you’ll know the exact sizes and quantities to buy, because you’ll be shopping for what’s actually staying. Take measurements after you’ve pared down, then buy storage to fit—not the other way around.

Mistake 4: Handling Items Repeatedly and Postponing Decisions

Watch someone declutter slowly and you’ll notice a pattern: they pick something up, study it, set it back down, pick it up again ten minutes later, and never actually decide anything. Every time you touch an item without making a decision, you spend mental energy and gain nothing. Do that across a few hundred objects and you’ll be exhausted before you’ve made a dent.

The antidote is a rule professional organizers swear by: touch it once. When you pick something up, decide its fate right then—keep, donate, trash, or relocate—and act on it immediately. Don’t reshuffle, don’t revisit, don’t admire it for the third time.

Keep your decisions moving

  • Limit your “maybe” pile. A small maybe pile is human; an enormous one means you’re just avoiding decisions. If everything is a maybe, nothing leaves your house.
  • Use a quick gut-check question. “Have I used this in the last year?” or “Would I buy this again today?” Trust your first answer instead of building a research project around a spatula.
  • Try a time-based test for tough calls. Some people find it helpful to give themselves only a few seconds to remember the last time they used an item. If nothing comes to mind quickly, that’s usually your answer.
  • Box up genuine maybes with a date. If you truly can’t decide, seal those items in a box, label it with today’s date, and store it out of sight. If you haven’t opened it in a few months, donate it unopened.

Decisiveness is a skill that improves with practice. The more decisions you make quickly, the easier the next one becomes—and the faster you’ll see the room actually empty out.

Mistake 5: Trying to Do It All Alone (and All at Once)

Two related errors live under this heading. The first is decluttering shared spaces and other people’s belongings in isolation. If you purge your partner’s or kids’ things without involving them, you’ll spark resentment and almost certainly end up re-buying or replacing things that mattered to someone. Decluttering a shared home works best as a conversation, not an ambush.

The second error is treating decluttering as a one-time marathon. People burn out trying to do the entire house in a single weekend, then never want to repeat the experience. Decluttering is far more sustainable as an ongoing rhythm than a heroic, exhausting event.

Build a system you can maintain

  • Bring others in early. Let family members make decisions about their own belongings. Even young kids can choose which toys to pass on when you frame it kindly.
  • Adopt a small repeatable habit. A simple approach is to regularly gather a dozen items to toss, a dozen to donate, and a dozen to return to their proper home. It’s manageable and keeps clutter from creeping back.
  • Schedule short maintenance sessions rather than waiting for crisis-level mess. Fifteen minutes a week beats two exhausting days a year.
  • Address the inflow. Understand why the clutter accumulated in the first place. If you don’t change your buying or storing habits, you’ll simply refill the space you just cleared.

The Bottom Line

Most decluttering frustration doesn’t come from a lack of effort—it comes from these five fixable missteps: never starting because the job feels too big, working without a plan or a clear reason, buying containers before paring down, handling items endlessly without deciding, and going it alone in one exhausting push.

Pick the mistake that sounds most like you and fix that one first. If you’ve been stalled, start with a single drawer this week and set a 15-minute timer. If you tend to fizzle out, write down your one-sentence “why” before you begin. Small, deliberate corrections turn decluttering from a dreaded annual ordeal into a steady habit that actually keeps your home clear—and keeps it that way.

How to Declutter Your Closet Without Feeling Overwhelmed

If you’ve ever stood in front of your closet, pulled everything onto the bed in a fit of motivation, and then sat down two hours later surrounded by a mountain of clothes you no longer have the energy to deal with, you’re not alone. The “dump it all out” method is the single biggest reason closet decluttering feels overwhelming. It floods you with decisions all at once, and decision fatigue sets in long before you’ve made a dent.

The good news: decluttering your closet doesn’t have to be an all-day emotional marathon. With the right sequence, a few simple rules to speed up your choices, and permission to work in small chunks, you can clear out what you don’t wear and actually keep it that way. Here’s how to do it without losing your mind in the process.

Why “All at Once” Backfires (and What to Do Instead)

The instinct to empty your entire closet in one go comes from a good place — you want a fresh start. But a closet holds hundreds of small decisions, and your brain can only make so many quality choices before it starts defaulting to “I’ll just keep it.” That’s how you end up shoving everything back in.

Instead, work one section at a time. Pull out a single category — just your jeans, or just your blouses — and deal with only that pile before moving on. This keeps the scope small enough that you can finish a piece of the project in 20 to 30 minutes and feel a genuine win. You can tackle one section a day for a week, or knock out a few sections over a weekend. The point is that each session has a clear beginning and end.

Working in categories also reveals patterns you’d never notice with everything jumbled together. When all eleven of your black T-shirts are in one heap, it’s suddenly obvious you only reach for three of them.

Set Yourself Up Before You Touch a Single Hanger

A little prep prevents the mid-project collapse. Before you start pulling things out, gather your tools so you’re not wandering off to find a trash bag and getting distracted for an hour.

  • Three labeled containers or bags: one for donate/sell, one for toss (damaged, stained, or worn-out items), and one for relocate (things that belong elsewhere in your home).
  • A “maybe” box: for the genuinely uncertain pieces. We’ll come back to this — it’s a release valve, not a loophole.
  • Matching hangers, if you have them: swapping to uniform hangers as you go instantly makes the closet look calmer and helps you see what you actually own.
  • A clear surface: a made bed or a clean table where you can sort one category at a time without things sliding into chaos.

One more piece of mental prep: before you begin, ask yourself how you want your closet to feel. Hanging on to clothes you never wear quietly weighs on you every morning. If you want mornings to feel lighter and quicker — fewer decisions, easy access to the things you love — that’s your north star. Letting go creates that ease.

The Rules That Make Hard Decisions Easy

The reason decluttering drags is that we treat every item as an open-ended question. Simple rules turn fuzzy emotional calls into quick yes-or-no answers. Pick one or two of these and apply them consistently across each category.

The 90-Day Test

Ask yourself: have I worn this in the last 90 days, or will I realistically wear it in the next 90? For everyday items, if the answer is no on both counts, it’s time to let it go. The obvious exception is seasonal clothing — your wool coat shouldn’t be evicted in July. For those pieces, just ask whether you wore it last season.

The Five-Outfit Rule

Professional organizer Tina Priestly suggests a clever filter for the pieces you’re on the fence about: can you build at least five different outfits with it that you’d actually wear? If a top only works with one specific skirt you rarely reach for, it’s earning very little space in your closet. If it mixes effortlessly with what you already own, it’s a keeper.

Keep What You Actually Reach For

The simplest principle of all: prioritize the items you wear often, and let the rest move on through donating or selling. Your favorite well-worn jeans and the shirt you grab without thinking are doing real work. The “someday,” “what if,” and “it was expensive” items are usually just taking up the prime real estate those favorites deserve.

A Section-by-Section Game Plan

Here’s a sequence that builds momentum. Start with the easiest categories — where decisions are mostly obvious — and save the emotionally loaded stuff for when you’ve warmed up.

  1. Start with the clear-cut category: something like socks, workout clothes, or basic T-shirts. Toss anything stained, stretched out, or full of holes. Quick wins here build confidence.
  2. Move to everyday tops and bottoms: apply the 90-day test. Pull the things you reach for to one side, and put everything else through the question.
  3. Tackle dresses, blazers, and “occasion” wear: this is where the five-outfit rule and honest reflection matter most. Be wary of keeping things purely for an event that may never happen.
  4. Handle shoes and accessories last: by now your decision-making muscle is warmed up, and these tend to carry less emotional weight than clothing.
  5. Finish with sentimental items: the concert tee, the dress from a milestone. Give yourself permission to keep a small, defined number — but store memory-only pieces somewhere other than your active closet so they don’t crowd what you wear daily.

For anything you genuinely can’t decide on, drop it in the maybe box. Seal it, date it, and tuck it out of sight. If you haven’t gone looking for any of it after a few months, you have your answer — donate the box unopened. This removes the pressure to be “right” about every single item in the moment.

Put Back Only What Earns Its Place

Decluttering and organizing are two different jobs, and doing them in the right order matters. Downsizing first means you have far fewer items to find homes for — think of it as pre-organizing for your organizing. Once you’ve pared down, putting things back becomes a pleasure instead of a puzzle.

Hang or Fold? A Simple Rule

A reliable guideline from organizing pros: hang anything that wrinkles easily, and fold the sturdy stuff. That means dresses, blouses, skirts, and slacks go on hangers, while denim, sweaters, T-shirts, and athleisure get folded. The exception is space — some organizers prefer to hang nearly everything (good padded “huggable” hangers are gentle enough even for sweaters) and only start folding once they run out of rail space.

Make Everything Visible

The clothes you can’t see are the clothes you don’t wear. A few small moves make a big difference:

  • Use matching hangers facing the same direction so the rail looks streamlined and nothing disappears into a tangle.
  • File-fold or roll folded items so they stand upright in a drawer rather than stacking in piles, where the bottom layers get forgotten.
  • Use drawer dividers or bins to keep categories separated and stop everything from shifting into one undifferentiated mass.
  • Improve the lighting if your closet is dim — you’ll wear far more of what you own when you can actually see it.

Keeping It Decluttered (The Part Everyone Skips)

Adulthood can feel like an endless loop of clearing out a closet that’s somehow full again two months later. Maintenance is what breaks that cycle, and it takes almost no effort once the closet is set up.

The reverse-hanger trick is the easiest habit to adopt: turn all your hangers so they face backward. When you wear something and return it, hang it the normal way. After a season, anything still facing backward hasn’t been touched — a clear, data-driven shortlist for your next edit. Some people designate a single brightly colored hanger that marks the front of the “recently worn” section, achieving the same insight.

Two more habits keep clutter from creeping back:

  • One-in, one-out: when something new comes in, something old goes out. This caps your wardrobe at a size your closet can actually hold.
  • Buy quality over quantity: constantly decluttering and then rebuying cheap, trend-driven similar items wastes money over time. Investing in fewer, timeless, well-made pieces keeps your wardrobe relevant and your closet leaner. It’s also worth remembering that trends cycle back — so before you purge something genuinely well-made, consider whether you’d be sad to rebuy it in a few years.

The Bottom Line

Closet decluttering only feels overwhelming when you try to do it all at once and decide everything from scratch. Shrink the task to one category at a time, lean on a couple of simple rules — like the 90-day test and the five-outfit rule — to make decisions fast, and use a maybe box for the genuinely tough calls. Downsize first, then organize what’s left so every favorite is visible and easy to grab.

If you only do one thing today, pick your easiest category — your socks, your T-shirts — set a 20-minute timer, and sort just that. Momentum, not motivation, is what gets a closet cleared. Then turn your hangers backward and let your daily routine do the rest of the work for you.

A Beginner’s Guide to the 15-Minute Tidy-Up Habit

If you’ve ever looked around your home and felt that familiar wave of overwhelm — the kind that makes you want to close the door and pretend the clutter doesn’t exist — you’re not alone. The good news is that getting a handle on your space doesn’t require a free weekend, a label maker, or a Pinterest-worthy aesthetic. It just requires fifteen minutes and a willingness to start small.

The 15-minute tidy-up habit is exactly what it sounds like: a short, focused burst of decluttering that you repeat regularly. It’s not glamorous, but it’s effective precisely because it’s small. In this guide, I’ll walk you through how the habit works, why it sticks when bigger efforts fail, and how to build it into your day without it feeling like another chore on an endless list.

Why Fifteen Minutes Beats a Marathon Cleanout

Most of us approach decluttering the wrong way. We wait until the mess feels unbearable, then block off an entire Saturday to “deal with it all.” By hour two, we’re exhausted, surrounded by half-sorted piles, and more discouraged than when we started. That kind of all-or-nothing effort rarely sustains itself.

The 15-minute approach flips the logic. Instead of one heroic push, you make tiny, consistent progress. A timer creates a clear finish line, which makes the task feel manageable rather than open-ended. You know that no matter what, you’re done in fifteen minutes — so it’s easy to say yes to starting.

There’s an important truth underneath all this: decluttering is never truly “finished.” As long as you’re living, eating, buying, and bringing things into your home, clutter will accumulate. That’s not a personal failing — it’s just physics. A short daily habit accepts this reality instead of fighting it, which is exactly why it lasts.

How to Run a 15-Minute Tidy-Up Session

The mechanics are simple, but a few specific choices make the difference between spinning your wheels and seeing real results.

  1. Set a timer for 15 minutes. Use your phone, an oven timer, whatever. The hard stop matters as much as the start.
  2. Pick one small zone. Not a room — a zone. A single drawer, one shelf, the kitchen counter, the entryway table. The smaller, the better when you’re starting out.
  3. Clear the field first. Don’t dump the entire drawer onto the floor. Instead, do a quick “micro purge” — scan the area and pull out the obvious trash, duplicates, and things that clearly don’t belong. You’re skimming the easy wins before you dig into the harder decisions.
  4. Then organize what’s left. If you have time after the purge, pull out the remaining items and tidy them into place. Often the purge alone makes the space look dramatically better.
  5. Stop when the timer goes off. Even mid-task. Finishing on time trains your brain that this is sustainable, not punishing.

The magic question that speeds up decisions

When you’re holding an item and feeling stuck, ask yourself a simple question: “Do I actually use this, or am I just keeping it out of guilt or ‘just in case’?” Most clutter survives because we never pause to question it. Saying the question out loud forces a quick, honest answer so you can keep moving instead of agonizing over every spatula and stray cable.

Aim for Done, Not Perfect

This is the rule I wish someone had hammered into me years ago. Perfectionism is the enemy of progress. It’s incredibly easy to get sidetracked trying to make a drawer look magazine-ready — buying matching bins, color-coding, lining up everything just so. But that instinct slows you to a crawl and burns through your fifteen minutes before you’ve made any real dent.

Function and follow-through matter far more than aesthetics. A drawer that closes easily and holds only things you use is a win, even if the contents aren’t arranged in a pretty grid. You can always refine later. For now, your only goal is to make the space work better than it did before you started.

Here’s a practical mindset shift: think of each session as “good enough for today.” Tomorrow’s session can build on it. The habit is the asset, not any single perfect result.

Stay in One Zone (and Resist the Bounce)

The single biggest mistake beginners make is bouncing. You start in the bedroom, find a coffee mug that belongs in the kitchen, carry it to the kitchen, notice the counter is messy, start wiping it down, spot a bill that needs filing, head to the office… and twenty minutes later you’ve touched five rooms and finished none of them.

This scattered approach is how clutter creeps right back in. Pick one zone, commit to it for the full fifteen minutes, and let that be your win for the day. If you find an item that belongs elsewhere, put it in a small “relocate” pile or basket near you and deal with it at the very end — don’t leave the zone.

Good first zones for beginners

Some areas give you a satisfying, visible payoff quickly, which helps the habit take root. Try starting with:

  • A junk drawer — quick wins from tossing dead pens, expired coupons, and mystery keys.
  • One kitchen cabinet — the kitchen is one of the most cluttered, high-traffic spots in most homes, so progress here is felt immediately.
  • The entryway or drop zone — clearing the spot where shoes, mail, and bags pile up sets a calmer tone the moment you walk in.
  • The bathroom counter or medicine cabinet — small footprint, lots of expired or unused products to clear.
  • Your nightstand — a tiny, personal zone that makes your bedroom feel instantly more restful.

Turning Fifteen Minutes Into a Habit That Sticks

A single tidy-up session is helpful. A daily one transforms your home over weeks and months. The challenge is consistency, and the secret to consistency is making the habit nearly automatic.

Anchor it to something you already do

The easiest way to remember a new habit is to attach it to an existing one. Run your 15-minute tidy-up right after your morning coffee, while dinner simmers, or during a commercial break in your evening show. When the cue is something you already do every day, you don’t have to rely on willpower or memory.

Layer in tiny “maintenance” habits

Beyond the focused session, a handful of micro-habits keep clutter from rebuilding between tidy-ups. These take seconds, not minutes:

  • Put dirty clothes straight in the laundry bin instead of draping them over a chair or leaving them in a pile.
  • Make your bed every morning — it’s a small act that makes the whole bedroom feel orderly and gives you an early win for the day.
  • Do a quick “closing shift” on the kitchen each night: clear the counter, run the dishwasher, reset the space for tomorrow.
  • Deal with mail the day it arrives — recycle the junk immediately so paper never accumulates.

One reader-friendly tip on laundry: if you have a smaller washer, running a few loads across the week rather than saving everything for one giant weekend session keeps the laundry pile from ever becoming a clutter source in the first place. It frees up your weekend too.

Have a plan for the “out” pile

Decluttering only works if the discarded items actually leave your home. Keep a donation box in a closet or your trunk, and the moment it’s full, run it to a thrift store or donation center — ideally within a day or two so it doesn’t become its own pile of clutter.

Stacking Sessions Without Burning Out

Once the daily habit feels natural, you might be tempted to do more. That’s fine — but be strategic. Rather than randomly tackling whatever feels worst, work through your home in stages, hitting the most cluttered, high-impact areas first. Kitchen cabinets and entryways tend to deliver the most noticeable relief.

If you like structure, you can loosely map zones across the week — counters one day, a closet the next, the bathroom after that — so you eventually circle the whole home. Just keep your expectations realistic. Most of us lead busy lives full of interruptions, and the point of this habit is to fit into that reality, not to demand a perfect schedule. Breaking the work into small weekly targets is far more sustainable than trying to overhaul everything in a single month.

The Bottom Line

The 15-minute tidy-up habit works because it asks for so little and delivers so much over time. Set a timer, pick one small zone, clear the easy clutter first, and stop when the bell rings — aiming for done, not perfect. Anchor it to a daily routine, layer in a few seconds-long maintenance habits, and get your donations out the door promptly.

Your next step is simple: pick one zone right now — a single drawer or your nightstand — set a timer, and go. Fifteen minutes from now you’ll have your first win, and that’s all it takes to start building a home that stays manageable for the long haul.

A Step-by-Step Guide to Decluttering Sentimental Items

Most decluttering advice falls apart the moment you reach the box of your grandmother’s letters, your child’s first pair of shoes, or the ticket stubs from a concert you’ll never forget. The usual rules—”if you haven’t used it in a year, toss it”—feel almost offensive when applied to objects that hold memory rather than function. That’s why sentimental items get shoved back into closets year after year, untouched and unresolved.

The good news: you don’t have to choose between living in a museum of your own past and ruthlessly purging everything that matters. There’s a middle path, and it starts with treating sentimental clutter as its own category with its own method. This guide walks you through that method step by step.

Why sentimental items are uniquely hard to declutter

Ordinary clutter is a logistics problem. Sentimental clutter is an emotional one, and that changes everything about how you approach it.

When you hold an object connected to a person, a milestone, or a version of yourself you’ve outgrown, you’re not really evaluating the object. You’re evaluating the relationship, the memory, and sometimes your own guilt. Letting go can feel like a betrayal—of a loved one who passed, of your younger self, or of the effort someone put into a gift.

A few specific traps make this category sticky:

  • The fear that letting go erases the memory. We unconsciously treat the object as the memory’s container, as if discarding it deletes the experience.
  • Guilt over gifts. Keeping something out of obligation to the giver, even when it brings you no joy.
  • Identity items. Objects tied to a former career, hobby, or life stage that you’re not ready to admit is over.
  • Inherited overwhelm. Boxes you received after a death that you’ve never actually opened because doing so feels too painful.

Naming the specific emotion at play is the first real step. You can’t problem-solve grief, guilt, and nostalgia the same way you problem-solve a messy junk drawer.

Prepare before you touch a single item

The biggest mistake people make is diving into sentimental items on a whim—usually at the end of a long decluttering day when they’re already drained. Decision fatigue is real, and it makes you either keep everything or, in a burst of frustration, throw away things you’ll regret. Set yourself up properly first.

Time it intentionally

Tackle sentimental items first when you’re rested, not last. Pick a window where you won’t be interrupted and you’re emotionally steady—not the anniversary of a loss, not after an argument. Give yourself a realistic block: two to three hours, not an entire weekend that you’ll come to dread.

Gather the right supplies

  • A “definitely keep” box for the items that are easy yeses.
  • A “maybe” box—this is your pressure-release valve.
  • A donation bag and a recycling/trash bag.
  • A “rehome” pile for items that belong to or would mean more to someone else.
  • Your phone or a camera for photographing items you want to remember but not store.
  • Tissues and a glass of water. Sounds small. It isn’t.

Decide on your storage limit in advance

This is the single most powerful preparation step. Choose a physical container—one memory box, one shelf, one bin—and commit to it before you start sorting. When you’ve decided that everything you keep must fit in one archival bin, every decision becomes a comparison rather than an abstract agonizing. Instead of “Is this worth keeping?” you’re asking “Is this worth more to me than what’s already in the box?”

A step-by-step sorting method

Work through one defined category or container at a time. Don’t dump three decades of memories onto the bed at once—that’s how people get overwhelmed and quit. Here’s a sequence that keeps you moving.

  1. Pick one small zone. One box, one drawer, one shelf. Finishing a small zone gives you momentum and proof you can do this.
  2. Handle each item once and ask the real question. Not “Could this ever be useful?” but “Does this item still earn its place in my life and my limited storage?”
  3. Sort the easy items fast. Obvious keeps go in the keep box, obvious trash goes in the bag. Don’t deliberate over things that are clearly one or the other.
  4. Use the “maybe” box for anything that triggers hesitation. Don’t force a decision on the hard items in the moment. Defer them.
  5. Photograph and release. For bulky or low-priority items with sentimental value—a child’s art project, an old trophy, a worn-out concert tee—take a clear photo, maybe with a note about why it mattered, then let the physical object go.
  6. Consolidate the keepers. Once you’ve sorted a zone, see if your keeps actually fit your predetermined container. If they don’t, you’re not done—go back and choose your true favorites.

Resist the urge to “organize” as you go. Pre-sorting, relabeling, and rearranging are procrastination in disguise. Decide first; organize the survivors later.

What to do with the genuinely hard items

Some categories deserve their own tactics because the standard approach doesn’t quite fit.

Gifts you feel guilty discarding

Here’s the reframe that helps most people: the purpose of a gift was fulfilled the moment it was given and received. The giver wanted to express care, and that exchange already happened. The object is not a debt you owe forever. You’re allowed to thank it, mentally, for the kindness it represented—and then donate it so it can be useful to someone else.

Items from someone who has died

Inherited belongings are the hardest of all, and you should be gentle with yourself here. You don’t have to decide everything at once. A practical approach: keep a small, curated selection that genuinely evokes the person—their handwriting, a signature piece of jewelry, one favorite sweater—rather than keeping everything out of fear. Quantity dilutes meaning. Ten boxes in storage you never open honor no one; one beautiful object you actually display does.

If the grief is still raw, it’s completely valid to box things up and revisit in six or twelve months. Just label the box with a date so it doesn’t become permanent invisible clutter.

Kids’ artwork and schoolwork

You cannot keep all of it, and you don’t need to. Create one folder or portfolio box per child per year. At year’s end, narrow it down to a handful of pieces that capture their stage. Photograph the rest and consider a printed photo book—it turns a chaotic pile into something you’ll actually look at.

Your “maybe” box

After you’ve finished sorting, seal your maybe box, label it with today’s date, and store it out of sight. Set a calendar reminder for three to six months out. When the date arrives, if you haven’t needed or thought about anything inside, you can let most of it go without the emotional charge that was there originally. Distance does the deciding for you.

Honoring memories without keeping the stuff

The core mental shift in this entire process is separating the memory from the object. The memory lives in you, not in the thing. That said, our brains love tangible cues, so give your memories a better home than a dusty box.

  • Create a digital archive. Photograph or scan letters, cards, children’s art, and small mementos. Organize them into clearly labeled folders or a shared family album.
  • Make something usable. Turn a stack of band t-shirts into a quilt, frame a single meaningful concert poster, or fill a shadow box with a few small treasures so they’re displayed instead of hidden.
  • Write the story down. Sometimes what you really want to preserve is the narrative. A few sentences about why an object mattered can let you release the object itself.
  • Pass it on with intention. Give a meaningful item to a relative or friend who’d treasure it. The memory continues, just in someone else’s care.
  • Display your true keepers. An item worth keeping is worth seeing. If it’s good enough to store forever, it’s good enough to put on a shelf.

A memory you can revisit in a photo album or see on your wall serves you far better than one entombed in a sealed container in the attic.

Common mistakes to avoid

Even with a good system, a few predictable errors derail people. Watch for these:

  • Starting when you’re emotionally fragile. Grief and decluttering at the same moment rarely go well. Wait if you need to.
  • Trying to do it all in one marathon. Sentimental sorting is mentally taxing. Short, focused sessions beat exhausting all-day pushes.
  • Keeping things “for the kids” who haven’t asked. Ask them first. Many adult children genuinely don’t want the items we assume they’ll cherish.
  • Letting the maybe box become permanent. Without a deadline, “maybe” just means “yes” in slow motion.
  • Confusing volume with love. Keeping more does not mean caring more. Curation is its own form of respect.

The bottom line

Decluttering sentimental items isn’t about getting rid of your past—it’s about choosing which pieces of it you want to carry forward, on purpose. Set a storage limit before you start, work in small zones when you’re rested, lean on a dated “maybe” box for the hard calls, and remember that a photograph or a written story can preserve a memory just as well as the object itself.

Your next step is simple: pick one small container this week—a single drawer or box—and run it through the method above. Don’t aim to finish everything. Just prove to yourself that you can let go of one thing and keep the memory intact. From there, the rest gets easier.

How to Declutter Your Closet When You Have Too Many Clothes

There’s a particular kind of paralysis that sets in when you open a closet stuffed past capacity. The rod sags, hangers are crammed so tightly you can’t slide them, and somehow you still stand there thinking you have nothing to wear. If that sounds familiar, you’re not failing at organization — you’re simply trying to manage too much stuff in too little space. The fix isn’t a clever folding hack or another set of matching hangers. It’s removing the excess first.

Decluttering an overstuffed closet feels daunting precisely because there’s so much in it. But that volume is also the opportunity: when you have too many clothes, you almost certainly have a large pool of items you don’t wear, don’t love, or forgot you owned. This guide walks you through a realistic process — one that won’t leave you buried under an avalanche of clothing on your bed at 10 p.m. wondering what you’ve done.

Start small instead of emptying everything

Conventional advice tells you to dump every single item onto the bed and sort from zero. With a modest wardrobe, that works. With too many clothes, it backfires — you end up with an overwhelming mountain, you run out of steam halfway through, and everything gets shoved back in worse than before.

A smarter starting point is to do the reverse. Instead of pulling everything out, pull out only the pieces you actually wear the most — your true workhorses. Think of the jeans you reach for weekly, the jacket you grab without thinking, the three or four tops in heavy rotation. Set those aside as your wardrobe’s foundation. Seeing your real, lived-in style in front of you gives you a reference point: now everything still hanging in the closet has to justify why it deserves to stay alongside those favorites.

This approach has a quiet psychological benefit. You begin from a place of clarity about what works for you, rather than from guilt about what doesn’t. Decisions get easier when you’re measuring items against a standard instead of staring at a pile of equally weighted “maybes.”

Take the easy wins first

Before you agonize over sentimental or expensive pieces, clear out the obvious. These are the no-debate decisions that build momentum and instantly free up space, which makes the harder choices feel manageable.

Pull anything that fits these categories straight out of the closet:

  • Items that don’t fit — not the body you hope to have, the body you have now. Clothes you’re “saving” for a future size deserve a separate box, not prime closet real estate.
  • Damaged clothes you’ll never repair — stretched-out elastic, broken zippers, stains that won’t budge, pilled knits. If you haven’t mended it in a year, you won’t.
  • Duplicates of things you barely wear — five nearly identical black cardigans when you only ever reach for one.
  • Itchy, uncomfortable, or fussy pieces — the sweater that scratches, the dress that needs constant adjusting. Comfort dictates what you actually wear.
  • Anything that makes you feel bad — the impulse buy with tags still on, the gift you never liked, the “mistake” purchase you keep as a reminder of money spent.

Don’t overthink this stage. The goal is volume reduction and momentum. You’ll likely be surprised how much leaves the closet before you’ve made a single difficult call.

Try things on — and be honest

For everything that survives the easy-wins pass, the deciding factor is whether you’ll genuinely wear it. The most reliable way to know is to put it on. Reading a garment on a hanger lies to you; the fit, the way it sits, how it makes you feel — those only reveal themselves on your body.

Sort into clear categories as you go

Work through one clothing type at a time — all the tops, then all the pants, then dresses, and so on. Grouping like with like exposes redundancy you’d otherwise miss. It’s hard to argue you need eleven striped tees when they’re lined up side by side. As you handle each piece, sort it into three honest piles:

  • Keep — it fits, you reach for it, it suits your real life.
  • Let go — donate or sell; someone else will get more use from it.
  • Undecided — keep this pile small and deal with it separately (more on that below).

Ask better questions than “might I wear this someday?”

“Someday” is how closets get overstuffed in the first place. Replace it with sharper questions: When did I last wear this? Would I buy it again today at full price? Does it work with at least two other things I own? If I saw it in a store right now, would I even notice it? Honest answers cut through the fog of attachment quickly.

A no-fuss method for indecisive closets

If the try-on marathon sounds like more energy than you can muster, there’s a passive technique that does the deciding for you over time — and it’s especially good for the genuinely undecided pile.

Turn every hanger in your closet backward, so the hook faces you. Note the date on your calendar about six months out. Each time you wear something and return it, hang it the normal way. When your reminder arrives, any hanger still facing backward marks a garment you haven’t touched in half a year. Unless there’s a specific reason to keep it — a formal outfit for rare occasions, true seasonal wear — that item has told you everything you need to know. Donate or sell it.

This method removes the emotion from the equation. You’re not guessing whether you’ll wear something; you’ve collected actual evidence. It’s a forgiving way to declutter for people who freeze up when forced to make on-the-spot decisions.

Organize what’s left so it stays that way

Once you’ve removed the excess, the clothes you kept deserve a system that keeps them visible and easy to use. A decluttered closet that descends back into chaos within a month wasn’t really finished — it just had its volume lowered.

Hang generously, fold the rest neatly

Hang as much as comfortably fits, including lighter pieces like tank tops and workout tops if you have the room and hangers. Hanging keeps clothes wrinkle-free, in sight, and easy to grab — and things you can see are things you actually wear. Arrange them like with like and in a logical order: lighter and shorter items toward one end, building up to long sleeves, sweaters, and jackets at the other. Many people find arranging by category and then by sleeve length or color makes getting dressed faster and the whole space calmer to look at.

Whatever doesn’t hang gets folded or rolled neatly into drawers, bins, or baskets. The key word is neatly — a drawer crammed without order quickly becomes a place clothes go to be forgotten.

Use the space, not just the rod

No matter your closet’s size, there’s usually unused capacity. Shelf dividers keep stacked sweaters from toppling, slim hangers reclaim several inches of rod, and the back of the door or empty wall offers room for hooks and over-the-door organizers. The aim isn’t to cram more in — it’s to give the items you kept a defined home so the closet stays workable.

Keep new clothes from undoing your work

Here’s the part most people skip, and it’s why closets refill within a season. If you decluttered hard but keep shopping at your old pace, you’ll be right back where you started by next year.

Consider a deliberate pause on buying clothes — a month, three months, however long feels honest for you. Work with what you have first. Living inside your edited closet teaches you something important: you were probably wearing the same handful of pieces all along anyway. The space you created is worth protecting, and the pause gives you time to figure out what, if anything, you genuinely need rather than buying on impulse.

When you do return to shopping, do it with intention. Ask whether a new item earns its place against the favorites you identified at the very start. You may well discover you already have enough.

Let the guilt go

Many people stall mid-declutter because letting go of clothes feels like admitting wasted money or a bad decision. But keeping an unworn item in your closet doesn’t recover a cent — it just clutters your space and your mind. Passing things to someone who’ll use them, whether through donation or resale, is the most productive thing you can do with a mistake. Release the item and the guilt together.

The bottom line

When you have too many clothes, decluttering isn’t about finding more storage — it’s about owning less and keeping the rest visible and usable. Start by identifying your real favorites, clear the easy no-debate items, try on the rest with honest questions, and let a backward-hanger experiment handle anything you can’t decide on. Then organize what remains so it stays organized, and pause your shopping long enough to enjoy the breathing room. Pick one category — just your tops, say — and start there this week. Momentum from a single drawer or rod section is usually all it takes to carry you through the rest.